


Cross
-
Posts
130 -
Joined
-
Last visited
Content Type
Profiles
Forums
Events
Posts posted by Cross
-
-
I'd have to say that probably the most important things of making it from newbie to master for me were:
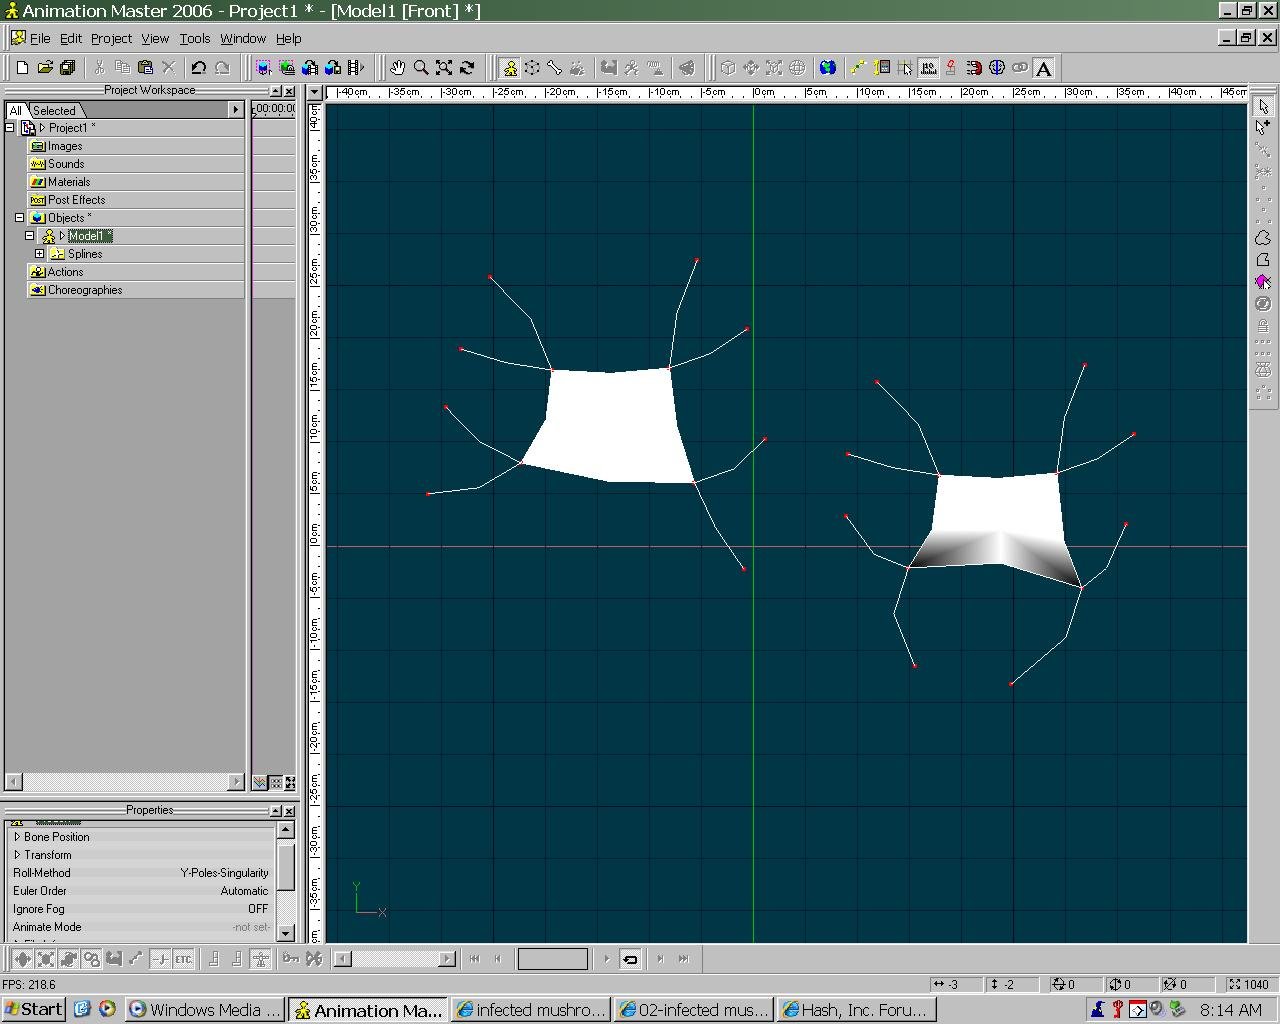
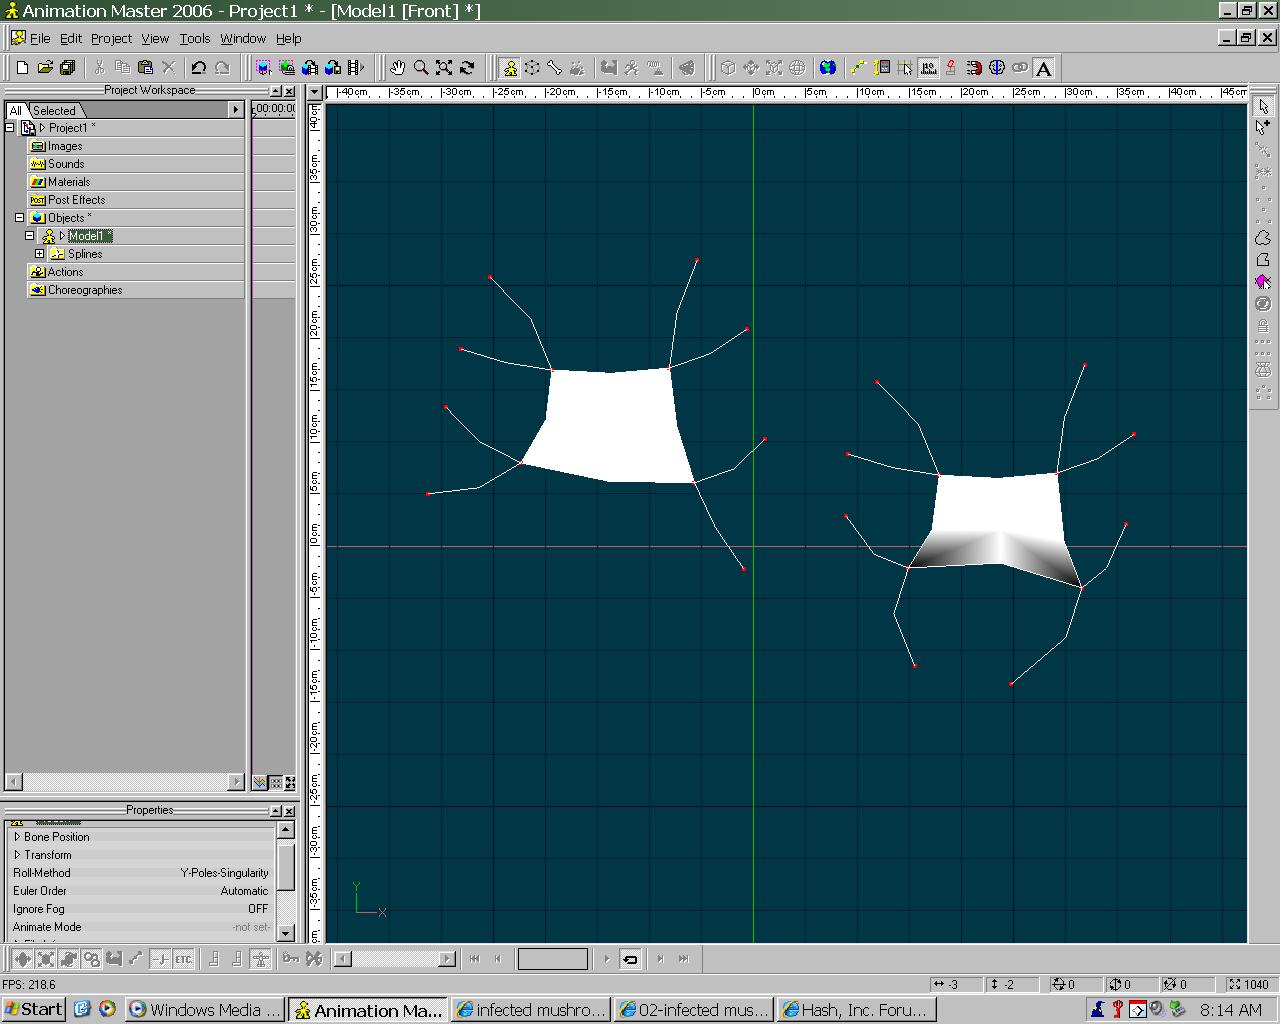
1. Make sure that the spline is going the right way!!! It's very important that you make sure which way your spline is going, If it makes an ugly black mark, it's probably something the program isn't going to appreciate! (note upload picture)
2. The step from making things i've seen, to making things of my own. Major step in creating unique projects!
-
Great model so far!
There is a tutorial on hair here: http://www.hash.com/forums/index.php?showtopic=29738
I'll have to try that out! here's a new update.
Oh, and i've already made his sword.


-
AYoo-OUCH!!!---I just opened a model I worked on last week, but actually have been dinking on for years- and all the 5 point patches are invisible. Now- it isn't hard to go around and specify each 5 pointer and hit the button...but this model happens to have a LOT of them (maybe 40 or 50) and when I specify the 5 points a lot of times A:M does not 'allow' me to hit the magic 5point button. SO---I have to try different things to get the 5 points to take, which ends up taking a long while until I get my model back the way it was when I last closed it. Grrrr! AND THEN I have to reapply any decals that were on the 5 pointers (A LOT)... AND THEN--- there's no telling if it will open next time with the 5 pointers all invisible again...
ANYONE else ever have this happen? Is there something I'm doing wrong?
This is a deal-breaker.
I've had this happen to one of my models before... and it did have around 124 patches... a little discourageing at times.
-
Working on the base modeling for him... I'm sure i'll need some great help with his hair, though...
-
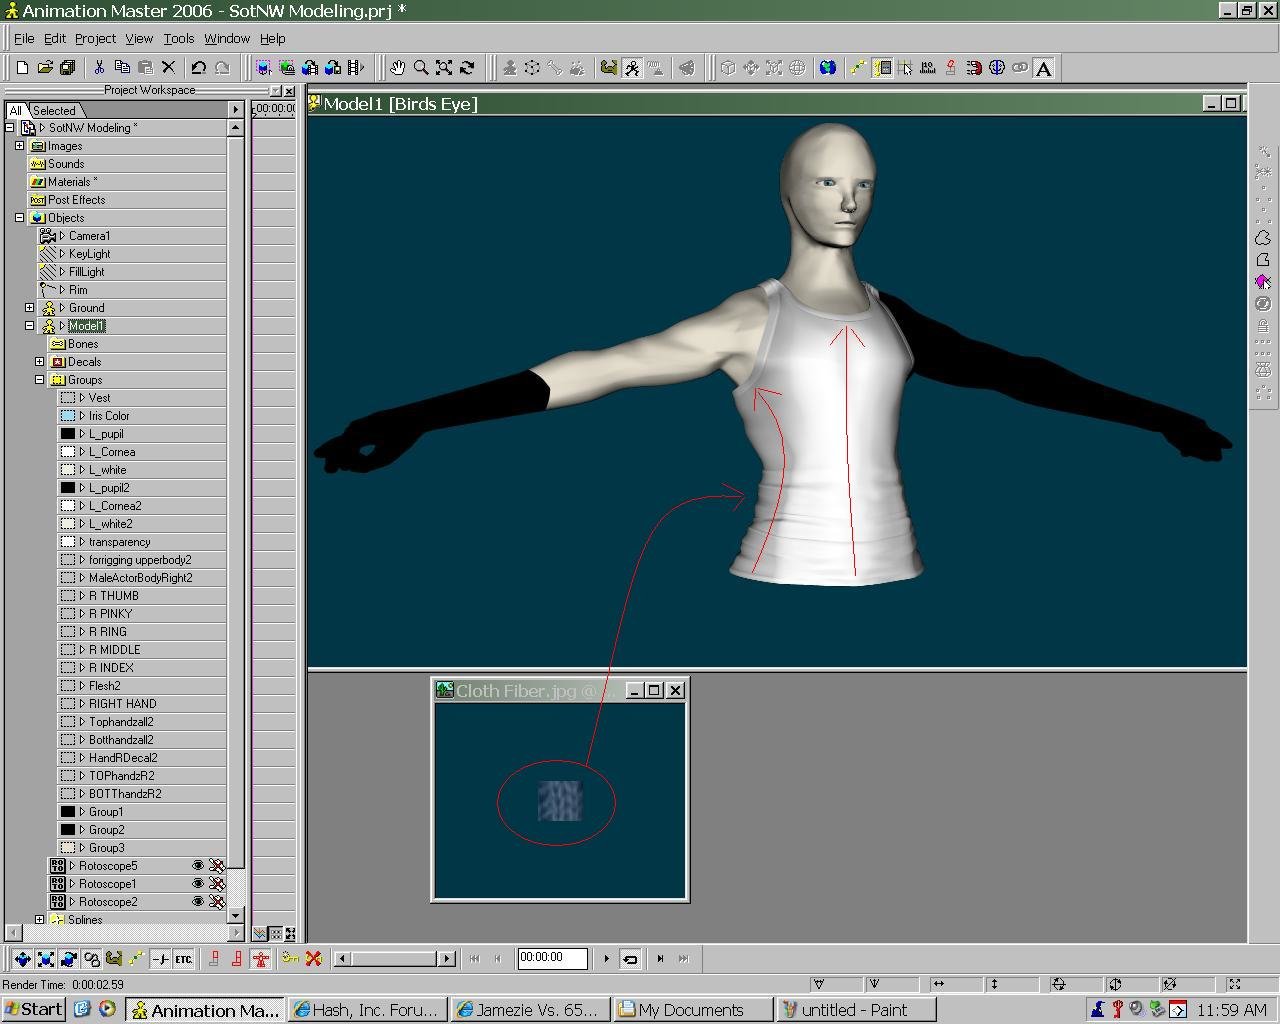
Uv editor might be your best bet. A quick run through: (cant find a link)
Decal a blank image over the t shirt splines.
Under the decal, now right click edit.
Move the splines so that they don't over lap
Here I usually do a screen copy and take that image into Photoshop
make a new layer,Paint on your texture as it should be positioned
Take out the spline layer and save
In AM under decals and images right click add image and choose the prior saved
It might need some minor tweeking but this is the general method.
Anyone with a better tute or a link please chime in
Could you please post images of how to do the steps? I'm still a little confused about it. It would be much appreciated.
-
Working on a shirt, but i need to have my decal wrap. how would i go about setting up the materials to do so?
-
all right... table, chairs and some accessories still missing, but i thought it´s time for a post...
i´ve never lit a indoorshot yet and i´m really not sure about the lighting at all... what would you guys recommend? i need something that renders quick since i want to do a short in this kitchen, so radiosity is to be ignored, i only have 2 computers for rendering... any suggestions? right now i have two rims outside the room, one causing z-buffered shadows, two low valued fill lights inside the room and one bulb light under the ceiling causing shadows too...
I think that i could do with a center piece, like a counter with some newspaper on it, coffee or something. maybe a few stools to sit in, too. I love the look so far

-
Go for it. that model is nice.
Hey I see you have a model of First Tsurigi from Advent children. I would love to compare notes to see how you constructed yours. heres the link to mine
I checked it out and mine's prettymuch the same exact model. I just used this referance to make it.

-
Just curious if anyone had any thoughts about me making a movie with this guy i made. anything i should change? add? any ideas for a storyline? etc?

-
Cross,
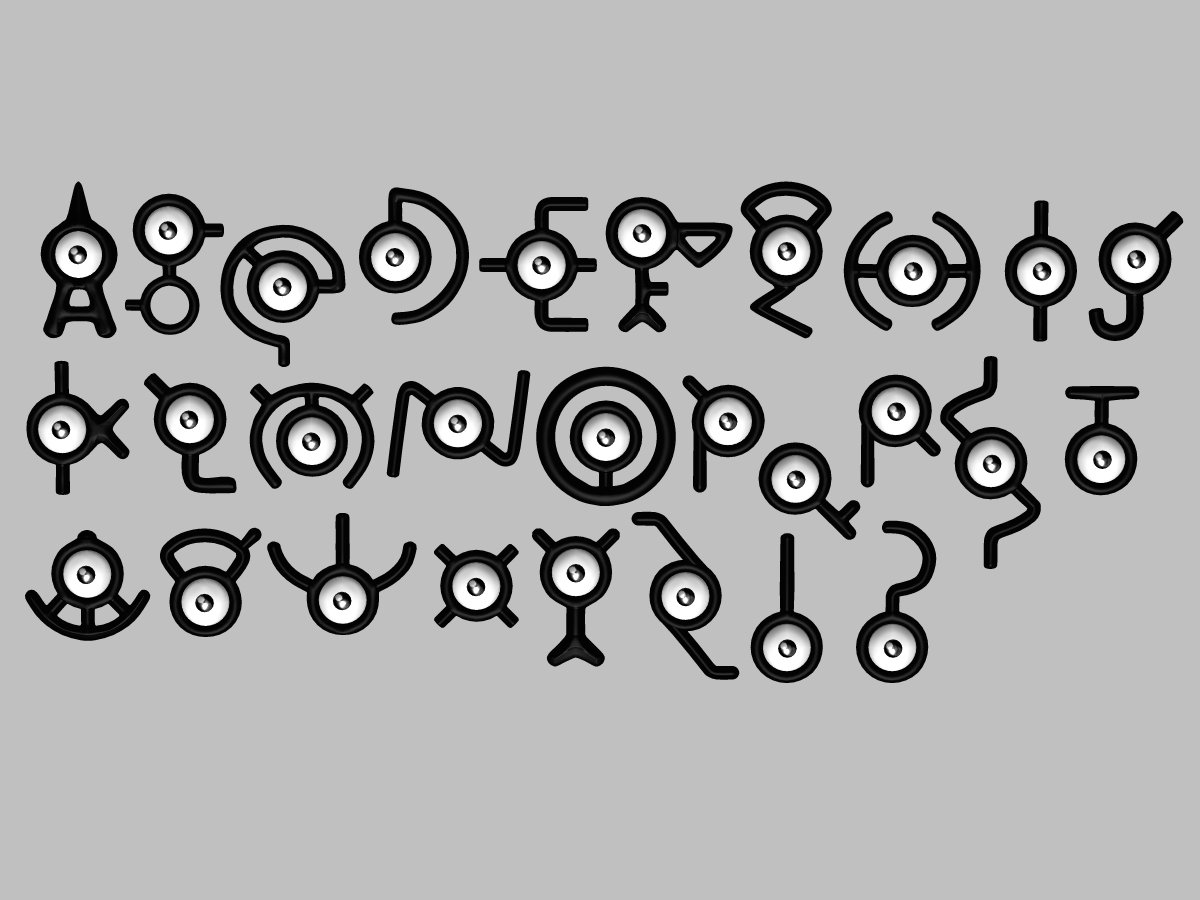
Several years ago I started modeling the Unknown characters too (I only modeled a few though before I moved on to something else).
Nice to see you did the whole character set (or most of them at least!).
Great job.
...and yes... I could read the whole thing. I was exposed to that movie in Japan when it was first released. We bought a booklet at the theater that had games and such encoded with the set of characters. I set out to show my daughters how to read all of it. Yeah... it was all the rage.
My goal with modeling the characters was to do animation on a path of the letters flying around in circles like in the movie. It seemed like a good idea at the time...

I'm going to try and emulate that with a "flock" type movement, might actually work! I was thinking of trying that quite some time ago, too.
-
we're prolly not members of the same generation, but i still agree. ' ' )
-jon
The comic was totally worth my time reading it XD
-
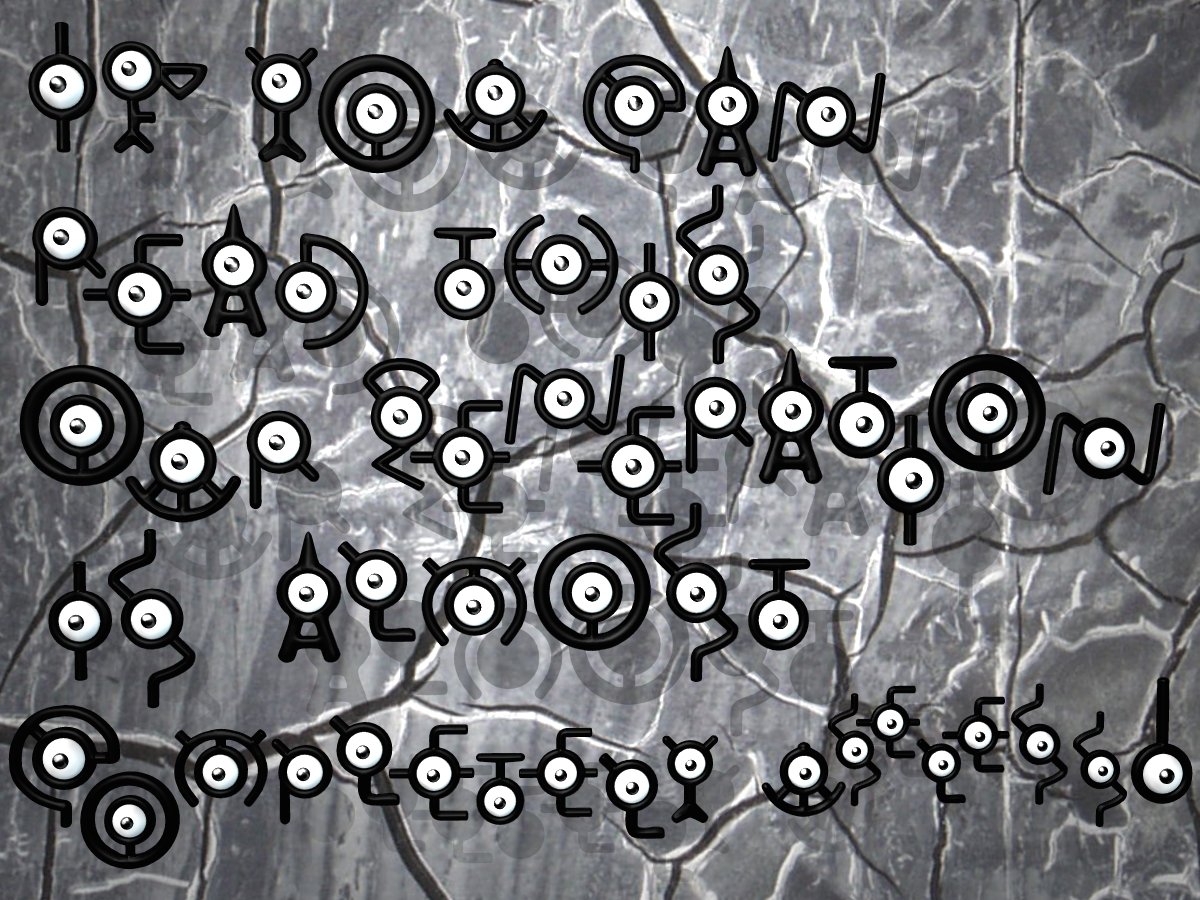
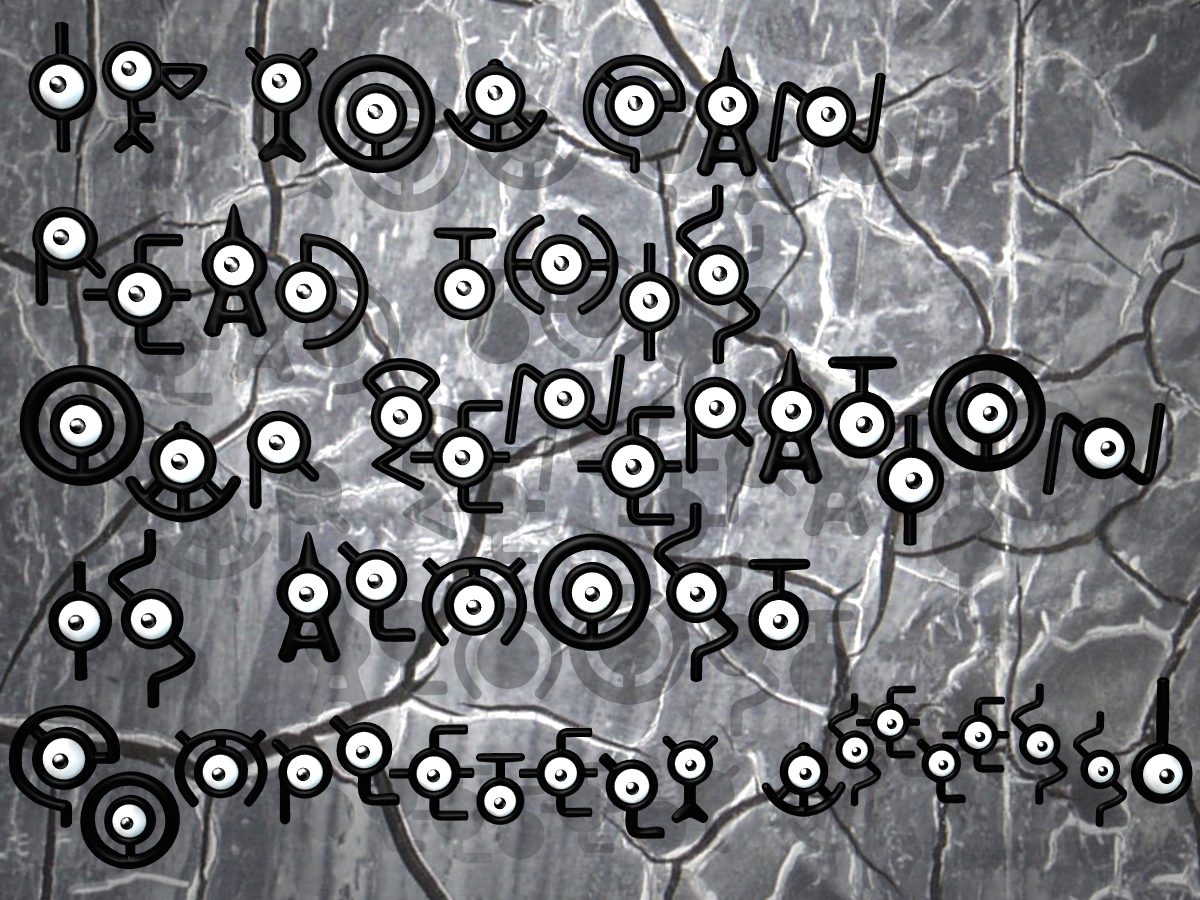
I was incredibly bored today so i decided to make the whole entire Unown Alphabet from Pokemon. Try to read the message below before you look at my index, and post if you could read the whole thing. I'll get a few laughs myself out of this...
-
Annnnnd Full Render!


-
Two Days of work ant the Bow is FINALLY DONE!!! Check it out!


-
You truly have modeling talent Cross. Is that your own Personal rig? Haven't seen that bone configuration before. I'm guessing the "wing" pelvis bones rotate those parts of the legs and likewise with the shoulders.
Hahah... thanks so much! yeah, the wings for the pelvis control the plates at his sides, i still have quite a bit more work to do on him though. Now i have to make his Bow... this will be fun.

-
Finally! done with the body! now i get to rig the sucker! Here's some basic rigging i've got down, haven't rigged the feet or hands yet.


-
UPDATE:


-
Well if you Rigged him well enough to position him in that Level 53 Armor position then you're on the right track.
I Really Like the Model!
Face kinda Reminds me of the guy from Kingdom Hearts.
You look like you have a good story to tell with this guy.
So Far so Good.
Keep it up!
yeah, definately, I've gotta work on the rest of the model though before i worry too much about the riggin, but thanks for the compliments! I made this model out to be more of an android version of the original, as if they were a dieing race and he was one of the few remaining.
-
You're getting better and better. Keep up the good work.
Thanks Eric, really means a lot to hear that from you! I'll keep watch for more of your new stuff as well.
-
I can't rig to save my life but the only flaw I see are the fingers. They should be outstretched otherwise rigging them is going to be a nightmare.
Cheers
Done and done. Thanks for that... i knew it didn't look quite right anyways... it looks much better now.


-
New project that i just started on a few days ago, wondering if there are any rigging gods out there who could help out with the bones after i got done with the model... or if you can see any flaws so far, let me know.


-
Looks very good from what I can see.
Could you post one with not as much compression.
The compression artifacts are clouding the view.
1: Forced Perspective is created by 1) using hella low focal length on the choreography camera, or 2) when in modeling, go into perspective mode and hold down CTRL while zooming in and out to increase the drasticness of the angle.


-
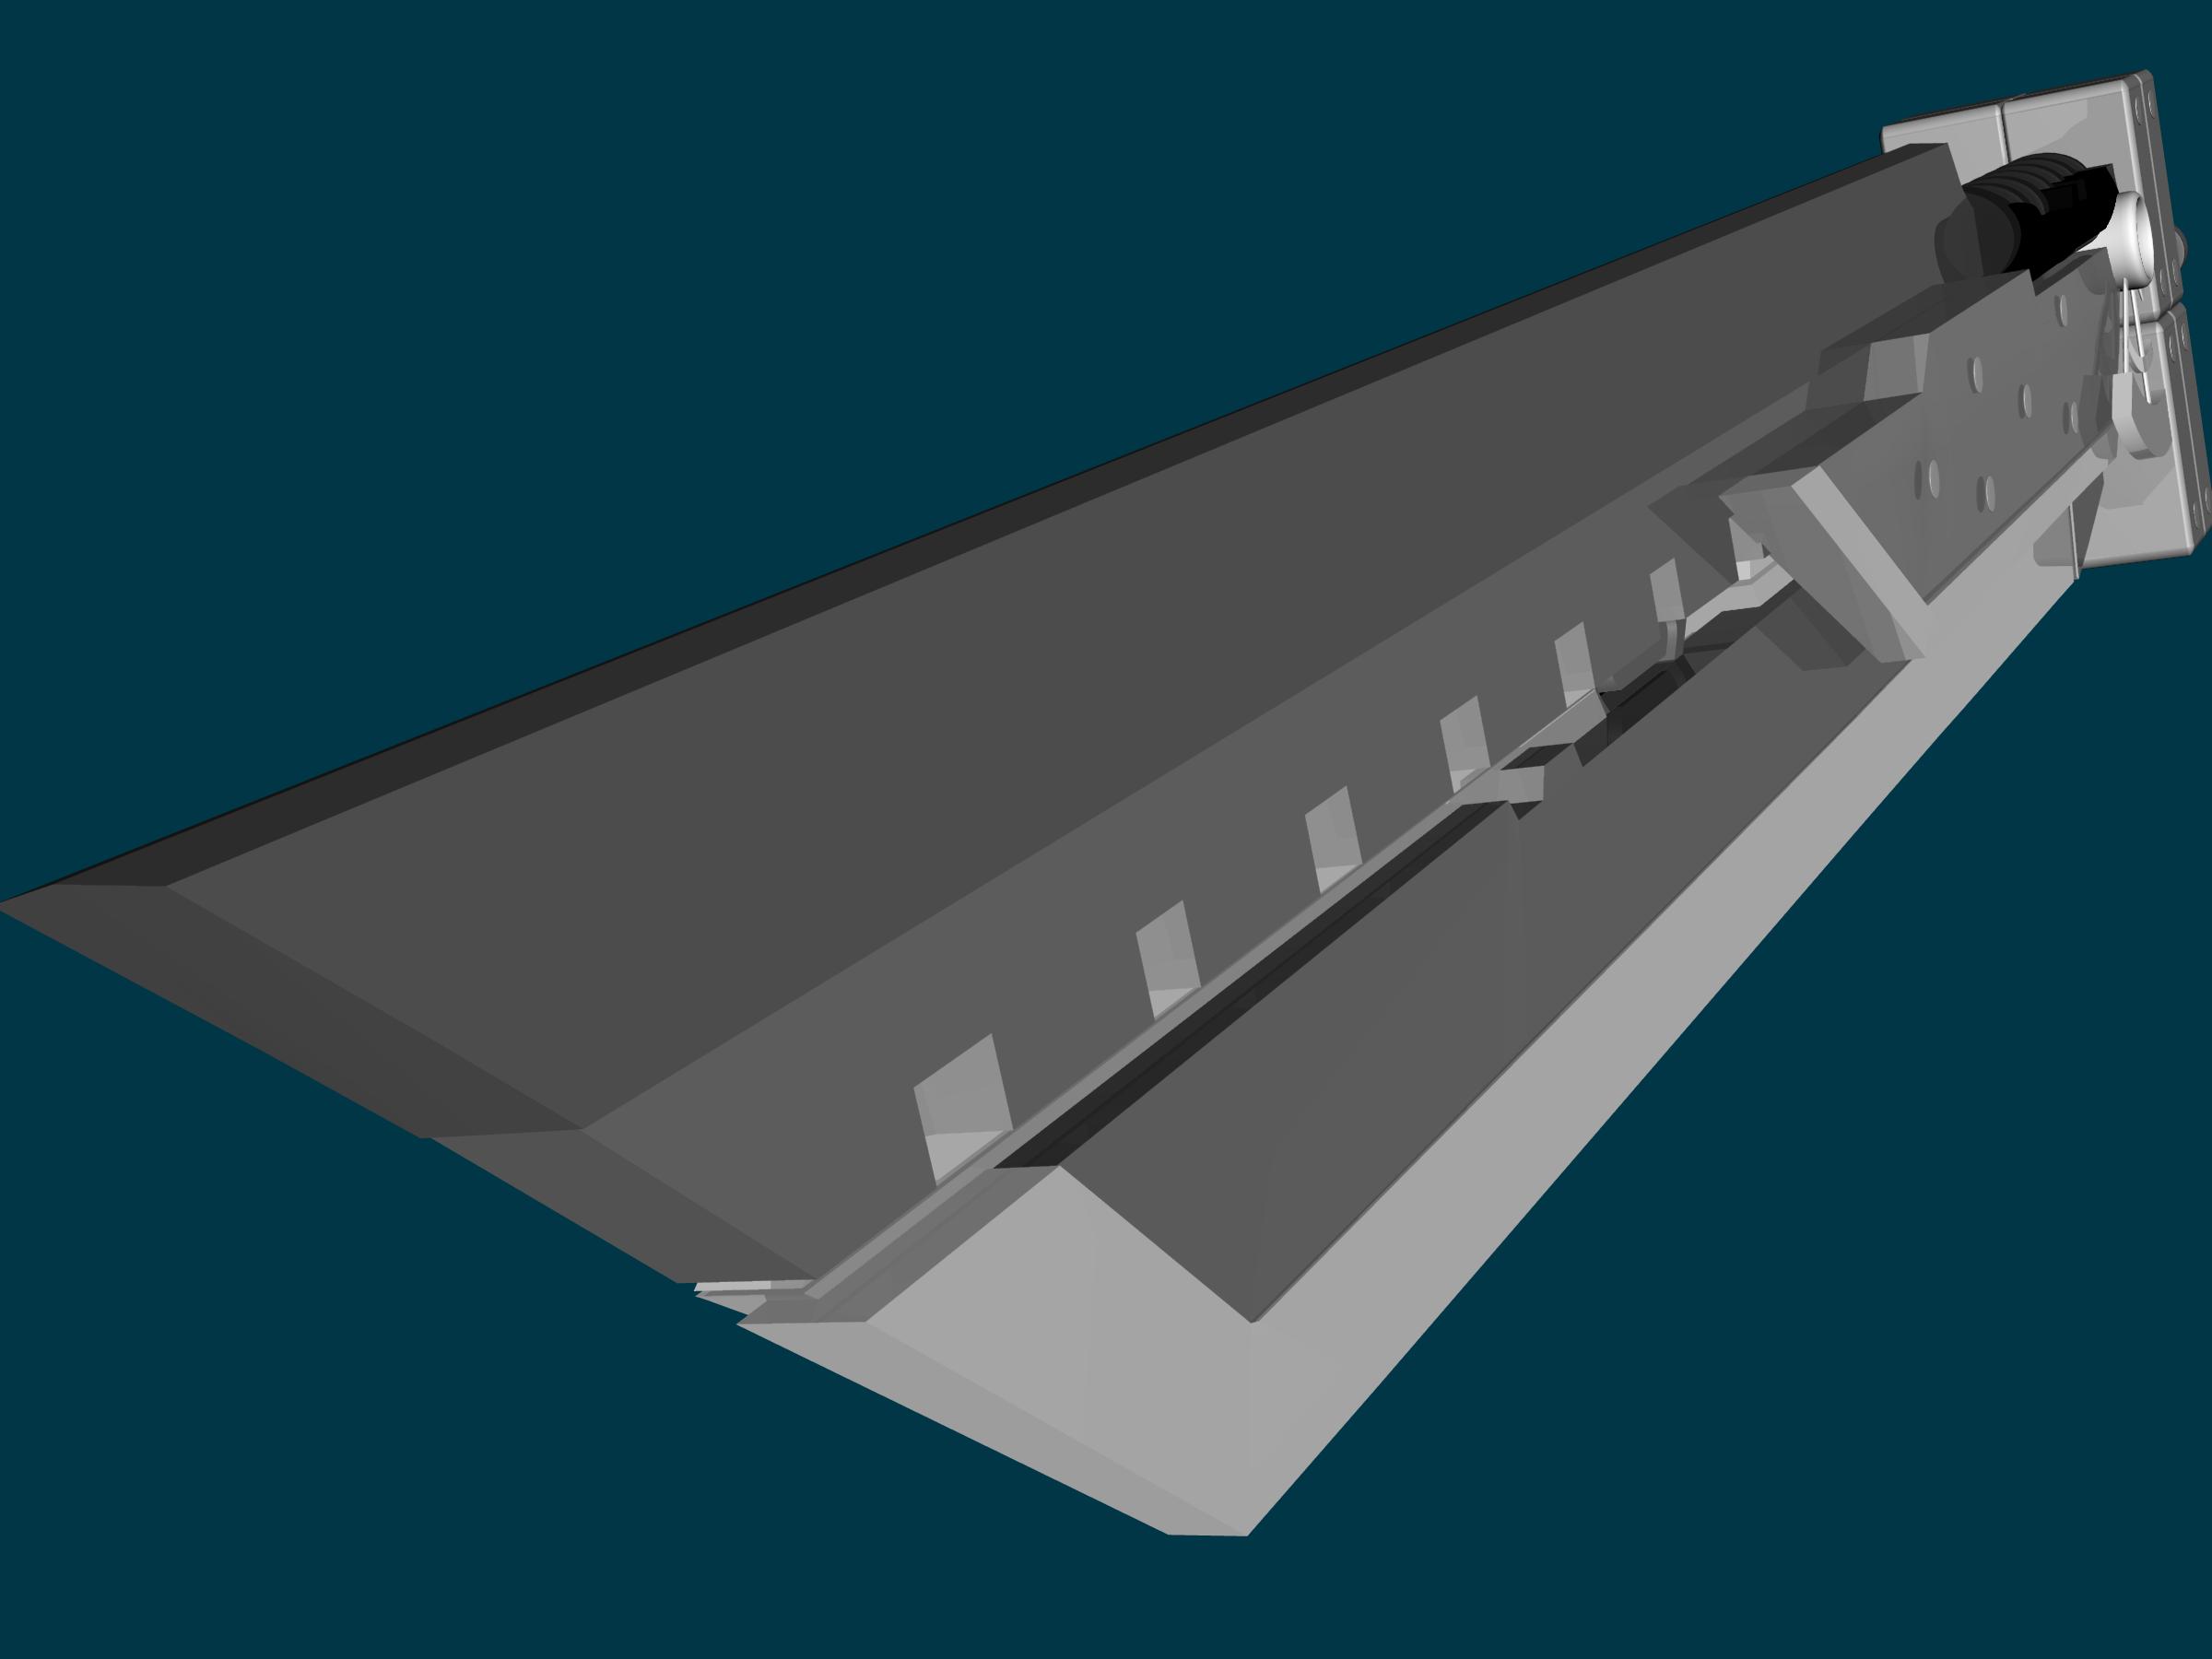
Working on an Animation for my senior project.
This is the Bellato's Massive Armored Unit (MAU) The "Catapult"
I'm plannin on having a desert backdrop with multiple other Catapults falling in from air support and having returned enemy fire. Besides the Wiring in the legs coming through the plating on the foot and the lack of the shoulder net launcher, can anyone see any flaws in my work so far?


-
I'm taking a huge break from the really detailed stuff i've made, obviously. maybe im just getting lazier.
I already made the pieces match up with the grid. Took me a while, but i've got the numbers exact, so now it's time to have some fun with this... one of my ideas is to add walls to the project and have a "Next Block" tunnel for the next block to travel through, obviously making this into an animation. Can i get some more ideas though?


Cloud Strife
in Work In Progress / Sweatbox
Posted
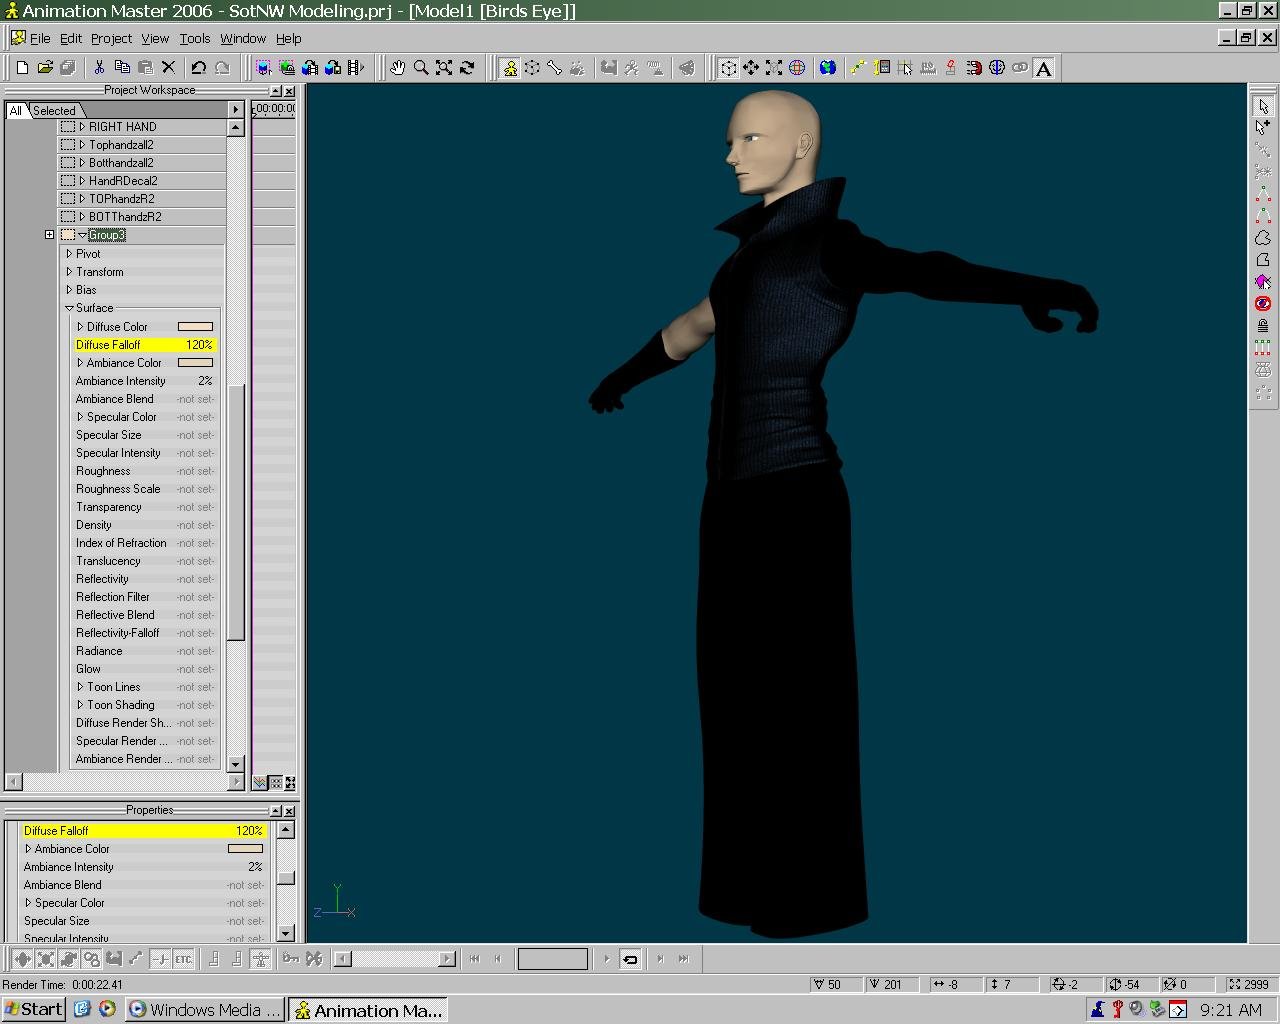
Here's some better lighting as well as some new texturing, enjoy!