


Tralfaz
-
Posts
899 -
Joined
-
Last visited
-
Days Won
1
Content Type
Profiles
Forums
Events
Posts posted by Tralfaz
-
-
Come on you guys... I'm blushing.
 Trust me though, there are lots of flaws in there.
Played around some more with the lighting, pod platforms and started working on the velcro walkways.
Al

-
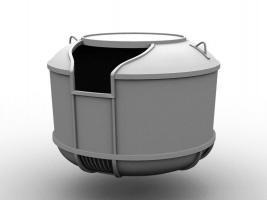
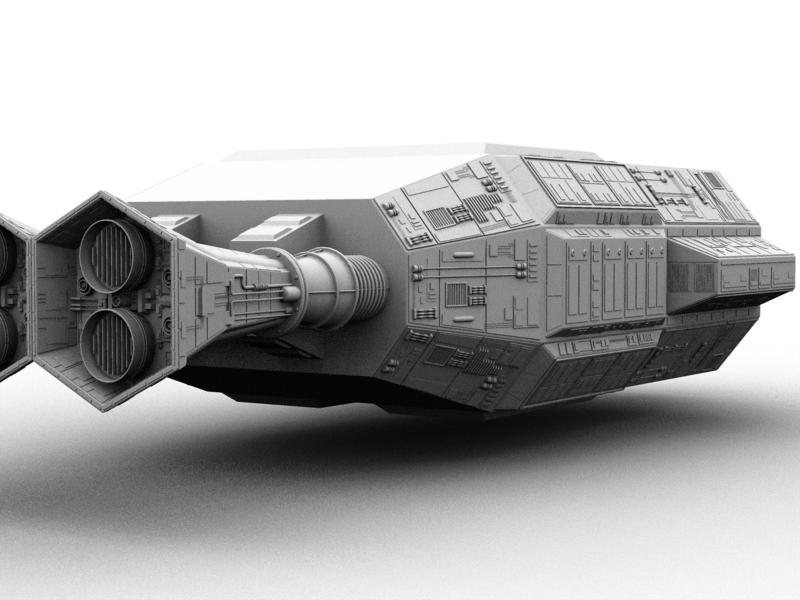
I needed to take a break from the Discovery model, so I started modelling this. All that detail was making me bleary eyed! Will get back to it shortly.
In the meantime, can anyone guess what this is going to be?
Al
OH MY GOD!!!!
I'm so jealous. I tried to model this a while ago and gave up after I couldn't get the cut out for the neon voice light look right. HOW THE HECK DID YOU DO THIS?!?!?!?
I had asked Stian for his help and even with Stian's model example, I still couldn't get it smooth.
Al, would you PLEASE post a wire frame so I could at least see the splinage?
George
Hi George,
I can post a wire frame if you would like, but I have posted the model for download in the Contributors Cue/Models section. You can find it here.
Al
-
Your project is looking pretty good Darkwing.
I know what you mean Robert. It would have been so easy for Hal to off Dave once he got back onto the Discovery. Dave didn't have a helmet in the emergency airlock, so Hal could have opened the pod bay door, thereby trapping Dave inside the airlock. Or Hal could have driven the remaining eva pod at Dave and got him inside the pod bay area. That area is zero gravity, so it should have been fairly easy.
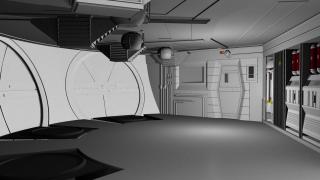
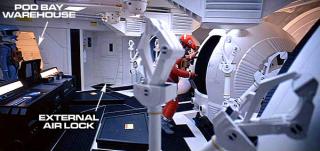
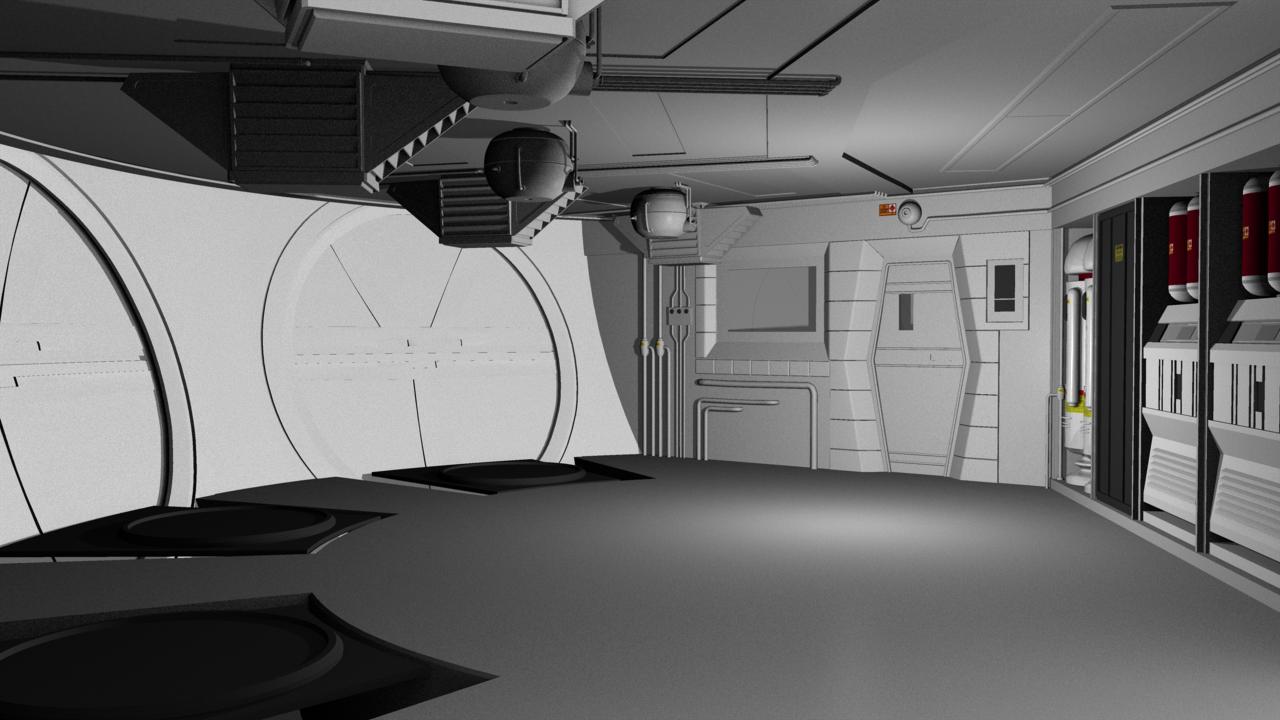
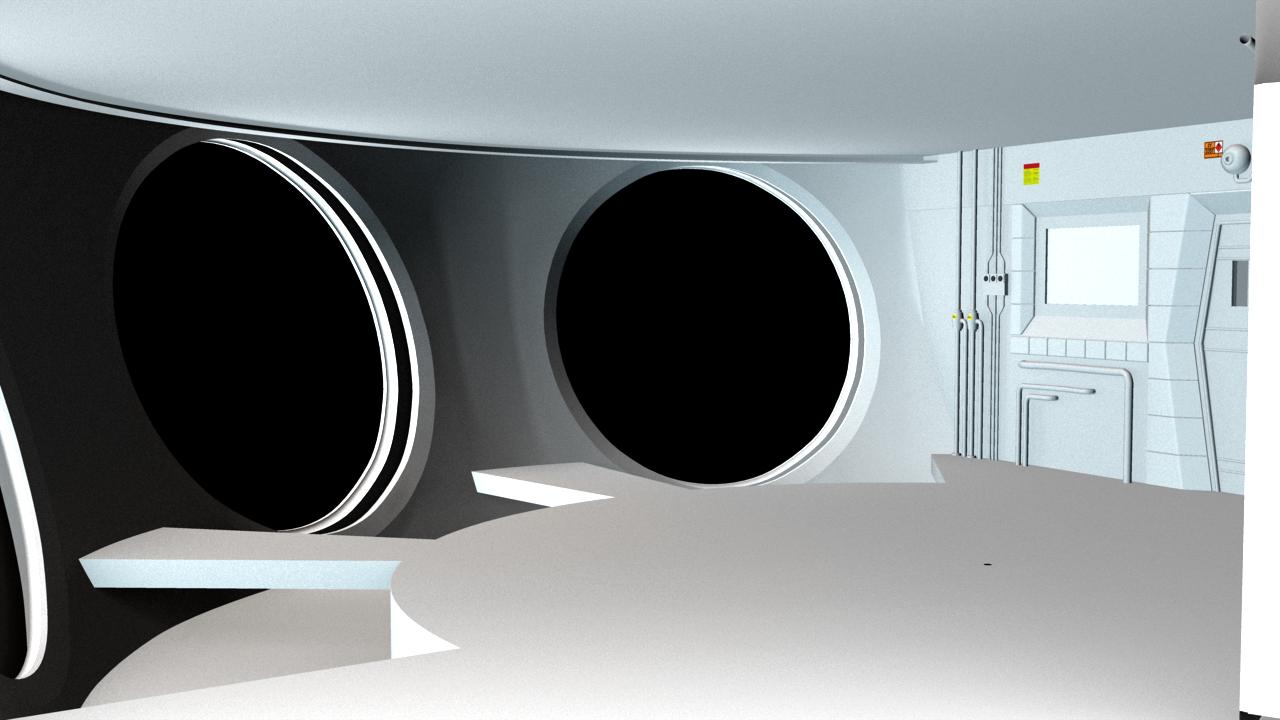
Anyway, here is a quick update. Did some more work on the ceiling. You can also see the proper pod bay doors, and have roughed in the platforms for the pods. Oh, and there is only one light inside the pod bay right now. Will play around with lighting a bit later.
Al
-
Thanks for all your suggestions, and will give them a try later on tonight.
When I worked on MMC5 (a long time ago now), I think I had tried adding lights to a model in bones mode, then the model went entirely black. I added lights to the street lamps, and a light inside the house to light the windows for the night scene. It rendered okay, but was really difficult to see or work on anything in model (object) mode. I am trying to recall this from my old fading memory
 so this may or may not have actually happened this way. I can't remember if everything went black when I went into bones mode or if everything was black once the lights had been added.
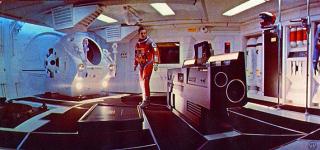
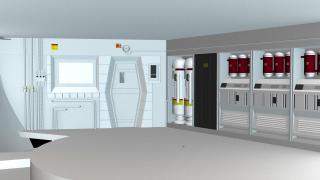
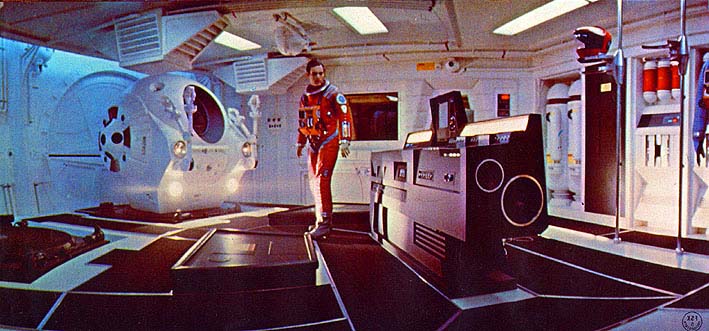
In the Pod Bay, it looks like there are some lights between the ceiling and the front hull, which provides some indirect lighting on the inside hull. There are also several, what looks like flourescent fixtures, in the ceiling. Then in the spare parts room, there are smaller light panels in the walls and that room appears to have a slight yellowish cast to it.
Would you use a couple of lights to provide the light, and then set the ambience value on the light panels to make them look as if they are lit up?
Al
-
I seriously doubt you don't know what you're doing Al, but it *seems* like adding the lights in an action would be the simplest solution. It's really looking nice so far.
Hi Gerry,
When it comes to lighting and texturing, it is really hit and miss with me. I truly don't understand the different types of lights and what they do. And why with some lights it doesn't really matter where they are placed in a chor, but the direction they point does matter. A good case in point is my B9 Robot model. Played and played with it until I got something that seemed decent enough. Then Mark redid some of the textures and lighting and it was like night and day difference in the final render. There is just sooooooo much to learn. I realize now why you have lighting teams, texturing teams, modelling teams, effects teams and so on in a movie or project.
There is a downloadable pdf from 3DTotal on lighting techniques. The PDFs are for other packages, but I am thinking the techniques could be translated to A:M as well. For around $15 USD, I think it may be worth the risk.
Al
-
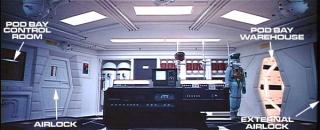
Started working on the Pod Bay interior for the Discover model. To make this model it's own complete set, I am going to include the Pod Bay doors and front wall sections (interior and exterior). The slider to control the doors will be part of this model now, and not the Discovery.
So far, I have the rear and left walls modelled (with temporary textures on them). The floor and ceiling are blocked out as well. It's been tricky trying to get everything to scale without having any blue prints to work from, just screen grabs from the movie. The front section with the pod bay door openings, is just a temporary piece so I can get the other parts modelled and scaled in place. I actually do have the interior of the doors done, they just aren't showing yet.
I am just using standard lighting to light this set so far. I am not sure how to light this model properly, so that it can also be used with the Discovery model. How would I get the lights to work on just the interior of the set? For instance, I don't want the lights in the pod bay to affect the exterior of the Discovery or the cockpit. Is it best to create the lights in an action, than apply the action to this particular model? Any help would be appreciated, as I really have no idea of what I am doing...

Thanks...
Al

-
The vette is looking pretty good. If you have the Dark Tree shaders and the AM Simbiont plug-in, you could use their paint shader. It does a really great job of doing a metallic paint.
You can get the shaders here.
And get AM Simbiont here.
I used the paint shader on the Honda Rebel I modelled a while back.
Al
-
@Tralfaz I am into mostly Landscape/Macro photography but I usually have my camera with me wherever I go. I do enjoy astrophotography too, I have this sweet 50mm f/1.8 lens thats super sharp and works great for astrophotography. How is the IS on the 55-200? I want to get a IS lens but I dont have enough money...
I've just gotten back into photography this year. I've tried some astrophotography (moon, stars), nothing too fancy though. Still learning the ins and outs of the cameras and lenses. Played around with HDR photography as well, very cool stuff. The IS is very nice to have. Works fairly well, and helps keep things sharp. I also have a Canon S3 IS point and shoot camera, which is a very good camera as well.
If you are interested, you can browse through my Photobucket Account. Have some photos and models up there.
Al
-
Great start on a great camera Photoman. I've got the Rebel XTi with the 17-85 IS, 55-250mm IS (nifty 250) and 50mm 2.8 (nifty 50) lenses. What type of photography are you into?
Al
-
Thanks so much for all your kind words folks.
I've got so much from these forums since I joined a few years back, that it is my pleasure to be able to contribute something back to the community.
Thanks again...
Al
-
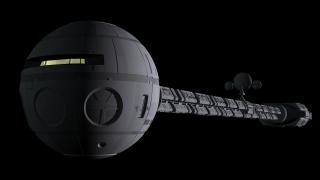
Finished working on the Discovery, and am providing it here for anyone who wants to use it.
Revision History:
2009-11-16
- Included Pod Bay Interior with Discovery model.
- The Discovery and Pod Bay Interior are now assembled via Actions instead of inside a chor
2009-11-25
- Include the Cockpit Interior as a separate download.
- If you haven't done so, download the Discovery model.
- Next, download the Cockpit model and include it into the existing Discovery folders.
- Discovery actions have been updated to include assembling the cockpit.
- Separate cockpit action to assemble just the cockpit, independent of the Discovery.
- I renamed the excellent benlens4.mdl to fisheye.mdl (easier for me to remember what is used for)
Enjoy...
Al


- Included Pod Bay Interior with Discovery model.
-
Thank you Nancy and Robert.
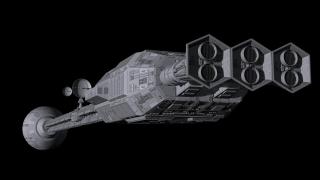
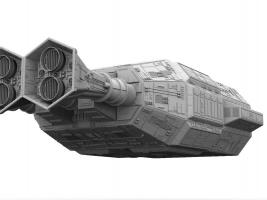
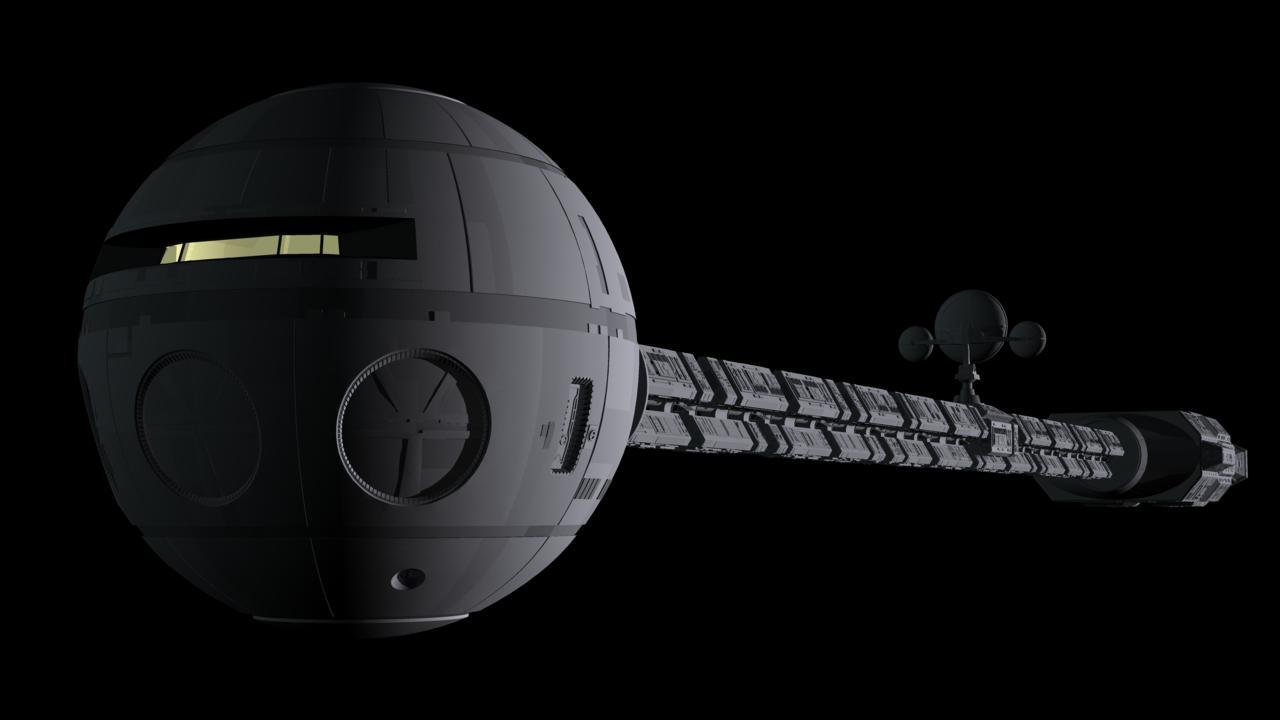
As for the engines, you are correct. They were to be atomic engines that would pulse at regular intervals, thereby propelling the Discovery through space.
Finished the texturing the ship tonight. Applied different shades of greys to the many panels on the Discovery. I've got a couple of ideas that I want to do with the Discovery and will be working on them in the near future.
Al
-
Thank you everyone.
Really nice start Tralfaz, but have you thought about adding some detail to the model? It looks a little plain
Nah, I want to go for the minimalistic approach....
Seriously though, modelling is now complete. (hopefully...)
Good heavens, just checked how many patches are in the rear engine module. This does not include the 3 engines, just the module. Sitting at 33,177 patches.
Al
-
Hi Ken,
This is looking pretty good, but I do have to agree with the tops of the roof looking a bit too bright. Once you start doing a fly through, it may not even be all that noticeable. Maybe you could have a nice big full moon to account for the brighter roof tops...
Hope you are able to post a video of the fly through (and in cross-eyed 3D!!!).
Al
-
Either Sir Nigel is a replicant, or he's in serious trouble

Yes, Sir Nigel is the latest Nexus model to be developed by the Tyrell Corporation.
Dunno how I missed this thread. Real nice work there.Thanks Ken.
After taking a break to work on the B9, it's time to come back and finish up the Discovery.
Started doing some more work on the engines. Still have the detail to complete on the top, bottom and back of the engine body portion. I hope to texture a lot of the panel detail and shading using decals.
Al

-
I watched the first few episodes on Hulu a while ago and at the outset, B9 was a rather menacing character under the spell of Dr. Smith. I'll have to look at those again and see if the B9 name is mentioned early on.
I can't remember if the robot was actually called B9 on the show or not. I had the Alpha Control Manual in which it called the robot B9. I've seen references all over the web to the robot as B9 as well.
I prefer the first season in black and white due to Smith being much more of a serious villain character. The robot was more mechanical in everything he did, like walking and talking. Smith actually had the robot programmed to kill off the Robinson family one by one. Made for some pretty tense moments in the series. Unfortunately, the Batman TV show came on the air and it was very campy. CBS saw how the ratings were going up with Batman, and decided to shift LIS towards being campy. This is why Smith ended up being a snivelling coward.
In the Alpha Control Manual, there was another explanation for Smith's change. It was due to him not being in a freezing tube during the initial 'full power' lift off from Earth. An unprotected human would be affected mentally, which is why the Robinsons were in the tubes during lift off. Apparently, they never did a 'full power' lift off again, which is why they were only in their couches. That and June, the mother, did not fair well when she came out of the freezing tube. John, said she would never have to go back into it again.
Well, this has filled my geek quota for the day....
Al
-
Thanks everyone.
Sorry about not adding the labels to a bone. They were a last addition to the model.
That is a really great render Mark. The body color looks really good. Did you adjust the material and if so, what did you set it to?
Al
[edit]
I've updated the model and the newest fixed robot is in the 1st post.
I've been looking more and more at your render Mark. I am really envious the result. I've said it before and I will say it again. Lighting and texturing is an art form, and one that I really, really need to practice. Would you be willing to share your lighting setup?
[/edit]
-
Hey folks.
I've been doing a fair amount of mechanical modelling lately, and have been finding myself re-creating the same basic shapes and objects over and over. So, I've decided to start a 'Greebles' library, where I can create re-usable parts, put them into a library and have them within easy reach whenever I need them.
I've created a library and was hoping some of you could check it out to make sure it works properly for you. The folder structure is based on the default folder structure that Animation Master installs with. You can either unzip the file into the default Animation Master folder (where Master.exe resides) with the option turned on the create or use the existing folders. You can also copy the files manually providing you put them in the folders as specified in the readme.txt in the zip file.
Currently, there are 22 'pipe' greebles, 11 of them as hollow pipes and 11 of them as solid pipes. They consist of straight pipes, bends, joints, etc.
I plan to add to the library as I go along, adding things like switches, panels, doors, etc.
Currently, we have a folder for models and materials. I wasn't sure if this should go under models or not. Or is it possible to have a Libraries folder?
Thanks in advance...
Al
-
 1
1
-
-
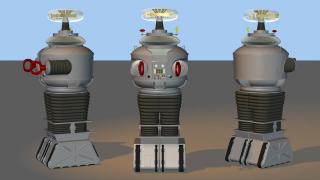
I've finished working on the Lost In Space B9 Robot. I would like to send Thank You to robcat for providing me with his concertina model in helping me figure out how to rig the robot's arms. And thank you to all who comment and help me through the modelling process of this robot.
I am including a project file, separate model, two action files and a single decal that was used in the model. Pretty much everything is rigged, lights, arms, claws, whirly gigs and so on. Lots of pose sliders to help make things a bit easier for you. The pose slider for retracting the arms doesn't work properly all the time. Not sure why. Also, I don't have any rigging for the treads.
Enjoy...
Al
Updated - October 31, 2009
The buttons labels were not attached to the Torso bone (as found by Largento). Model updated to fix that problem. Thanks Mark for finding it and letting us know about it.

-
Okay, let's split it! IMDB shows it as 1956.
Al
Edit: Oops! Beat me to it......
-
just a quick note, robbie isn't the one that trafalz is building here, robbie is from the forbidden planet and looks somewhat different, though i don't know which was first, lost in space or forbidden planet
Forbidden planet was first with Robbie the Robot. It was made in 1955 and Lost In Space was done in the early 1960's.
Al
-
And now a quick video of all the lights and whirly gigs buzzing away..... Lights need some fine tuning though...
Al
-
That looks so cool! What is the concertina model ? I build a "Bender" model but had trouble rigging the arms and legs, they move much like the B9. Is there a post for that model?
You can find robcat's concertina model in this post...
Al
-
Thanks everyone.
I saw that sight already Mark. Got some reference photos from there. Pretty amazing that they can find a market for these robots for that amount of money!
I appreciate your trying to create an arm rig Paul.
I was hoping to have the lights flash randomly through an expression Rob. I suppose it would be a lot easier to just create an action that flashes the lights, then have it repeat itself.
From what I have read, there were definitely two different finishes on the robot (as there was a hero robot, and a stunt robot). One of them had a smoother silver finish and the other was a more textured silver finish. I was trying to go for the more textured finish, but am totally open to other options. A lot of the photos of the replicas have the smoother shinier finish, so I tried using a metallic paint shader from Darksim for the body color. Let me know if this is any better or not. Might need to be a bit brigher silver...
Thanks...
Al


B9 Robot - Classic 'Lost In Space' robot
in Characters
Posted
Glad to be of help George, and thank you for your kind words.
LIS was and still is one of my all time favorite TV shows. I still enjoy sitting down and watching them every now and then. Even the giant talking carrot episode... It's pretty funny really, to see Don West turn his back to the camera when they are caged up in that episode. He turns his back because he is laughing at the giant carrot in the scene!
I agree it would have been hard to keep a show like LIS going if Smith had always been a seriously evil antagonist all the time. It would have been hard to keep a show with a small cast like that going. The movie was kind of iffy for me, although I did enjoy Gary Oldman as Dr. Smith. With the rebirth of shows like Galactica and V having a darker serious tone to them, I wonder if they would ever re-do LIS for TV?
I've modelled the Jupiter 2 three times now. Once in Anim8or (complete with launch tower), once in C4D (just the outer hull) and also in A:M (outer hull with working fusion core and outer hatch, partial interior upper deck with working flight consoles and now the B9 robot). The Jupiter 2 was done quite a while ago, and I have learned a lot about modelling since then. I would like to go back and redo it again, making it more accurate and functional. Would love to try doing the chariot at some point as well. Really need to learn organic modelling so I can start working on some human characters. Ohhh... the pain... the pain...
Al