

Caroline
-
Posts
1,248 -
Joined
-
Last visited
Content Type
Profiles
Forums
Events
Posts posted by Caroline
-
-
You're right about the decals - it is very hard to get them to look right. I think this exercise is more about advanced organic modelling, and just an intro to decals.
You now know how to put a decal on? And reposition it? And make it look a bit better? That is a good result then.
And that's a fine looking model

-
Hi, Rodney - welcome to A:M!
Have you been to the Hash site and downloaded "The Art of Animation:Master"? Also known as TaoA:M, the name of this forum.
http://www.hash.com/2007web/reference.htm
This will have exercises to take you through almost every feature in A:M. You can do the examples as in the book, and then extend yourself by putting your own take on them. Then you can post your results on the TaoA:M to entertain and delight everyone
There are videos to illustrate most of these exercises:
http://www.hash.com/2007web/vm.htm
This forum is a wonderful repository of knowledge - learn to use the search at the top right of the forum!
-
Those black bits look like normals pointing the wrong way.
"Normals": Each patch has a right way to face and a wrong way. Patches should all face outwards, but sometimes, especially when adding 5 point patches, they get pointed the wrong way.
To see which way a patch is facing, press Shift + 1 (that's the 1 that's NOT on the numeric keypad). You should now get a spike on all the patches. If the spike is pointed inwards, it's the wrong way.
To turn a patch around, use the patch tool on the right (Shift+P), and click the offending patch. Then press the F key. The spike will now be on the opposite side, meaning the patch has turned over.
When finished, remember to press Shift+1 to turn off the spikes.
[Another way to see patches with bad normals is Shift+6 (option means don't show back facing patches). Any patches facing away from the camera now become transparent. Important with this one to remember to press Shift+6 again to turn it back, otherwise you think you've lost your patches.]
-
That's really good - I love the toe-tapping anticipation.
My suggestion? Move on to the next exercise
The black sky, in case you were wondering why it is not blue, is caused by one of the Advanced Render options - under buffers, turn the Alpha Channel OFF. If you were to render this to a .tga sequence instead of a .mov, all those .tgas would have an alpha channel selection where the black is. This is useful for integrating layers of pics / videos when doing final edits.
-
dammit...wouldn't load up! have to try again later
Make sure that you render to a .mov (Quicktime), as that is the preferred format for the forums. Also, to get a sensible size, render (using the Advanced Options) using Sorenson Video 3 compression, or if you don't have that, try H.264 or MPEG.
Looking forward to seeing it
-
Or you could get your avi (I would use a .mov, as A:M seems to play better with a .mov), and import it as an Image > Animation Sequence, and apply it to a simple model.
It will automatically play in any chor.
This project takes the previous .mov and applies it to a bent cube (my primitives got written over - note to self: embed primitives after loading, otherwise they will get bent).
Project: rabbit.zip
-
And this is 'animating the position' of the decal.
It is 4 static decals applied at different positions, and each decal image is given 0%-100% at different times.
Project: rabbit.zip
-
If you mean 'animate the position' of a decal, I don't think you can.
You can swap out different decals using 'show more than drivers'.
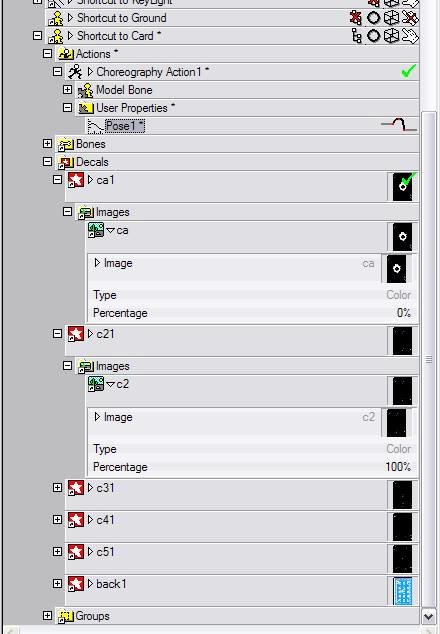
You have to decal the item with multiple decals, and then assign 0% - 100% for each decal.
This is a card project that swaps out decals using a pose. (Each 1% moves to a different card, but I got bored after the 5 Clubs
)Project: cards.zip
If the decal is a static picture that you want to move up and down a model, you could create a small model with just the decal, and then move the model up and down.
-
'Record Relationship' tool
I swear that button wasn't there yesterday. Rusty - make a few more new buttons, please
-
I found a "light buffer" option in the render options, but no shadow buffer
Are you sure you are still rendering to .tga? jpg, png and other options do not have the shadow buffer.
-
You mean "how do I lay the first spline?"????
In the side view click the Add CP button, put a cp at various points, following the nose on the rotoscope.
Then you can extrude it in the front view, as per instructions. (If you didn't mean that, whereabouts are you stuck?)
You can have the front and side windows in your view together - Window Menu > New window, then Window Menu > Tile Vertically. Then you can set one window to side view (4 on keyboard), and one window to front view (2 on keyboard), and you can see much more easily what you are doing.
-
And if you are searching for two words, use the + in front of the words (otherwise you get an OR not an AND). Example:
+decal +giraffe
will only pull those threads with both words.
-
That's a great effort - well done for persisting so well through your difficulties
-
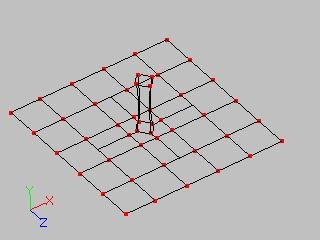
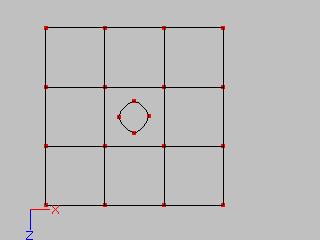
Conceptually, this is how I would attach a horn (although, as Rodney says, for the giraffe exercise I am pretty sure I just stuck them in the head without attaching
):Basic mesh without horn:
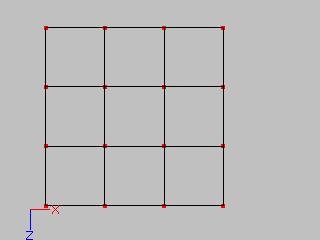
Add base of horn unconnected:
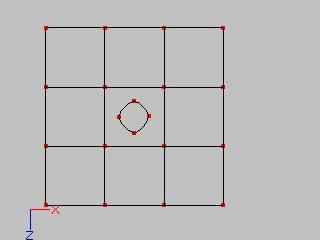
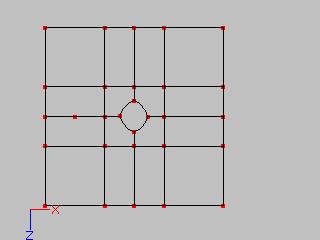
Add splines (you will have 5 point patches that you will eventually fill with the 5 point patch tool):
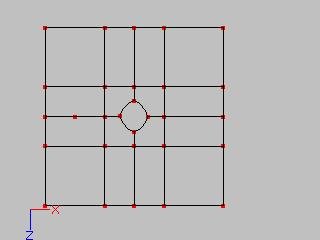
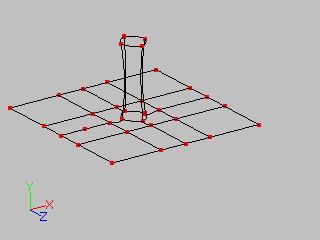
Select the base of horn and extrude:
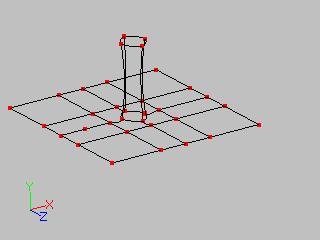
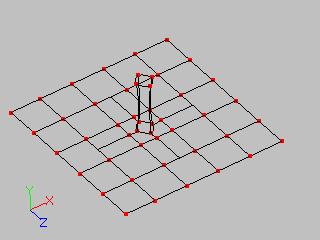
Make excess splines into hooks:
-
Sounds like a graphics card thing, so I can't suggest much. I think you have an nVidia card (Your screen grab top right looks like an nVidia icon?)? You could search for nVidia on the forums - other people have tried various things, that I can't recall, because I have ATI.
Actually, one thing you could try is switching Direct3d / OpenGL - that's Tools Menu > Options > Global, and change the Real Time Driver.
-
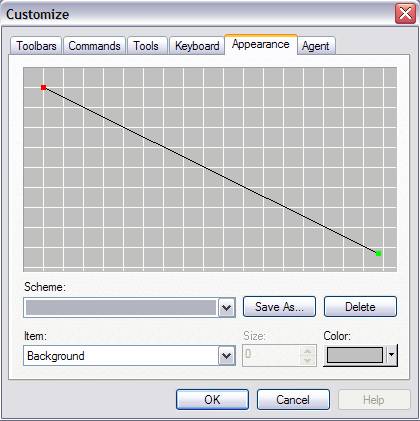
To customise your colours:
Tools Menu > Customize > Appearance Tab, then choose the item from the item drop down and change its colour. I suggest once you are happy, to save it as a scheme. You could have several schemes depending on what colour your model is.

-
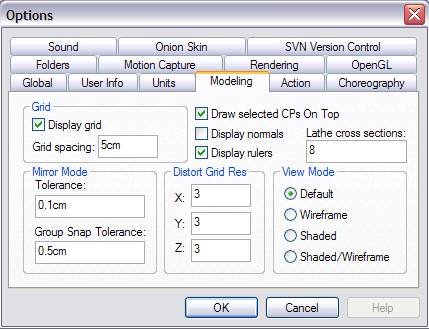
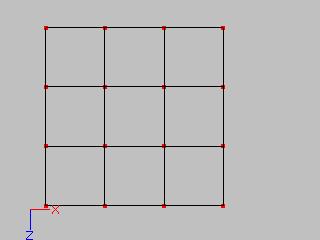
To change the graph:
Tools Menu > Options > Modeling Tab, then change the grid spacing.
-
P.S. Some of the model links for downloading do not work.
The ones I have tried have all worked, but you have to change the backslashes to forward slashes in the address bar.
For free stuff there's also:
-
Couple of shortcut keys you might be able to use:
Click on a spline, press the comma , key. That selects just that spline so you can move it.
Click on a CP, and press the T key then click and drag to turn the model so you are viewing it in 3d space.
R - rotate the selected area.
S - scale the selected area
-
it is the tail fin of the Imperial shuttle.
It's hard to tell from this how it is built (it looks fine to my inexpert eyes).
I didn't know how to save it as a JpegThe most useful for diagnosis is a screen capture of a shaded wireframe (that's 0 on the main keyboard, not numpad). If you are on Windows, do shift+Prt Scr, then go into your image editing application (I use Irfanview for that), and paste it, then crop the picture down to what is useful, then save it. I don't know how to do it on a Mac.
-
but I also believe there is a tool I am not using to get the edge look, could this be beveling?
All the "best" modellers do plenty of bevelling. There is no bevelling tool as such, just add extra splines where the bevel should be.
You could put up images and wireframes of your spaceship and what you want it to look like, so that we can be more specific. I doubt it is a material that you are missing.
Coincidentally, Yves also has an article discussing bevelling on his site:
-

(Not a useful post, just letting you know people are out there waiting for the next episode
) -
Materials are way fun. Complicated, and take time to render, but fun.
Start with exercise 16 marble in TaoA:M. That is a good introduction to materials.
Then examine the materials that came with A:M. Dissect them and check out how they combine attributes.
Then search for johnl3d's posts, because he puts up a material nearly every time, and dissect them.
Basically a material consists of attributes. Attributes just contain the surface properties that can be applied to groups in a model. But you can combine the attributes in interesting ways, using Material Combiners, which can also contain attributes and combiners.
This page from the manual explains Material Combiners well:
http://www.hash.com/Technical_Reference/Cu...t_Combiners.htm
Tutorial from Yves Poissant on Combiners:
http://www.ypoart.com/tutorials/materials/index.php
And a "wow, hold onto your brain" tutorial by Yves, to create wood grain:
http://www.ypoart.com/tutorials/wood/index.php
The other material textures are listed here:
http://www.hash.com/Technical_Reference/Cu...ure_Plugins.htm
Simbiont testing done here so you can see what is the result of the free Darktrees:
http://www.pixelburg.com/am_materialtest/d...nt21/index.html
-
I can't see anything wrong there.
Are you able to click on a single control point and select it? If you can, press the / key and does that select all CPs connected to that selected CP?
You don't have the PWS showing on the left, that is unusual. Click View Menu > Project Workspace. Is the model selected in the PWS?


how to move act. file
in New Users
Posted
Have you tried dragging and dropping it?
I know it works from Windows Explorer into the Library, but I have not tried that Catalog window.