


T-Dogg
-
Posts
344 -
Joined
-
Last visited
Content Type
Profiles
Forums
Events
Posts posted by T-Dogg
-
-
I was rigging one of my own characters using the 2001 rig. I was following in the manual about how to install it and everything seemed to be OK. I changed some of the bones' positions to make it more symmetrical. Then I added a bunch of fan bones to help with the joints.
Somewhere during all of this, I must have messed things up because the rig does not behave at all like the characters that come on the CD. If I try to raise the foot off the ground, the foot target pulls away from the foot and the knee will not bend.
[attachmentid=22567]
Does anyone have any idea what might be causing this problem? I am hoping there is a simple fix for it because I really don't want to go back and start all over from scratch. I spent a lot of time on this already.
Thanks for your help!
-
T-Dogg,
Holy seamless animations Batman, you've got it looping perfectly!

To do that, the buildings must be on a circlular model that you're rotating right?
-Jim
Yes, that was the concept! However, I didn't have a perfect circle. What I did was model 3 basic building shapes... then I started putting copies of them together in a row. I scaled the heights on some and flipped some on the x-axis to try to make it look like there were more buildings than I had actually modelled. Then I selected the whole row and used duplicator. I ended up with a large pentagon shaped group. After that, I used the magnet tool and started distorting the buildings to give it that screwy look and again to make it look like they weren't all alike. I rotated the group in an action. Then I slapped a single 4 point patch in the middle that remained stationary. This was originally done just to hide the backs of the rotating buildings from the camera. It became even more useful though when I came up with the idea to decal the Bat-signal onto it.
Holy potholes Batman; Gotham streets are in desperate need of repairs
Hahaha! You're definitely right, Dhar! There are a lot of potholes, and I think even an occasional speed bump!!! All those superhero battles in Gotham definitely give the road crews job security!
The original animation looked somewhat dead, so I went into the timeline and started slapping keyframes onto the Batmobile's y-axis translation. After that, I had to go back and put a translate constraint on Batman because I hadn't done it earlier!!!
Using Paintshop Pro I experimented with some filters to create some different effects. There were 399 frames of animation, but PSP's batch processing worked like a champ. I ended up with a Black&White version, a sketch version, and a couple of others.
I know I am probably doing a lot of things wrong in my processes, but I am still learning as I go. So any pointers you guys can give me on modelling, and animation as well, is always appreciated.
-
I needed a break from modelling, so I gave in to the urge to make some kind of animation using my Batmobile model even though it is still in an unfinished state. So I played around some and came up with a short looping animation of a night drive through Gotham City.
I used the "Caped Wonder" model I got off the Hash ftp as my driver. I give thanks to whoever created and shared it.
The animation is HERE for the time being. It's a 10MB Quicktime movie file using the .h264 codec. I probably should have added the theme song again and some car noises, but since it was just a quick bit of playing around, it has no sound.
The buildings might look somewhat distorted. There is nothing wrong with your television set. Do not attempt to adjust the picture.... Wait a minute, that's the wrong show!!! Actually, I distorted things on purpose trying to convey some sense of the strangeness that is Gotham City. If the style looks somewhat hodgepodge, it's because I used ideas from the comic books, the TV show and even Hanna-Barbera cartoons... all thrown together in a 13 second loop.

I hope you will like it.

Maybe after I finish the car model I'll return to this project and add in some sounds and work in a few of my other ideas to give it a more finished look... but who knows?
-
Thanks Rodney! Things haven't been going as quickly as they first were, but I am still plugging along.
I need to update my HA:MR file with the newer model. I actually need to play around more with webHA:MR and learn how to really use it. It's a great way to show off a WIP and let other modellers see exactly what you're doing, but we all know it has a lot more potential than that. I need to really tap into it so I can do something with it once I finish this model.
-
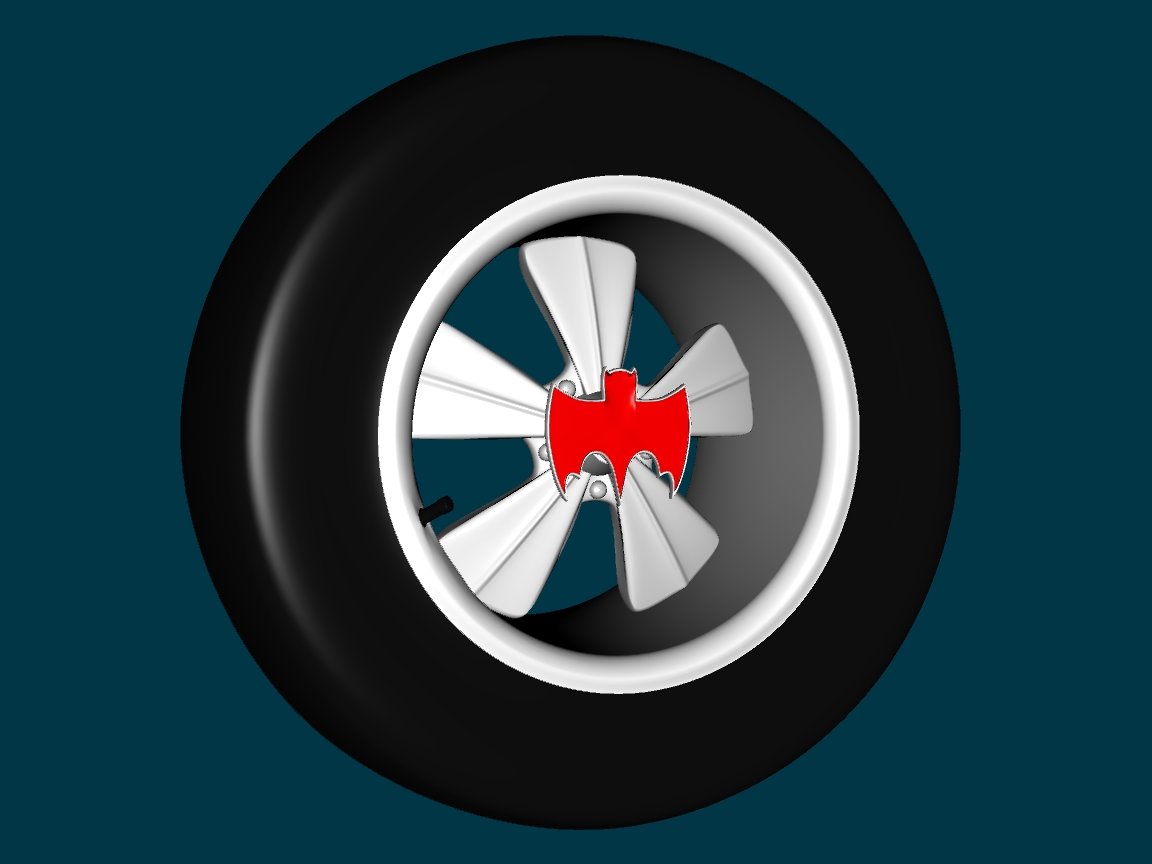
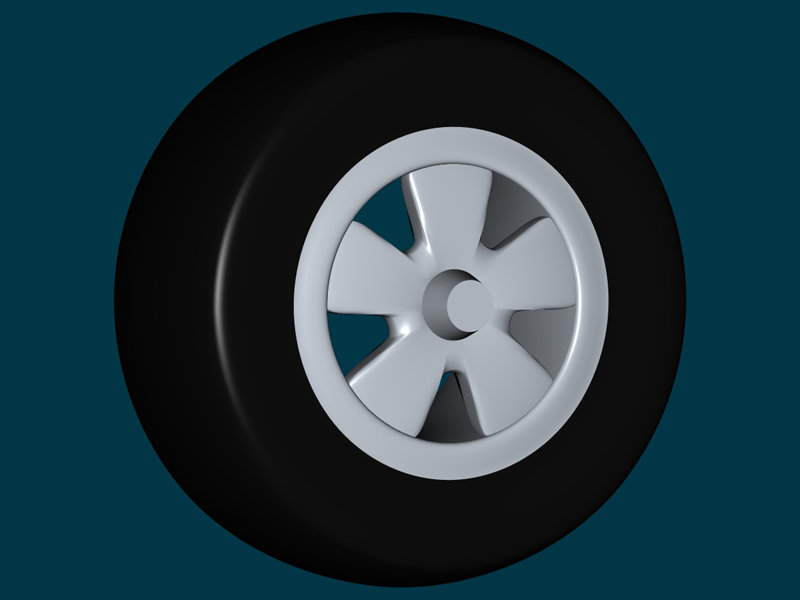
A few hours ago I decided to scrap those generic-looking rims and start modelling some slightly more detailed ones from scratch. I also finally got around to modelling the bat emblems. I am pretty happy with the way these tires turned out.
[attachmentid=22099]
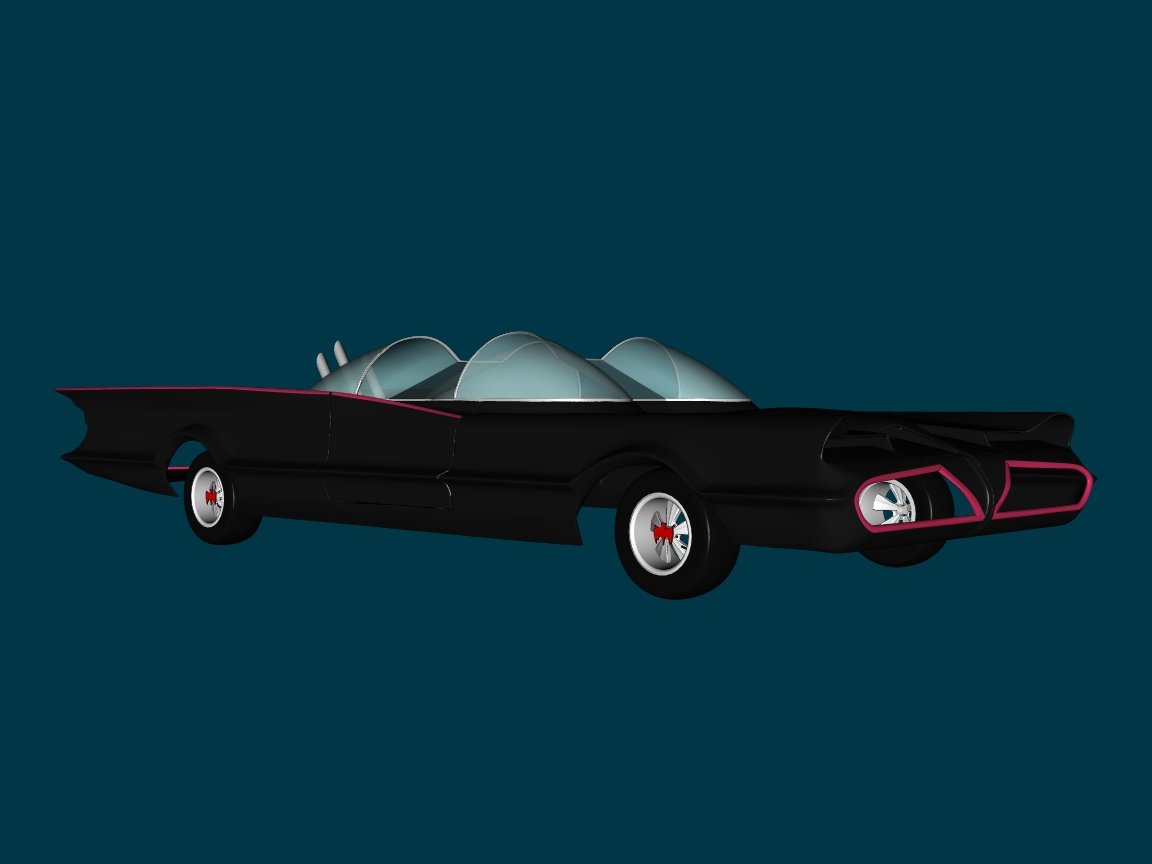
Here's how they look on the car.
[attachmentid=22100]
It's really starting to shape up now, but there is still so much left to do. Sometimes I wonder if I might have bitten off more than I can chew with this project. But at times like this, when I feel like I've made some progress, it makes me feel proud and helps keep me going for at least a little while longer... until I start getting frustrated again. :-)
I am going to try to finish the body and chasis and then get to work on the interior.
-
After a bit more tweaking....
[attachmentid=22096]
Still not perfect, but better, I think.
-
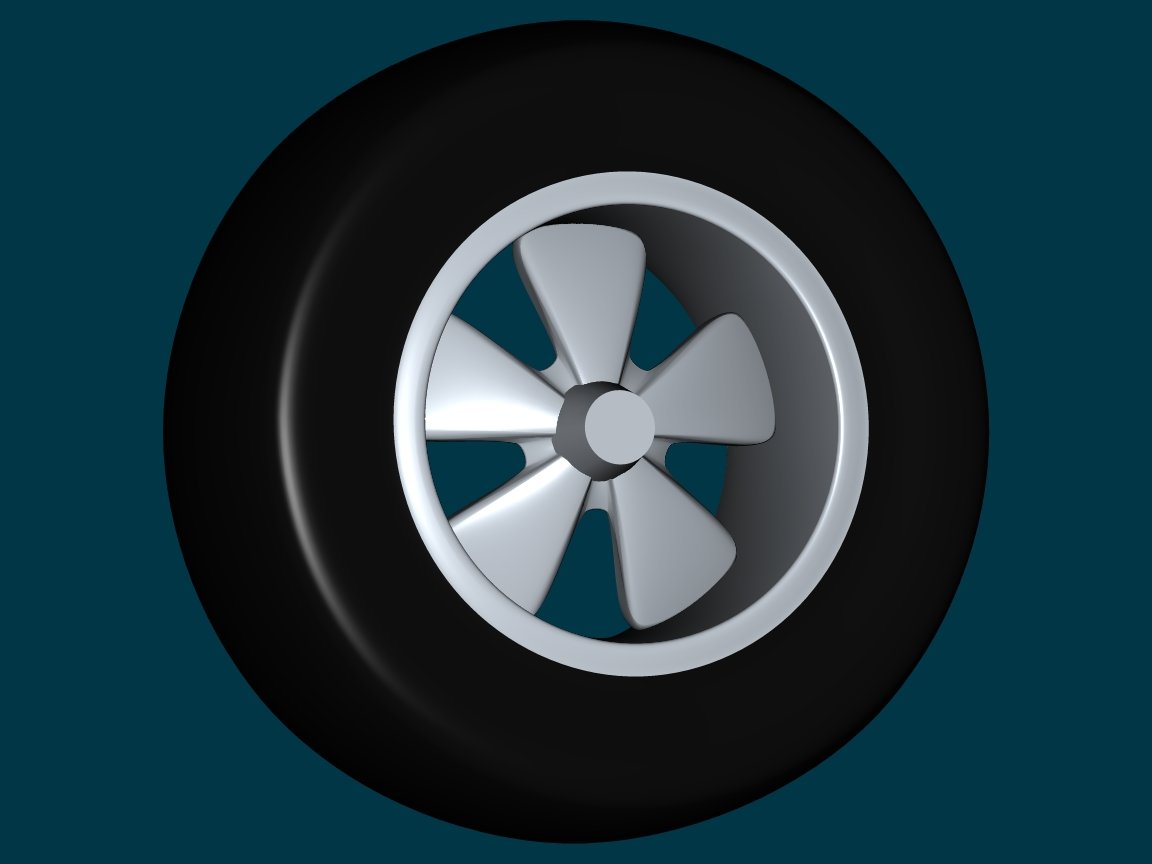
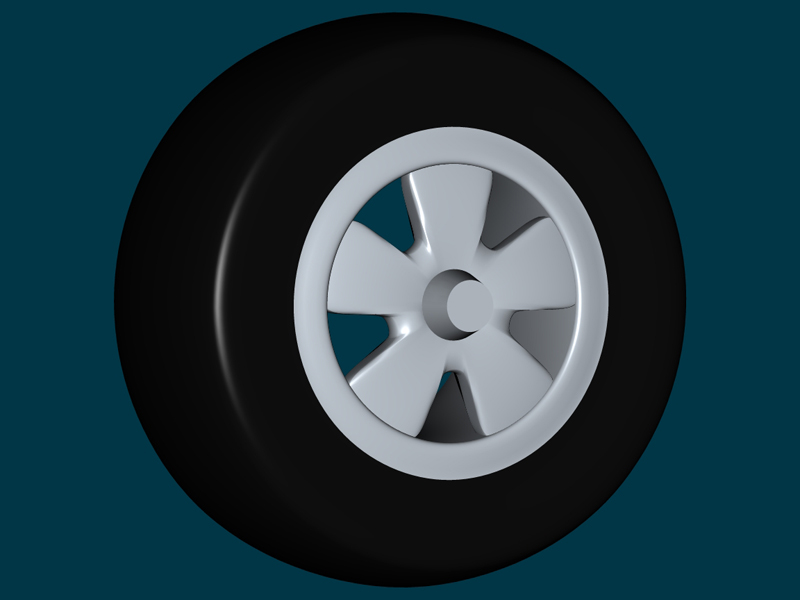
I started working on the tires. I still need to add the bat emblems, but this is what I have so far.
[attachmentid=22066]
I admit, they aren't very detailed, but I think they look OK.
-
I finally have a small update to post. I reworked the windshield some. Then I copied it, flipped it, and reshaped it to make the rear window.
[attachmentid=21892]

-
What`s next? Maybe the Yamato??
;>) Jake
Yeah! Then you can convert it for space travel and do an A:M version of "Star Blazers"!
I loved that show as a kid... still do.
-
The mascot contest is over and I am trying to go back and fix a lot of the mistakes I made on this character: My Losing Mascot Entry
HERE is a short quicktime file. It uses the h264 codec, so you'll probably need the newest version of QT to view it.
I need to add some bones to help with forearm rotation.
I also need to do more with the hair and eyebrows. They just don't look right being flat when his coat is so furry. On the other hand, I might remove the fur and try toon rendering him.
I may or may not go back and try to model the face differently.
I've also been fixing the fur. In my rush to make the deadline, I forgot to tweak a lot of the hair settings.
I've also been trying to fix the scenery and figure out why the ice hole area doesn't render correctly. Somehow I messed it up and now it eats up all of my RAM and I get an error every time I try to render the full scene.
Hopefully after all is said and done, I'll be left with a finished character that I can really be proud of. I'll also have a lot more knowledge that I can use on my future characters.
-
EDIT - I noticed the website says this:
The following textures and turbulences are necessary in order to use these materials:
* Worley.trb (par Yves Poissant)
* AMC_Crackle.trb (Enhance A:M)
* AM_fBm.atx (Enhance A:M)
Unfortunately, all the links are broken.
Are these files still available? If so, where can I find them?
I found Worley.trb here: Yves' Worley.trb I haven't located the other ones. The ice material seems to work without them anyway.
If you're not able to find those files, you could test out these settings. This might specifically be good for an ice sculpture for example.
Transparency 100%
Index of refraction (IOR) 1.31
specular size 25
specular intesity 100
density of 1 to 4 maybe
If you're going for an ice cube that is a bit frosted on some parts, you may have to use a gradient or turbulence combiner - giving one node more density than the other.
If you're going for a glacier you might play a little more with the density setting and give a bit of blue diffuse color and give it a bump material.
Thanks markeh! I'll definitely try those settings out. They look similar to what I had tried to copy from 3D World. The settings they listed were:
Duffuse Color: White or pale blue-grey
Diffuse Strength: 100%
Glossiness: 85%
Specular Color: Lighter than diffuse color
Specular Strength: 100%
Multiple Specularity Through Opacity: Off
Ambient Color: Dark blue-grey
Ambient Strength: 53%
Opacity Strength: 35%
Reflection Color: Lighter than Diffuse colour, darker than Specularity; alternatively, use an image
Reflection Strength: 30%
Refraction color: White or light grey
Refraction Strength: -100%
Refraction Index: 1.309
Lighting Model: Glossy (Plastic)
Remember, those settings were for a different program, but some of them were the same in A:M. Other times I kinda guessed. For several settings I didn't have a clue so I just ignored them. What I came up with looked sort of similar to the ice material that was listed on Black Mage's link, except mine seemed brighter.
I hadn't touched the specular size or density though, so I'm going to use your settings.
-
Thank you so much Balck Mage! I am definitely going to give it a try....
as soon as I finish downloading all these wonderful materials.
That's a great link!
EDIT - I noticed the website says this:
The following textures and turbulences are necessary in order to use these materials:
* Worley.trb (par Yves Poissant)
* AMC_Crackle.trb (Enhance A:M)
* AM_fBm.atx (Enhance A:M)
Unfortunately, all the links are broken.
Are these files still available? If so, where can I find them?
-
Can someone please tell me some good surface properties to create ice. I have been experimenting on my own, but I can't get it to look right.
I was trying to adapt the ice settings in the current issue of 3D World magazine from Daz Studio to A:M, but I got confused because some of the D|S settings are named differently than the A:M settings.
I decided it might be best to just ask people who specialize in A:M what settings they use. So I am asking... What settings do you use?
Any help would be gratley appreciated. Thanks!
-
I just did a quick check. That model is indeed a v13 model. It won't open at all in v12.0w but does open in v13.0j. Sorry.

-
One question:
This started out as a joint project.....where's Oakchas??
I wish I knew, Jeetman! Hopefully all is well with him.
I have a question for those of you who have viewed my HA:MR file. Currently my winshield has 2 surfaces for the glass. Would it be better to just have one? I wanted to give it a little thickness, and I also read somewhere that glass models should have 2 surfaces to get better reflection or refraction or something..... but when I turn on transparency for my glass as I have in the newest HA:MR version (I think transparency is set around 65%), I get wierd patterns in the glass.
-
Thanks for posting this T-Dogg. I just learned something new!
Me too, friend. Me too.
-
Do you have transparency set for the windshield?
I'm basically just modelling right now and not really doing too much with the other settings, so it's probably not set to be transparent. I'll try to remember to change that next time I update it. So far I've really only added some of the red stripes as the mood has hit me.
I have been away from AM for several months now.
saw erics updated S7 and must say very nice mate.
which led me to this wip thread and i have to say that this is the best thread i have read on any forum.
I think that this should be the way to go for new users of any program, have the newbie taken under wing.
Great work guys, looking foward as well to seeing the final render.
JTB
Thank you so much for the kind words!
It helps keep me going on this project when I feel myself getting pulled in so many different directions. -
Thanks for the info, robcat! I had actually used this before, but my scene only had one object in it at the time, so I thought it was pretty much just opening that object up in it's regular modelling window. Now I have tried it again and I see that it is much more powerful than I had realized. It actually opens up the entire scene in a modelling window, no matter how many objects are in it.
This is just what I was hoping for!
-
I vaguely remember reading somewhere that modelling can be done in A:M's choreography window. Is this really possible? I've tried but all my CPs always end up disappearing. Any help would be greatly appreciated.
-
I posted an updated version on my website. Hopefully it is working now.
-
I solved my issues with HA:MR. It should load properly now with no errors.
-
Thanks, Homeslice!
Yes, it is just a partial model right now with no interior or wheels.
Even on the standalone HA:MR viewer the model opens in a very strange view. You can click on orthogonal view and it will work fine even if you go back and click on perspective view afterwards. I'll send Ken a copy of my model and see what he can figure out.
-
I've only had A:M for about 6 months, myself. I'm still not very good at it, but I feel like I'm improving a lot.
I completely agree with what the other posts say about starting a WIP thread. I've learned so much from other modellers looking at my work and giving me advice. The folks on here are extremely knowledgeable and helpful, so be sure and take full advantage of their expertise!
I get discouraged sometimes too, or I find myself in a rut that I don't know how to get out of. At times it feels like I am running into a brick wall and as soon as I finally break through it, I hit another one. What helps me is that I am working on a couple of different projects right now. When I get frustrated with one, I switch to the other. I've found I also do better when I listen to music while I work. (Remember, once A:M starts you can take out the CD and put in any other CD you like.)
Hang in there and don't give up. We're all in this together!
-
Here's just a tiny update. Really it's also a bit of experimentation, as well. Instead of posting pictures like I usually do, I thought I'd try to use Hash's new HA:MR plugin so you superior modellers could actually look at my model in full 3D and give me some good advice on how to improve things.
Here's the link:
Please let me know if this works for you, because I have had ZERO luck using the plugin myself where other people say it works great.
As always, thanks for your time and assistance.


I broke the 2001 rig!!!!!!!!!!!
in 2008 - Rig
Posted
Thanks, Mike. I don't like the autobalancing stuff either. I think I will remove it as well and follow your simplified rig.
One other thing: It puzzles me why someone would make such a complex rig and not even make it symmetrical. Maybe it doesn't really need to be, but I feel like my models are symmetrical, my bones should be as well. Maybe I am too nitpicky... especially for a newbie.
Actually, my problem is the opposite of what you're implying. I actually saved too much! I pretty much did it exactly like you said, too. I named it model_v001, and so on. It works well if A:M crashes and I need to go back one version. Where it doesn't work well is trying to go back through all those different versions later and trying to figure out what was going on. For example, I can't recall what I was doing between versions 027 and 028 or whatever the numbers were. If there is any lesson to be learned here, it's that I need to make more descriptive save filenames!!!
You were right on the money about heirarchy, though! I opened the 2001 rig into my project and started comparing it with my model's skeleton. It seems some of the fan bones I had added knocked the calf bones down in the heirarchy so "Attached to Parent" was no longer working.