iGeek
-
Posts
264 -
Joined
-
Last visited
Content Type
Profiles
Forums
Events
Everything posted by iGeek
-
I'm still new to lighting game. What would you recommend? I'm not very familiar with the advanced lighting stuff, just the different properties and types of lights. I'll start setting something up, though. I might try to mimic one of Apple's shots if I find a good one. -Zev edit: Wait, you mean turn it in a new environment? Should I slow down the spin? The one I posted made a full turn in 40 frames. I rendered it with 16 passes and 20% motion blur. It took about 15 hours give or take. But I've got time. By the way, is the metal for the stand OK? It's not exactly the same as the real thing. Close enough?
-
oooo, A:M on the desktop... Great idea! I'll do something like that when I've got a bit of free time. I've gotta run now, be back later. As for the keyboard/mouse, that will have to wait for a rainy day. Or not. Are there any tricks I should know for the individual keys? Or will I just have to copy and paste a lot and find a good rotoscope image from Apple's PR website? Maybe I'll do that tomorrow if I have a bit of time. Thanks for the comments! -Zev
-
I think that may be mostly the render. If you look at the real thing, it is quite sharp. Download the project and look at side.tga up close. It's really big. Thanks for the quick response! -Zev
-
I had to enter some text to post this image. w00t

-
I bought A:M at Macworld a few years ago, and have just recently really started putting it through its paces. This after having graduated from Amorphium 1.0. So, after a few started and abandoned projects, I decided to build an iMac G5. I went all out and actually finished this one. Doing so helped me learn a lot of shortcuts and techniques, such as material creation and Boolean cutters. Have a look and tell me what you think. I've posted a movie of the iMac spinning on a mirror on my iDisk, along with the project and all its resources so you can see what I did. I apologize in advance for the 5 or so Boolean cutters that I should have modeled in, but it seems to have worked alright. You can download them from http://homepage.mac.com/igeek1/FileSharing11.html. Have fun messing with it. If anyone can figure out a better way to do the ports on the back please tell me. I didn't quite get them right. Cheers, -Zev Eisenberg P.S. In case any potential employers are reading this, I'm 16 and I did this entirely from scratch by myself.
-
Wow, that looks hard! I guess I didn't know what I was getting into. Oh well, it's a good exercise. -Zev
-
Wow, amazing violin! It really looks real. How'd you do the scroll and f-holes? If you download my project you'll see that it's slightly awkward, the way I'm going about it. Also you'll see that I have about 8 rotoscopes for various views, but I also have my own cello as a reference. that's what I'm kind of modeling after. That's why this one is slightly wider than some of the 'scopes- my real cello is. -Zev
-
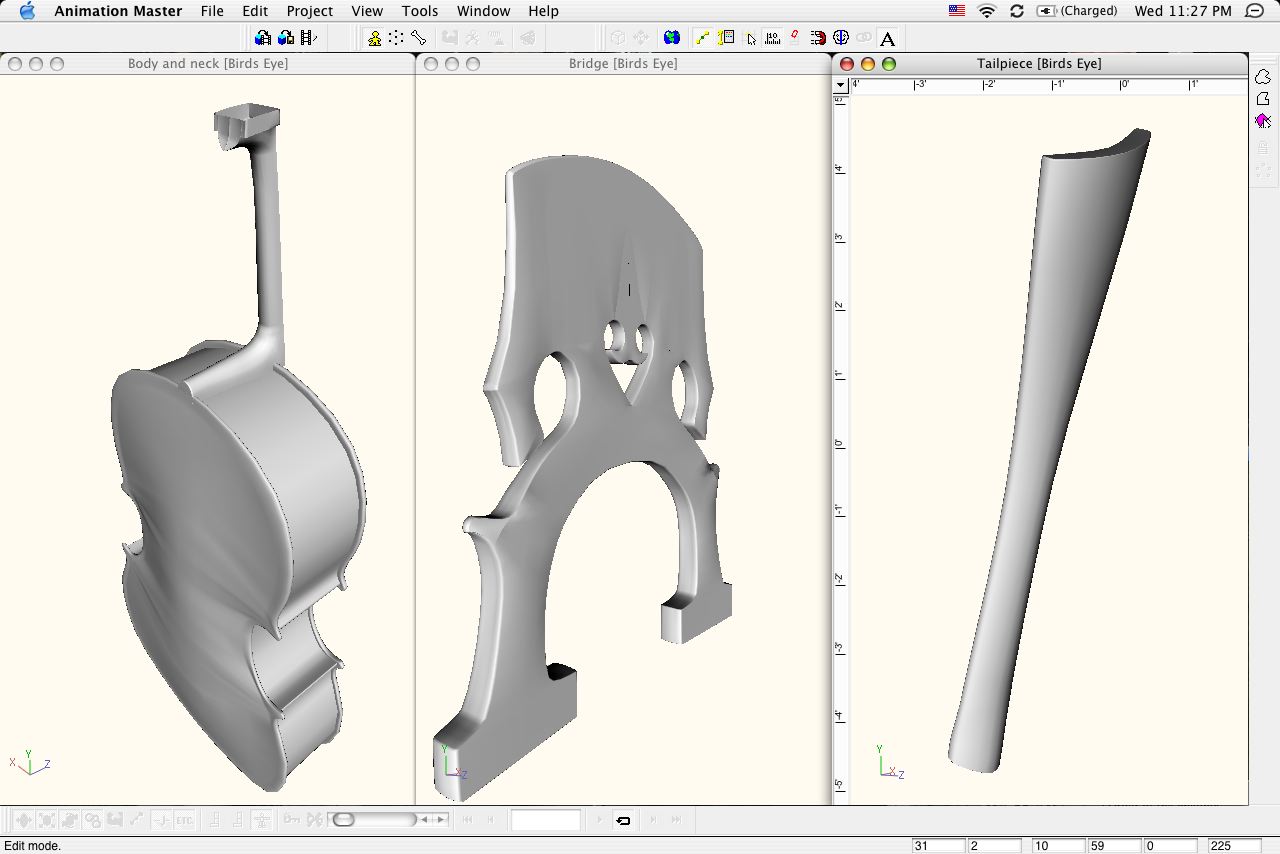
Finally, an update. I've made some more progress. I finished the bridge (darn 5-pointers!) and have begun work on the neck and scroll. The scroll is easily the hardest part. I also completed the tailpiece, the part to which the bottoms of the strings attach. Here's an image of what I've done so far. You can also go to http://homepage.mac.com/igeek1/FileSharing11.html and download cello.zip, which is the complete project, if you want to see it in more detail. My method for starting the scroll is pretty crude. I may start over. I leave for camp for a week on the 11th, and I may or may not be able to see the forum until I get back. 2 days later I'm going to music camp, where I'll get to spend more time with the real thing. Thank you all for your comments and quick responses. Boy, this is fun! -Zev
-
I've had a lot going on. I'm still working on it. I'll post updates when I so some more. Don't bother to check here every day. Just subscribe to this topic. It'll email you when I update it. Sorry to keep you all waiting. Note to Randy: YOU GOTTA INCORPORATE COREIMAGE! It sounds like an amazing technology. It would be so amazing if it worked with 3D. does it? Core level access to image everything. MMMM......
-
Very nice animation. It's amazing how expressive something like that can be. I was half expecting the ESC key to press himself to get away from Ctrl-Alt-Delete. Still, brilliant animation. -Zev
-
Hiding didn't work, but thanks anyway. Could someone download it and give it a try? Otherwise i'll add another spline. I just like to have a clean mesh. I figured out a workaround for one side. Edit- nycer, your post wasn't up when I wrote mine. Thanks, but I've already made some more changes, tapering the bridge, etc.
-
I have taken it upon myself, after about a year of learning this program and seeing it through the OS X Beta program, to model a cello. After one unsuccessful try I modeled the body, and I'm almost done with the bridge. That's where the problem is. I'm having some issues with the bridge. There are four five point patches that refuse to be recognized. I select the five points, but the five-point-patch button is grayed out. Their equivalent regions on the flip side are behaving fine. I've gone over the entire model and flipped all the normals facing out. Is this the right thing to do? You can download the entire project from my iDisk and try it yourself: http://homepage.mac.com/igeek1/FileSharing11.html. It's cello.zip. Feel free to check out the other stuff there. Please advise. I'm still a relative newbie, I may have missed something obvious. Thanks in advance. -Zev
-
Hello again! I presented the project in class today on my PowerBook. We got an 80 on the whole project, mostly because my partners and I had not had time to rehearse. However, the "model" section got 100!!! Thanks once again to all who helped me. And I don't care about grades anyway. I went to a Waldorf school last year. No grades and no stress! Woohoo! -Zev
-
Update: I took rickh's advice and scaled the mountain to a few meters tall. Now a spline rendering as lines appears plenty big. I may keep this, instead of the tube in the last post, just to keep spline count down. When colored with a light blue, it looks similar to glass. I'll be doing a realtime flyby in class anyway, so low patch count is a good thing. -Zev
-
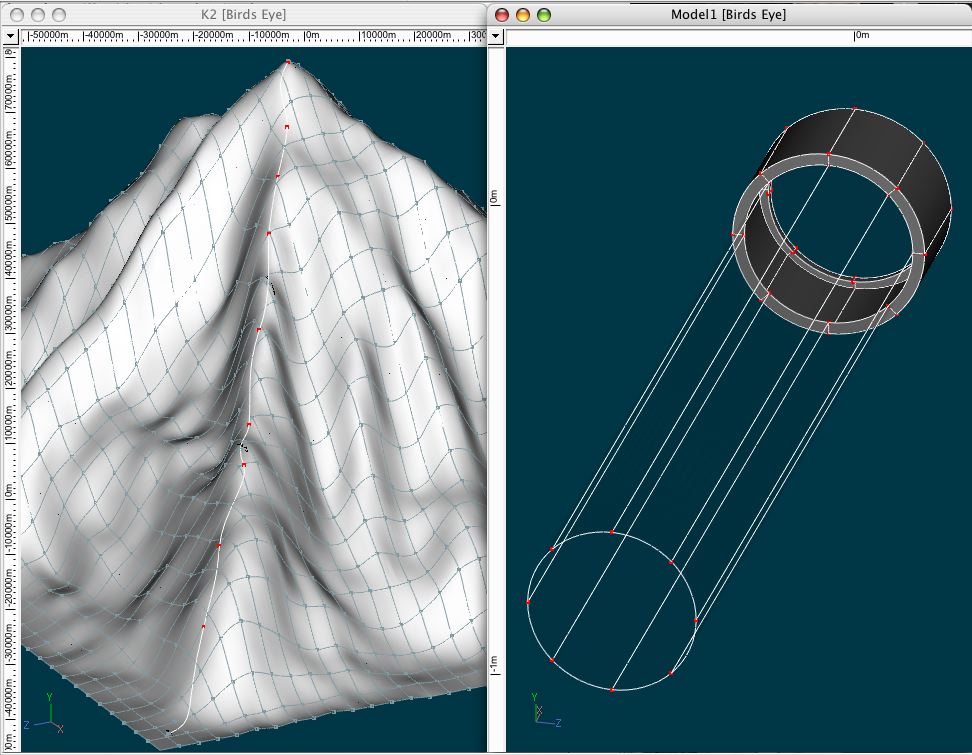
Here's a problem. I have a non-rendering spline running from my base camp to my summit lodge, passing through two other lodges. I've actually gone in and created correctly scaled building mock-ups. I was wondering if there was a way to take this tube I've created and repeat it a few hundred times, following the curve of the spline? Otherwise, how can make that spline render as a tube about 3 meters in diameter? I can get it to render as a hairline only. PS sorry about all the images!
-
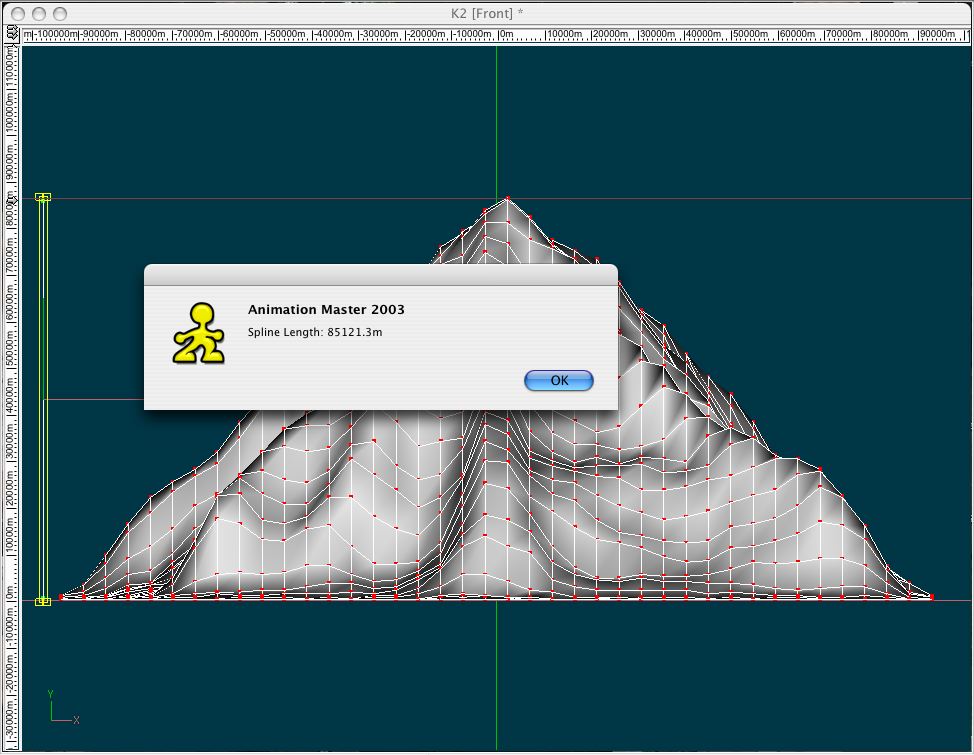
Here's an interesting one. I've got the mountain scaled to be authentically sized. It's supposed to be 8611 meters tall. I created a guide at 8611m, and it displayed at 861.1m. I moved it to 86110m, and it displayed at 8611m as in the screen grab. The reference spline that I added to measure measures at 85121.3. Is this a bug?
-
Sorry
-
Mtpeak2 helped me create a mesh with the terrain plugin on his PC. I'll post my grade when I get it. Thanks, all!
-
What do I do then? I can't find it in any contextual menu or anything. I don't know much about plugins.
-
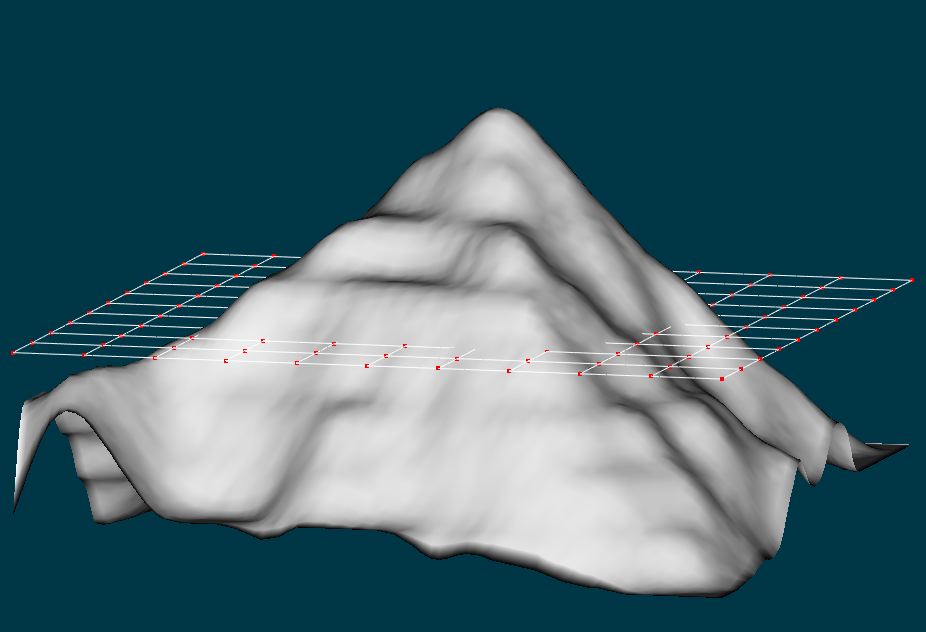
Wow, cool! It's a bit taller that I want. In this image I applied the above displacement map at 3000%. However, as you can see, it didn't modify my mesh. Can someone talk me through installing and using the plugin? I can take it from there. If anyone has some free time, though I don't suppose you do, I'm paleozev on AIM/iChat. You could talk me through it in real time. Thank you all so much for the help! I'll tell you what i get for a grade some time next week, after the final.
-
Thanks. The problem is that I need to make the mountain part of the grid's geometry. If you have the Siggraph 2000 training tapes, look at Brian Prince's landscape tutorial. He has a grid that has been modeled into a set of cliffs. The splines are physically (?) shaped to make the cliffs. i need this because I need to model things like buildings and a tube running up the mountain. That will also allow me to do a realtime flyby for my class. Isn't there some kind of plugin for this? Here's the project. Use the above image as the displacement map. K2.prj
-
I need to build a model of K2 for a 9th grade science project. My teacher has authorized me to build it A:M rather than papier maché. I've attached a rough image I made from a topo map. It's not the final image for the displacement map, just a stand in while I finish it. I was wondering how I can apply the displacement to the model's geometry. I need to model some stuff to top of the mountain to make it look like a national park. How can I do this? I have the latest 10.5 release under OS 9 and Beta 7 under OS X. I know I should post this in the newbies forum, but I see this as a work in progress. Thanks to anyone who can help! PS. This project is due Monday!!!
-
That clip is amazing. I just have two tiny comments. First, there's an insignificant pass-through on his collar at around :30:01. Second, you can hear the speaker breathing, but your character is not; his shoulders are not going up and down, and it makes the viewer kind of tense. My parents teach an Eccentric Performing workshop (http://www.celebrationbarn.com/workshop/work/w6.eccent.html) that deals a lot with being comfortable on stage, and letting the audience feel comfortable, and one of the ways to do that is to breathe. You don't have to change anything, as it's almost perfect as is, but it's just something to keep in mind when animating: everyone has to breathe.