


AMAR
-
Posts
155 -
Joined
-
Last visited
Content Type
Profiles
Forums
Events
Posts posted by AMAR
-
-
Causitics Pic... turn it onHere's the direct pic link if that help's on where is it and how to turn it on?
-
i've posted a response earlier here to your question which also includes Yves's link.Caustic Question
-
Look great

Yves has an tute in causitics and I know you turn them on in the choreography window. Click on the choreography icon while on the choreography your working on and select the causitics setting. here is a pic and then try this link for more detail on the subject.

-
here's my first test the figure this plugun out. it's looks ok with the sprite leaves
-
-
-
just wanted to post a sample ......... whatever you see first. Hit me back email or via a post.
-
Hi, I'd like to say i'd do your model. But I need a little more details. Send me an email and I'll send you my specs turnaround and on the retainer detail. My email is amarama@sbcglobal.net
-
i have 768 to 1024 mb of ram on all my systems
-
Thanks Mike like your stlye also and I like your egg. I've got one too.
-
-
-
Thanks zacktaich,tobinjim I did adjust the models face to look closer to the inconsistencies you normally see in a face the pores and some other eyes adjustments need to be made. But her face like most of my models unless their cartoon after you copy/flip/attach you adjust the face so it doesn't have the ole mirror technique face and body look to match are own face and body deformities........ :blink:
-
Capture3-old helmet hair (the black wig)
-
Capture2 - the head ..........OHH Jim these are the wires u asked for.
-
Thanks Jim .......no the hair was done old school with the old helmet hair...I still don't like the tweaking process and the constant redrawing of the hair yet it looks great and i tried it before but i find modeling the hair and providing good maps and even later providing high resolution maps for ECU shots work. They also render a lot faster and until i get a render farm or at least two to three more computers decidcated to rendering i can't get much done with working and modeling while constantly doing quick renders of hair particles. Don't mind me I know from experience their great for stills or even render a lot faster since the early days but still for animation projects the decal method works alot faster which I know you already know............. Here's a few screen capture. Capture1 -the full torso
-
here's another view ........ :D
-
here's one of my other 2003 models i need to finish for 2004 and animate. I'm open for comments.
-
Zaryin its looking better only comment if your going for human (old school) proportions for your model he should be at least 7 1/2 heads tall. If you're aiming for the hero/or ideal body type their are 8 1/2 head tall(today's standard). And the exagerated sometimes anime style would be 9 1/2 head tall.
You said you're going for the more realistic human body proportions so i'd even use myself as a model and using a ruler or tape styled meaursing device to make my proportions accurate using my rulers and drawing and scale down rotoscope of the proportion you desire. But the character looks good I think now you fix the proportions and the character few texture maps we be second in detail.......
-
sound like a video card issue maybe u need to update ur video card driver for panther. I've experience similiar problems and it's usually a video card issue and the missing rulers was because i was in perspective mode.
-
I want to thank you for decicating time to doing this it shows dedication to the hash users community and great commoradery. I personally commed you on create a tutorial for the new and some users that knows this stuff but by either lasyness or tiime constrainsts have provide these secrets to the other users. I personally have been using hash for several years now and just started recently posting some stuff for comments on the forum board. I have veen using other tutorial based on the other program like studio max, Lightwave or Maya and yet there different than hash and are babies to hash in comparision all are simliar when it comes down to texturing and i'm sure your tute in no different. Form reading the other posts I think this tute is Photoshop exlusive which is great and excuse my ingorannce if this has been covered already but maybe to those that will use your tute maybe for the viewer it could be mentioned that in not exclusive to Photoshop thaat this tute will work in other photoshop type programs. It's great if it had not been for gutys like yourself and books i wouldn't know what I know today. My resolution is to share my knowledge as you but i have no patience in typing and editing all that type. I again commend you keep the good work.
To all HAPPY NEW YEAR!!!!!!!!
and HAPPY HASHING!!!!!!
-
in 10.5 you will attach the hair to splines (create mat, turn on advanced properties in the options menu, then select spline by going to the spline number in the spline group area. Then apply the material to the splines and use the rotation handles you get to twist and turn the hair. In the alpha version it evene easier just section off your head in groups then apply material figure out how many hair layers you want for each section. Hair generally has three to four coor in sometimes more but no less than three on the average for realistic hair. Then once Hair materials are applied use the NEW AMAZING Brush tool and comb to your heart desire. Note until the rendering out the hair i'll view the hair with my dynamics off and flat vs. shaded to save on preview and since when you use the brush tool it's pushing the splines around i'd occasonally during grooming turn my "flat" view in wireframe to speed the process and lower the chance of a crash.
-
excuse my grammar i sometimes forget about when i'm trying to do two or more things at once...... :D
-
if you can give image image or drawing of what you what i can model it ...for that point (not to seem arrogant) i can just any as long as i have good references or rotoscopes.
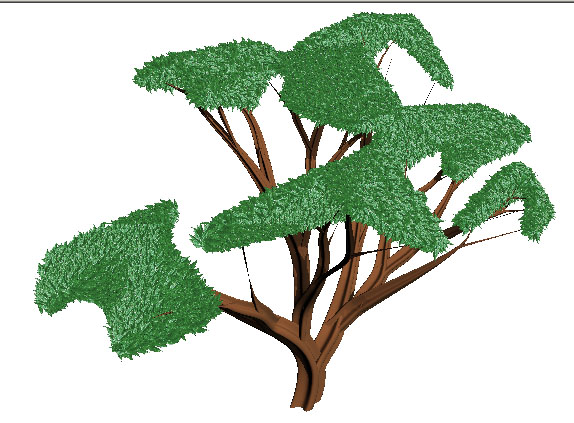
Tree Generator Plugin
in Showcase
Posted
Here's my 2nd attempt_______Great Plug-in.
my mini (weird) forest.