

Olorin
-
Posts
53 -
Joined
-
Last visited
Olorin's Achievements
Apprentice (3/10)
0
Reputation
-
Looks good, man. Gotta agree that the sense of weight and balance seem off, but I can't be more specific since I'm still laboring in the modeling stage. Animation comes later.
-
Thanks much. I tried to be frugal. I based my splinage on a model by sonofpat (see earlier posts this forum) which is of Naomi Campbell. I wasn't sure if the layout would work as well for a caucasoid face as they do for a negroid face, but they seem to do just fine. Probably be just as good for a male face, too. No, I didn't. Haven't heard of it before. I did spend considerable time flipping normals to get them all facing out, though. No, just a model I found on the web. Lately I've spent so much time staring closely at her face, though, I'm beginning to feel like she's a long-lost niece.
-
Well, I'm pretty pleased with the way my model is progressing, but since noone else seems to be interested, perhaps I should cease posting updates. If anyone would like to see more let me know, otherwise I'll just keep her to myself. B-
-
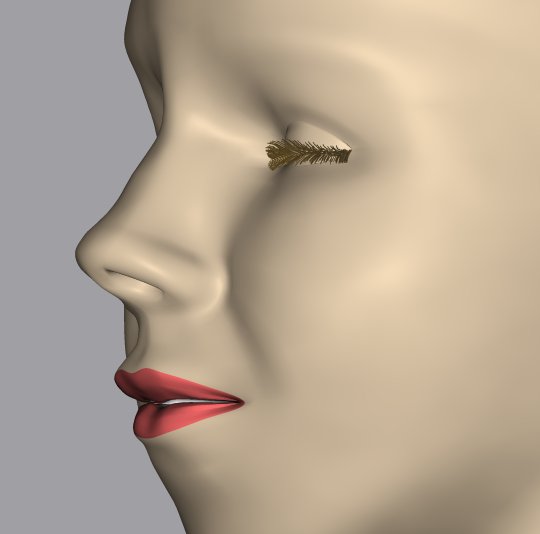
And here she is with a set of eyelids. Took a while but once I decided to model them in the closed position it worked out fairly well. I decided to try out the v11 hair for eyelids and that turned out pretty well, too, for a crude first try. I could get used to that Hair System stuff. Now I just need to figure out how to make a pose so I can get her to open and close those pretty eyes for me. I couldn't get enough info from the manual or the help file... I'll scan the tutes and see if I can find the missing info. In the meantime, if anyone knows of a particular tute for making poses with v11 don't be shy about letting me know. B-
-
Patience, gentlemen. I often have to put my AM work aside for a few days as other less important things (life, sleep, work) rudely intrude. I just got back to my Sandra model after a week of ignoring her (she forgives me, I think) so I suspect Mike will be back soon with more of his character-in-progress. B-
-
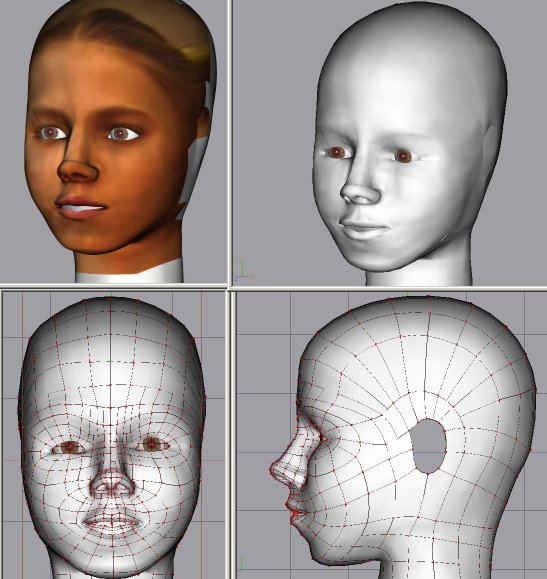
OK, as promised here is the latest on Sandra's head. I've fixed a number of issues with her chin and brow areas, softened and smoothed her nose considerably, added 'laugh lines' which made her mouth look more natural and I've applied the porcelain material to make her softer and rounder. Whaddya think? Here's a rendering using a simple skin material and slight lip coloration. Next, I tackle the eyelids and then the ears (with some trepidation).

-
OK, I got the porcelain thing figured out. The problem was that it's effect is only visible in renderings, not in shaded mode. This may seem painfully obvious to some, but I found absolutely no mention at all of this simple fact in any available docs, Martin's Tech Notes, or in any post revealed by a forum search. So here for posterity is what I learned about applying Porcelain: 1. Porcelain effect is not visible in shaded views, only rendered views. 2. Black, blotchy surfaces in models using porcelain are caused by patches with normals turned wrong way around. 3. Strange spline artifacts can be eliminated by a) saving, closing and reopening the model after porcelain has been applied and rendering twice in a row - sometimes the renderer doesn't get the normal blending right the first time. Now that I got it working it's really cool. My model looks sooo smooth. I thought at first that the porcelain/normal thing would be a pain but it actually turns out to be a great way to quickly find the areas where normals are reversed. Porcelain clearly shows the trouble spots, then the 'normal hairs' show the exact patches that need flipping. OK, enough blather. I'll post an updated model in the next day or two for comments, etc. B-
-
Well, I found the porcelain material and applied it, but I didn't see any difference. My model was not any smoother. Is there a trick to making it work?
-
Thanks, Genocell. I definitely want her to have a beautiful sunny smile, so I'll try your suggestion. I'm also gonna fiddle with her nose like SeanC suggested, to make it softer and less harshly angled. Maybe this weekend I'll tackle the ears and the eyelids. BTW, can you tell me more about the porcelain material? Can I use it in addition to decals? How does it work? Where do I find it (it's not in the libraries that come with AM)?
-
Thanks, Sean. That's a great link.. I'll definitely learn a lot from that!!
-
I was going to wait until she was more complete before I showed her to the crowds, but I'm itching for some input - and she's just so darned cute!! I wanted to do a child for my first head model since their contours are so much rounder and simpler than adults. Now I've got the basic shape, but I find I'm at a loss about how to approach the eyelids and especially the ears. Any suggestions would be most helpful. The model (human) is about 11 years old. Do you think I captured her youthfulness? The decal is from a photo of her, but not the same one I used for the rotoscope. OK, criticize (and suggest) away. B-
-
Let me chime in here.. Before you attach your arm to the body you need to make a hole at the shoulder to accept the arm. Looking at your picture it appears that the shoulder is still a closed surface, so there are no available splines for the arm to attach to. The splines which run along the length of the arm should flow into splines that already exist on the shoulder, which means you need to break some splines open (and probably delete some spline segments) to create unattached splines for the arm splines to attach to. Try this: The spline running along the top of the arm should be one with the spline that meets it and flows up side of the neck. Disconnect that spline from the part which goes down the side of the body and connect it to the top of the arm. You should have one continuous spline running from the wrist, up the top of the arm and on up the side of the neck. Do the same with the spline on the bottom of the arm, attaching it to the free section of the spline which _used_ to connect to the neck spline but now has a free end. Then use the same technique to attach the splines running along the front and back of the arm to the spline running around the chest (break the chest spline at the point where the arm meets it. Now your five point patch should render properly. Note that the top arm spline connects to a vertical body spline while the front arm spline connects to a horizontal body spline. The two arm splines were going in the same direction, then they split off in different direction once they join the body. This is what creates the need for a 5 point spline. In a case like this, you will usually need four five point splines to complete the attachment. B-