

JohnnyB
-
Posts
121 -
Joined
-
Last visited
Content Type
Profiles
Forums
Events
Posts posted by JohnnyB
-
-
Hey John,
Back in those days I think the serial number was stamped (in red ink) inside your user manual.
I'm not sure where you purchased so not sure if Hash Inc will be able to assist you on this one.
Nowdays, Hash Inc maintains a copy of all the web activation codes.
v12 was well before the days of webactivation.
Did you actually register your copy of A:M with Hash Inc?
OK. That's right. It is stamped inside my user manual. I'm working in Florida right now and my user manual is in Cape May. I guess I'll have to wait until I get back home.
Good to hear from you again Rodney.
John
-
I've experienced a system crash, and AM needs my serial number to re-activate, which I can't seem to find. Help.
John Bailey
-
Happy Birthday Rodney. And many more. (and he lives down in our alley... without a shirt)

Know that we ALL appreciate your continuous efforts here.
JohnnyB
-
neither did I
I've got you listed Marc, but thanks for the reminder.
I think it was Dhar that said the class of 2006 was outperforming all others.
While I'm not entirely sure that is all true... It's going to be a thrill to put these certificates together!

There's been some truly outstanding work posted in 2006.
I'm done apologizing.
I've got no excuses.
Who else is missing their certificate?
JohnnyB
Happy New Year 2007
-
"Nice skies." I’m not sure how you’re making your pictures of the airplane. Are you rendering from the modeling window? Let me know.
Meanwhile, I’ll assume that you are in the modeling window, since there is no scenery (ground, sky, etc.) around your airplane. Open a new Choreography, and import your airplane into the choreography (File/Import or right click in the models library window and select New/Shortcut and select your airplane model and open it, then drag the resulting icon into the choreography). Select the Images tab in the Library and open the folder labeled sky. There’s some beautiful skies in there! Pick one and drag it into the choreography. A box will open that allows you to select Rotoscope or Layer. Select Rotoscope and it will place the sky behind your ground plane. Delete the ground from the Objects folder in the Projects window. All that’s left is to position your airplane model and camera to the pose you like.
Hope this helps. Your plane looks great, just give it some friendly skies.

Hi Johnny,
I was taking a snapshot of my screen in the modeling window. When I tried to add sky in the past the sky looked too pixelated but today it doesn't have that look. I wasn't deleting the ground before- I 'm so new I hesitate to press the delete button!
Thanks for your help.
Lori
Aahh! Beautiful!
Johnny
-
Exercise 10: FW Fighter
Name: Lori Hiatt
Tutorial and manual
Date of Completion November 17th, 2006
This was a struggle for me. I started to get the hang of it around my third try. Not happy with the propellers or the whole in the top of the tail section but needed to move onward before frustration set in.
I couldn't figure out how people got those nice skies behind the plane. Wish I knew.
"Nice skies." I’m not sure how you’re making your pictures of the airplane. Are you rendering from the modeling window? Let me know.
Meanwhile, I’ll assume that you are in the modeling window, since there is no scenery (ground, sky, etc.) around your airplane. Open a new Choreography, and import your airplane into the choreography (File/Import or right click in the models library window and select New/Shortcut and select your airplane model and open it, then drag the resulting icon into the choreography). Select the Images tab in the Library and open the folder labeled sky. There’s some beautiful skies in there! Pick one and drag it into the choreography. A box will open that allows you to select Rotoscope or Layer. Select Rotoscope and it will place the sky behind your ground plane. Delete the ground from the Objects folder in the Projects window. All that’s left is to position your airplane model and camera to the pose you like.
Hope this helps. Your plane looks great, just give it some friendly skies.
-
Thanks Johnny. I made the decals from the blueprints that I downloaded from http://www.the-blueprints.com/ and used as the rotoscopes. I have a program called Black Magic which allows me to colorize black and white photos and images. After the images were colorized, then I used Paint Shop Pro 5 to airbrush in some details like the exhaust marks.
Great site! Thank you.
Keep up your great work with AM.
JohnnyB
-
Cool! Great view.
Where did you get the decals? I need to do a WWII Navy torpedo bomber for a video I'm working on and haven't seen top and side views of any airplanes anywhere.
JohnnyB
-
"It's the car. Chics always dig the guys with the car!"
Name: Al Dinelt
Exercise Completed: Exercise 8: Customized Car?
Date Completed: October 1, 2006
Instructor: TAoA:M
[attachmentid=21028]
Can someone please explain to me how straight edged tires can turn out to be round when rendered?
Thanks...
Al
Yup! Your screen is at a low resolution. Simply load your car and hit page up until the tires are round. (I hassled myself crazy with the same problem. I even uploaded screen shots of my octagonal tires. check it out at the bottom of page 5 and top of page 6. I've found that it really helps to go through the past efforts of everybody on this forum to see the problems they've encountered and the solutions they came up with before even diving into a new exercise. There's a lot of information on those pages.)
BTW Cool car!
JohnnyB
-
Great dust clouds and a foot stomping walk.
The only thing I noticed was that she sinks into the ground. With each step part of her foot disappears. You could probably fix it by going into bones mode, select the path and from a front view, tap the up arrow until her feet are above ground.
That's the only suggestion I could come up with. Good job.
JohnnyB
-
Name: Caroline Begbie
Exercise: Exercise 2 - Chorus Line
Date Completed: 24th Sept 2006
Remarks: Played around with lighting, but I realised that needs a whole new lifetime, so I'll hold off on that for a while. Also, in the movie, my knight has a rather effeminate skip in his cancan, which the other two do not, but he does not do that in the project. Perhaps it is the compression (Sorenson Video 3).
[attachmentid=20861]
[Hi, Rodney, Mike, David!]
Hi!
I had the same problem with Knight. Have you gone to the following forum location and downloaded the new (good) Knight? If you have the Knight from Yeti V12 (evil Knight), he has weak knees. Not your problem. download this Knight and resubmit.
http://www.hash.com/forums/index.php?showt...3&hl=Knight
Let me know if that works for you.
JohnnyB
-
Hey, that's pretty good. But the bootcamp is down the hall to your right (Students). This is the new users forum!
Ooops!
 Is it possible to move my stuff over there? Or, should I just leave it and start a new thread?
 -
I gave up on the math and did it on a calculator. Entered scaling manually.
Comments?
[attachmentid=20725]
JohnnyB
-
Ran into a problem right away trying to bounce the ball. When I right click in the transform Y scale box, as discussed in the tutorial, X and Z disappear so I can't copy it into the formula. If I type 1/Z I get a syntax error.

-
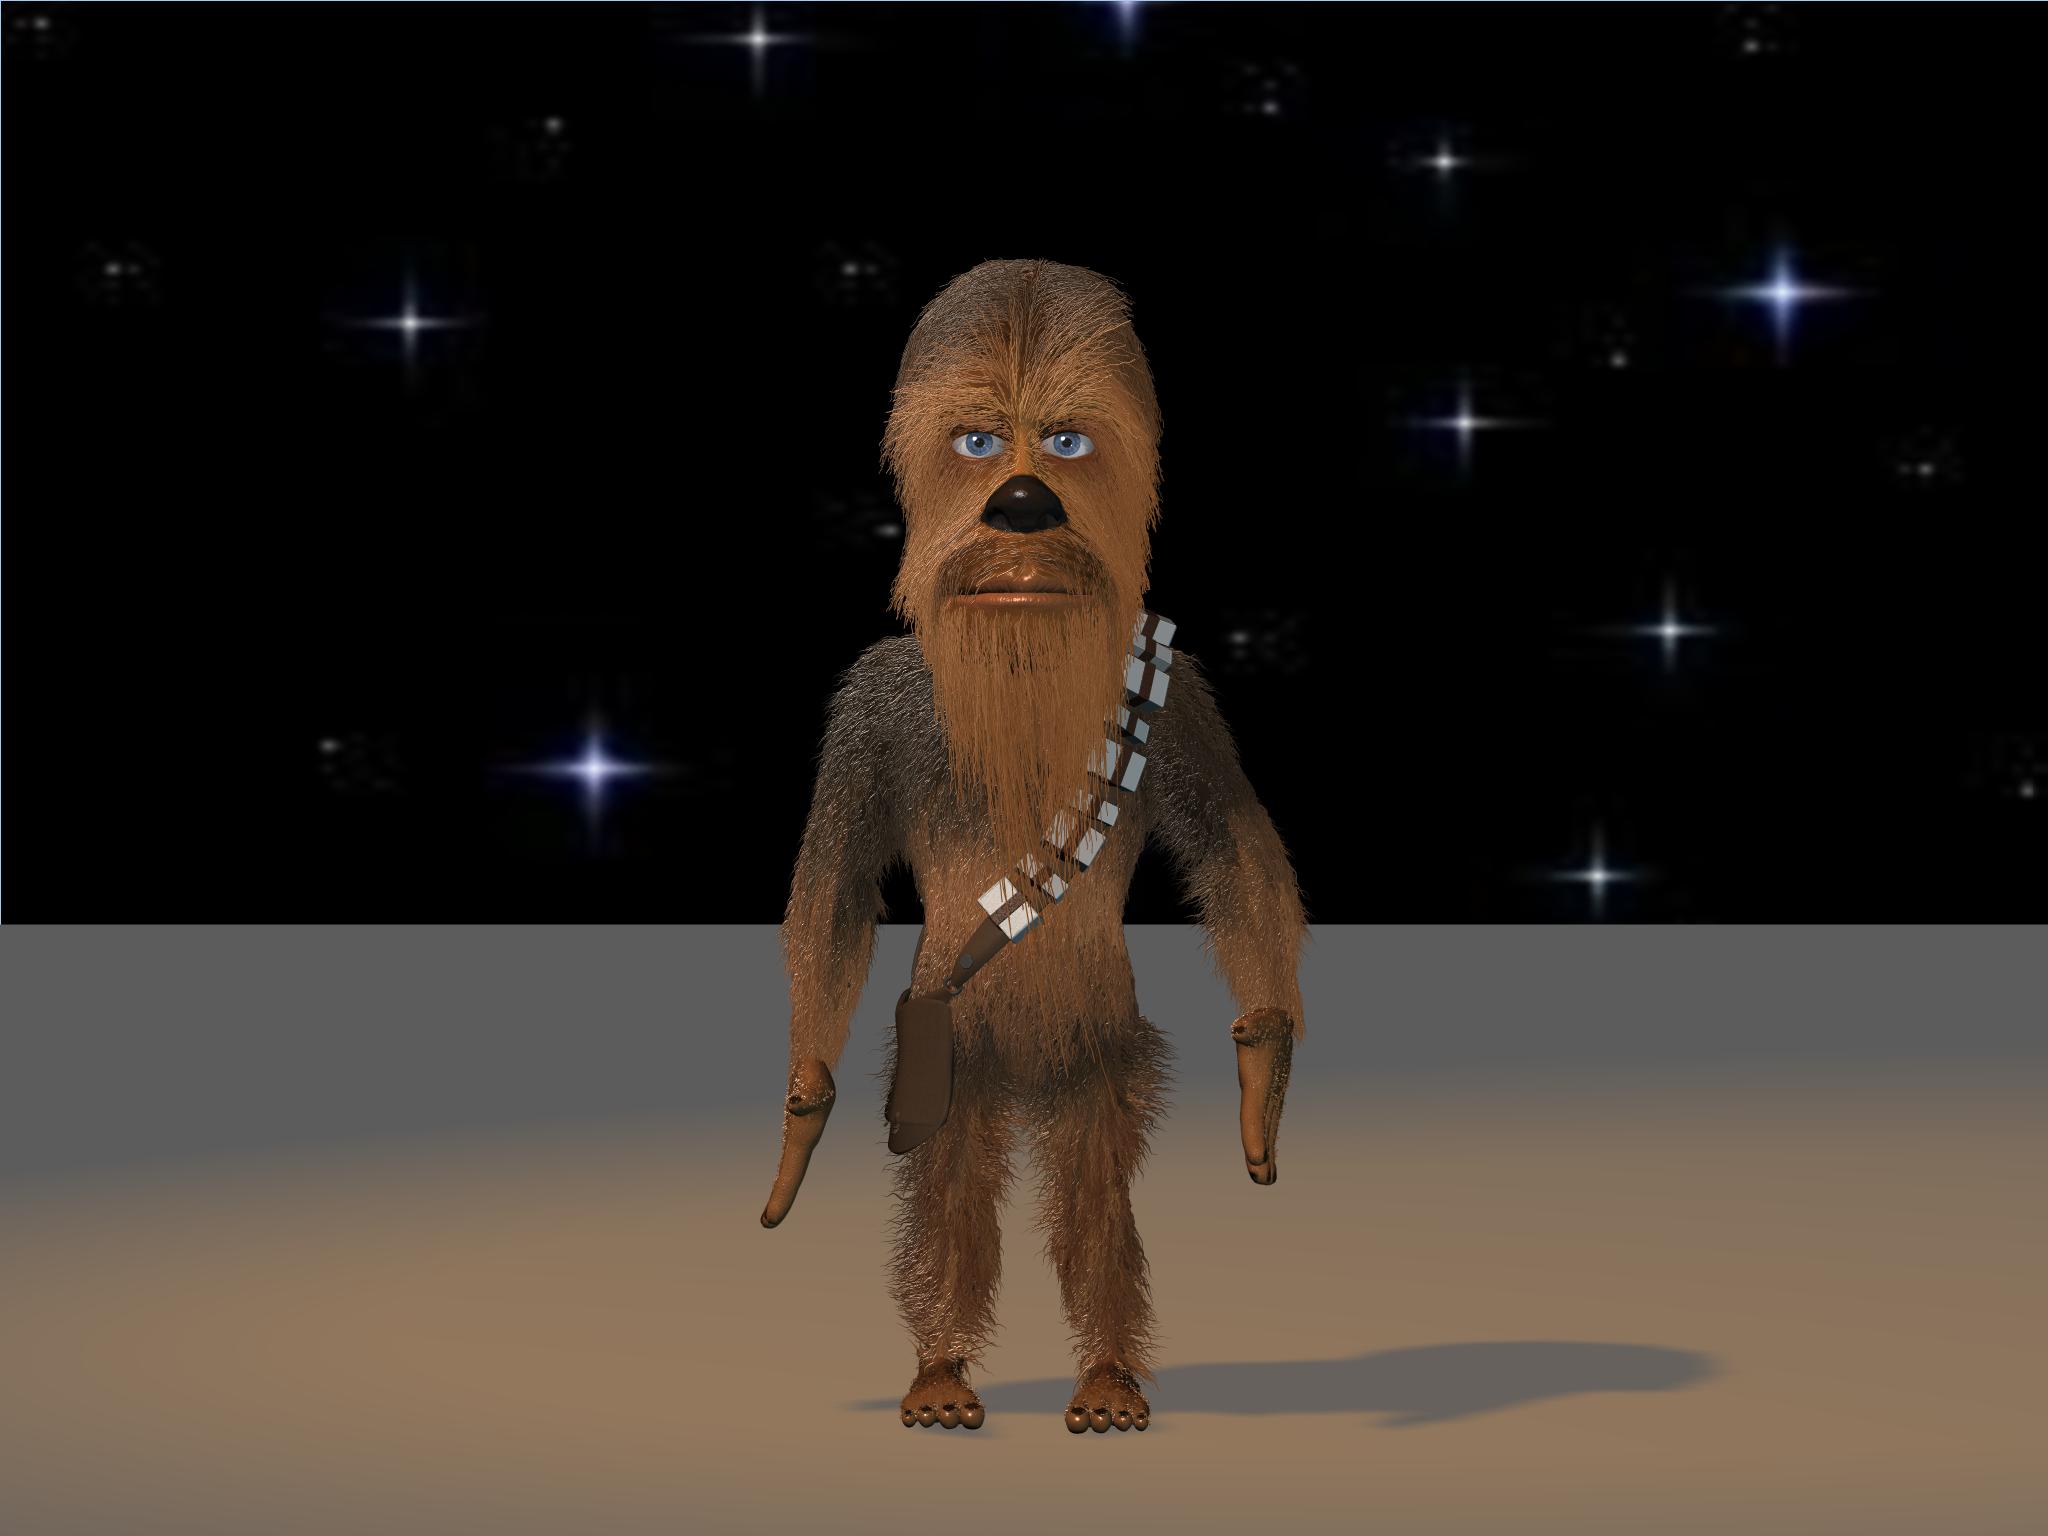
Exercise 20: Its Getting a Bit Hairy
John Bailey
September 12, 2006
[attachmentid=20497]
Wow! That was a job. It slowed my computer to a crawl, and I've got a fast machine (Intel Pentium D950 Dual-core 3.4GHz w/ 4000MB Ram)! It was groaning over this exercise.
I couldn't get the two Hair Emitters to cooperate, so I just did it with one. If anyone knows how to make them work, I'd appreciate some hints.
JohnnyB

-
John,
I haven't had a chance to break out Exercise 20 and run through it again.
My memory tells me you've missed something simple (isn't that always the case?).
How many decals/stamps do you have controling the hair?
Do you have one for the length and one for the color?
Sorry. I'm behind in Hair technology myself.
I have 2 emitters short and long in the fur. When I apply diffuse color to the body front it adds the diffuse color to the short emitter. If I add a second diffuse color to the image, it adds it to the short emitter leaving the long emitter white.

-
I can't seem to get the body fur on the wookie to change to the body color.
I click on, for example, the decal for the body front, right click the "Images" folder and pick [ADD IMAGE] then pick "face color" or "body color." In the face or body color Properties dialog, I change "Type" to "other" Right click on Properties Driven and pick [Add Property][DiffuseColor].
The hair guides stay white.
Wassup?
JohnnyB
-
I had to redo exercise 2 because my original file got corrupted somehow. Same concept, but I added some camera work I've been thinking about and some music for them to dance to.
http://media.putfile.com/Chorus-Line
Now to get back to Hair
JohnnyB
-
How about jpgs?
Jpgs will be fine. Thanks!
If grabbing a frame from a movie just make sure its one you want to see on your certificate.
Right! Let me know if you need something different than what
I'm sending.
-
[attachmentid=20427]
Exercise #10
Completed on Sept 10th.
No instructor, just using the book.
Notes: Nothing fancy this time, my real job has been killer recently. On Thursday and Friday I put in 26 hours. Anyhoo, I'm still plugging away at TAOAM, even if it's only ten minutes a day.
Cool view. Flying above the clouds! Good job.
JohnnyB
-
Nice redo on that one John.
The still image makes his arms/hands look a little out of whach but the animation reads fine.
Are you able to email your exercises to me?
While 'Putfile' is a great place to share video on the cheap I can't seem to even get a screen capture of the video window to grab the images for use in your certificate.
Looks like you're set to be first to get the new certificate too.
My email is in my signature block.
I'll get right on it. How about jpgs?
JohnnyB
-
Exercise 1: You're the Director
John Bailey
September 9, 2006
Rodney
I've finished the series but couldn't find my first exercise
so I redid it. Polished it up a bit.[attachmentid=20411]
http://media.putfile.com/Exercise-1B-Youre-the-Director
JohnnyB

-
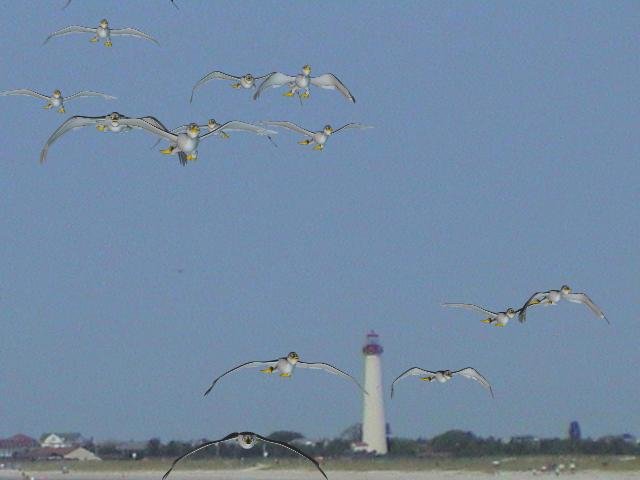
Exercise 19: Flying South (Flocks)
John Bailey
September 5, 2006
Here's the last one
Geese at Cape May Point. It's really a common scene at this time of year.
http://media.putfile.com/Headed-South
[attachmentid=20278]
What's next? Is there a place to post Exercise 20?
JohnnyB
-
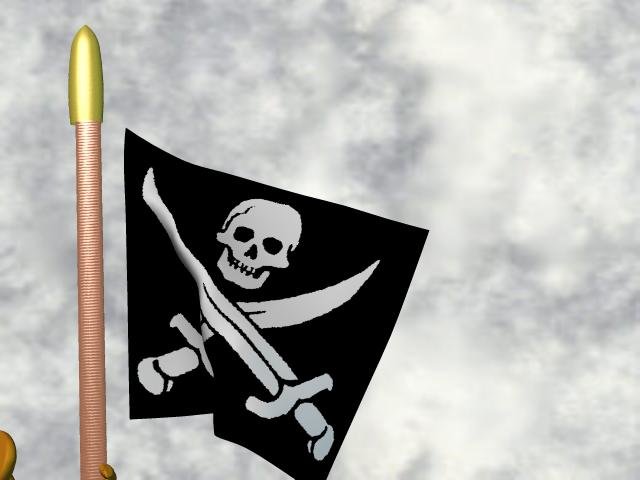
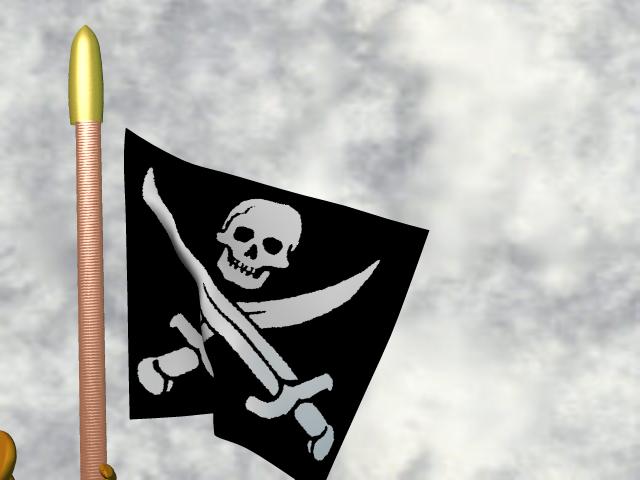
Exercise 18: Waving The Flag (Cloth)
John Bailey
September 4, 2006
I finally got that Jolly Roger flying. I used simcloth (Shear stiffness 55, Air drag 0, Bend Angle damping 0, Shear/Stretch damping 0) with a Force (width 60cm, Fall off 200cm, and a magnitude of 300%). I wanted to see the whole flag stand out almost straight and all of these parameters finally gave me four of them after much experimentation.
I had to use constraints on Shaggy. I'll play around some more with grouping. I'm really interested in that concept.
http://media.putfile.com/Pirates-of-Cape-May
[attachmentid=20256]
Whew!
one more to go.JohnnyB

recovery after system crash V12
in New Users
Posted
This doesn't help you right now, but when you get back home, take a Sharpie and write the serial number on your AM disk. I can't count the number of times that simple act saved my bacon in the past.
Got it!