

RS3D
-
Posts
142 -
Joined
-
Last visited
-
Days Won
2
Content Type
Profiles
Forums
Events
Posts posted by RS3D
-
-
Thanks to robcat2075, markw, Rodney, mborok and ludo_si for your comments. I will keep working on the model to try to complete it.
I have worked on the eyes, cleaned up some of the splinage and located a really nice left side picture for rotoscope (see attached).
I have also made another .mov of just the head that I hope is better than the first one.
-
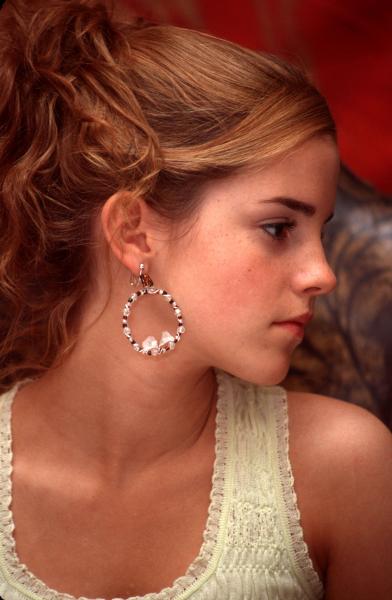
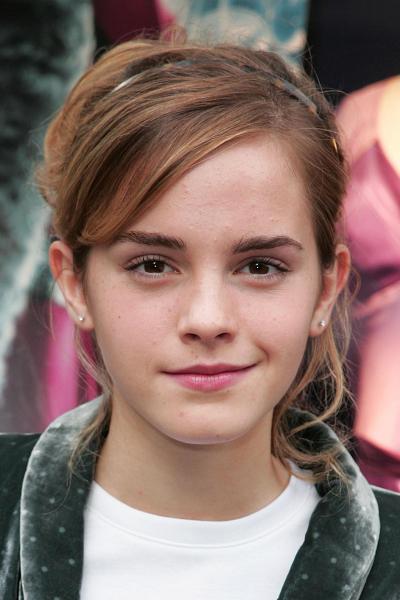
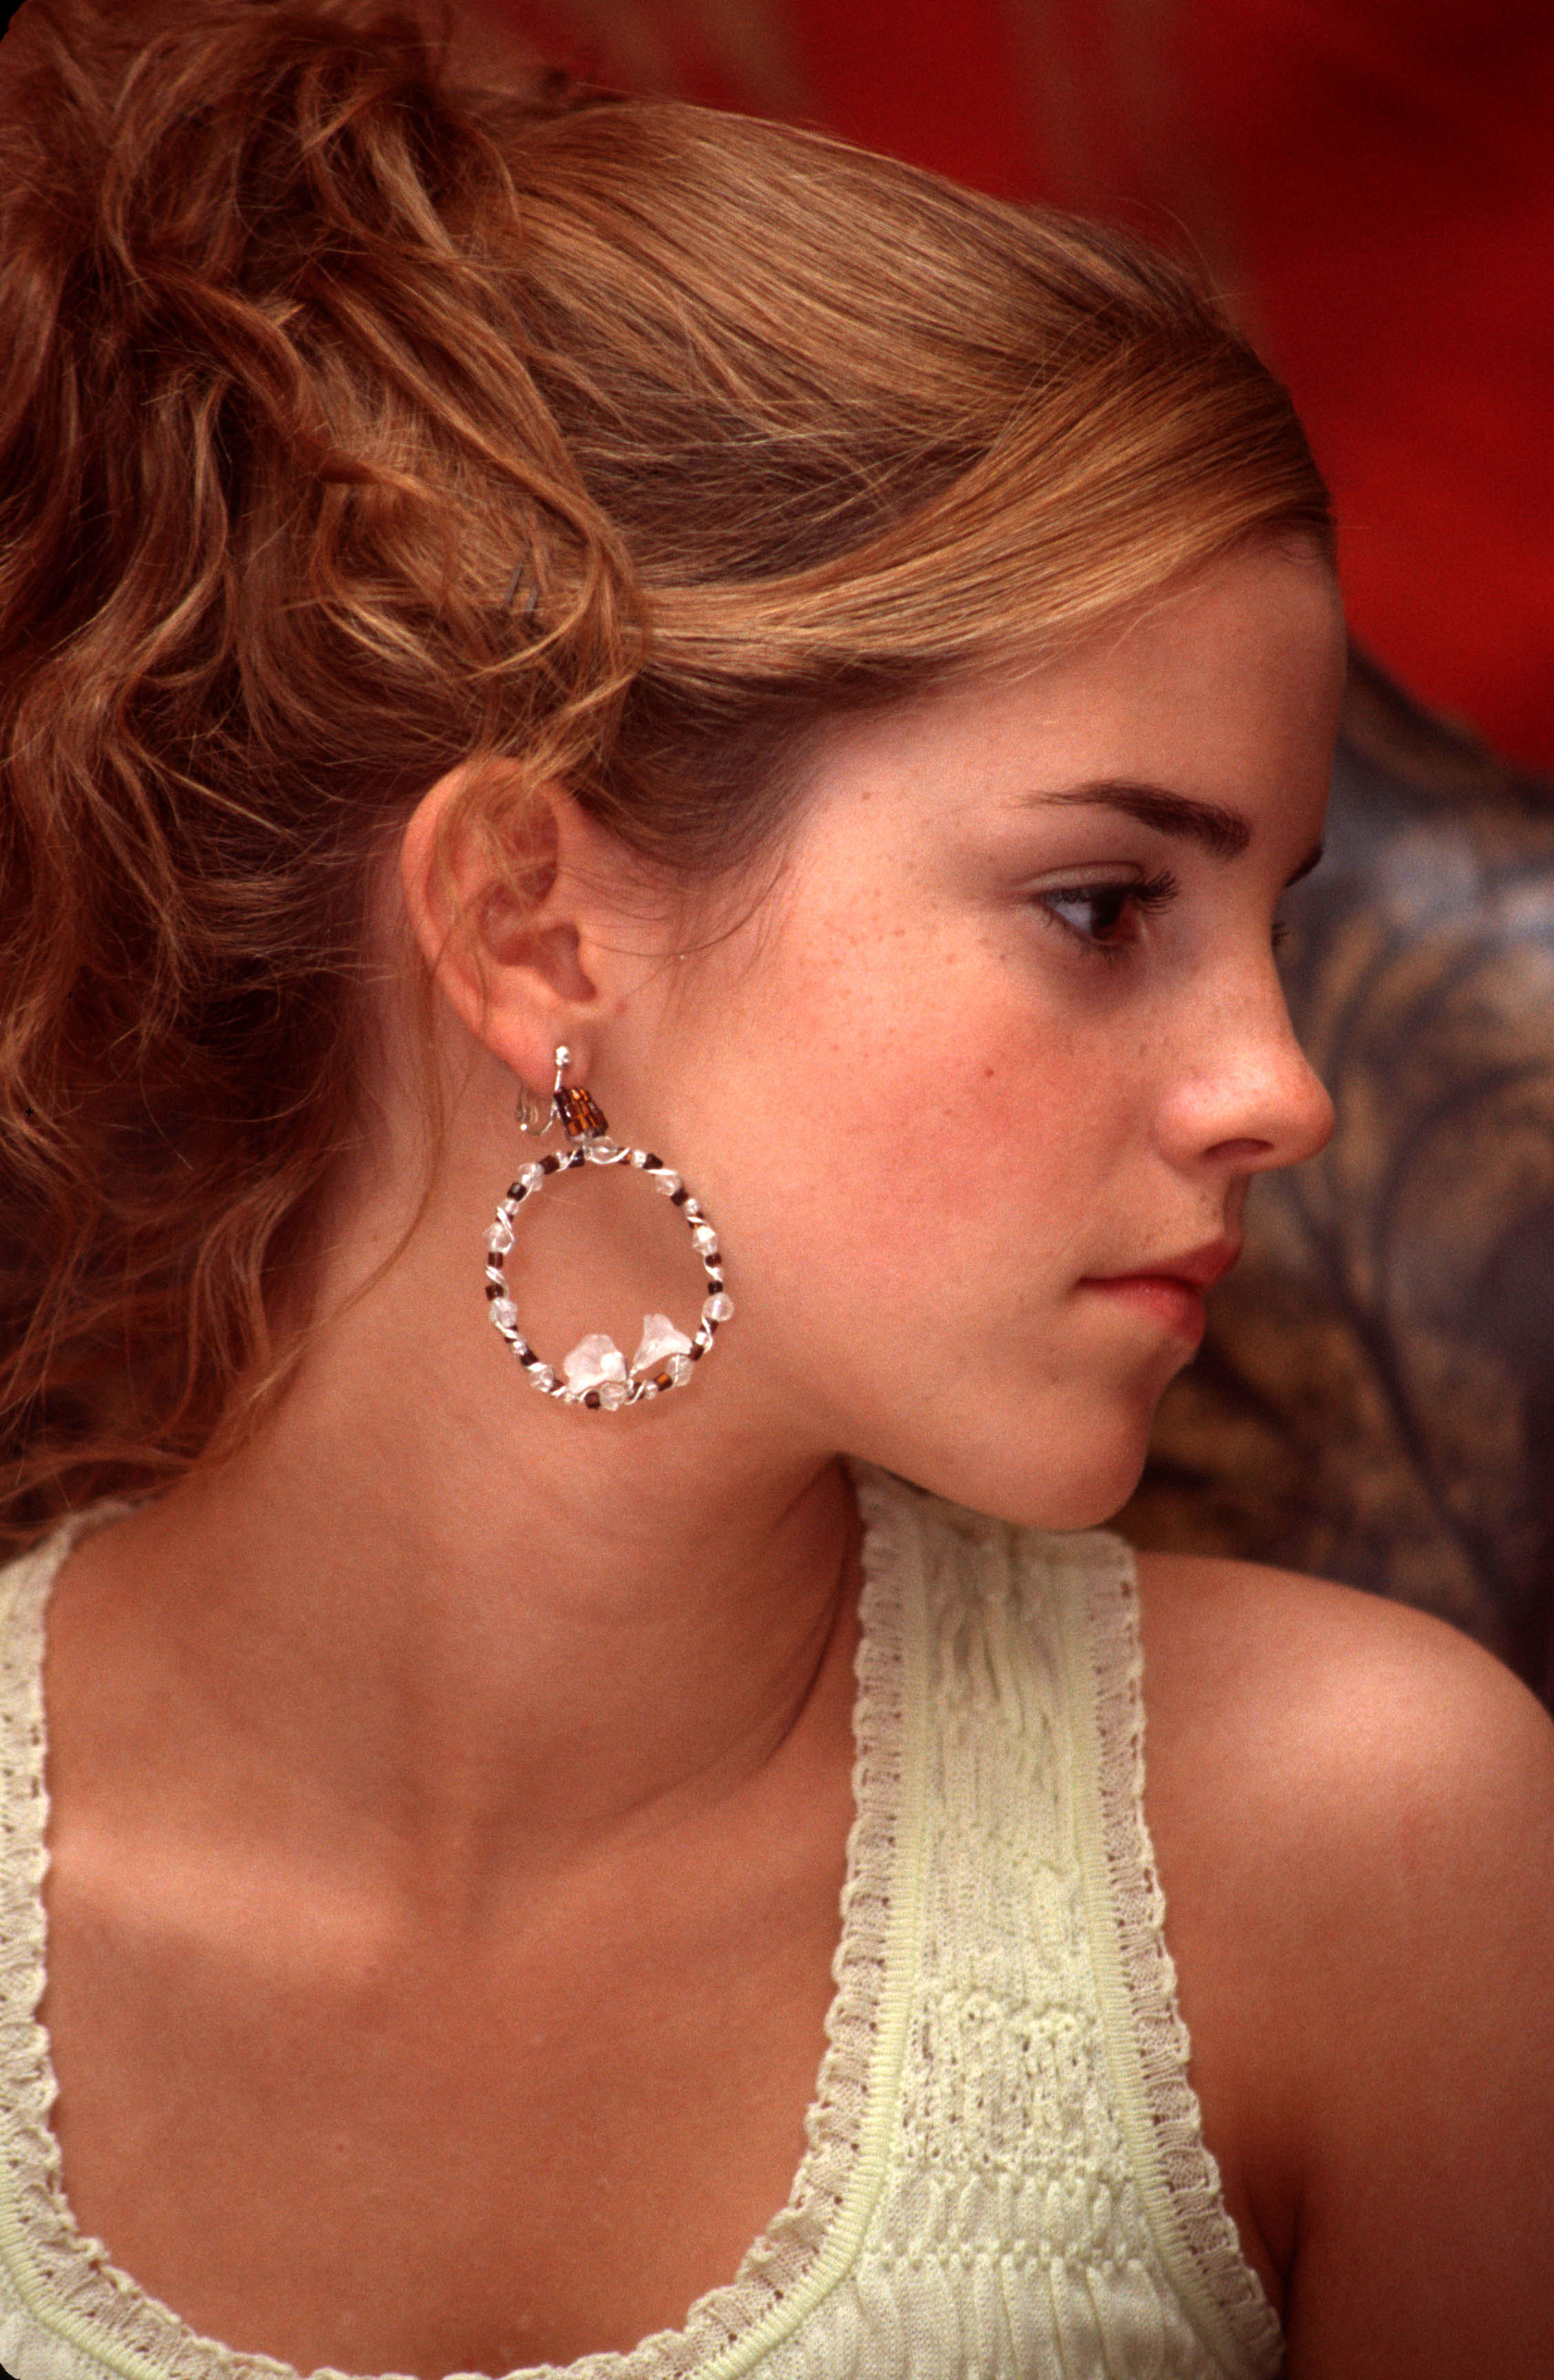
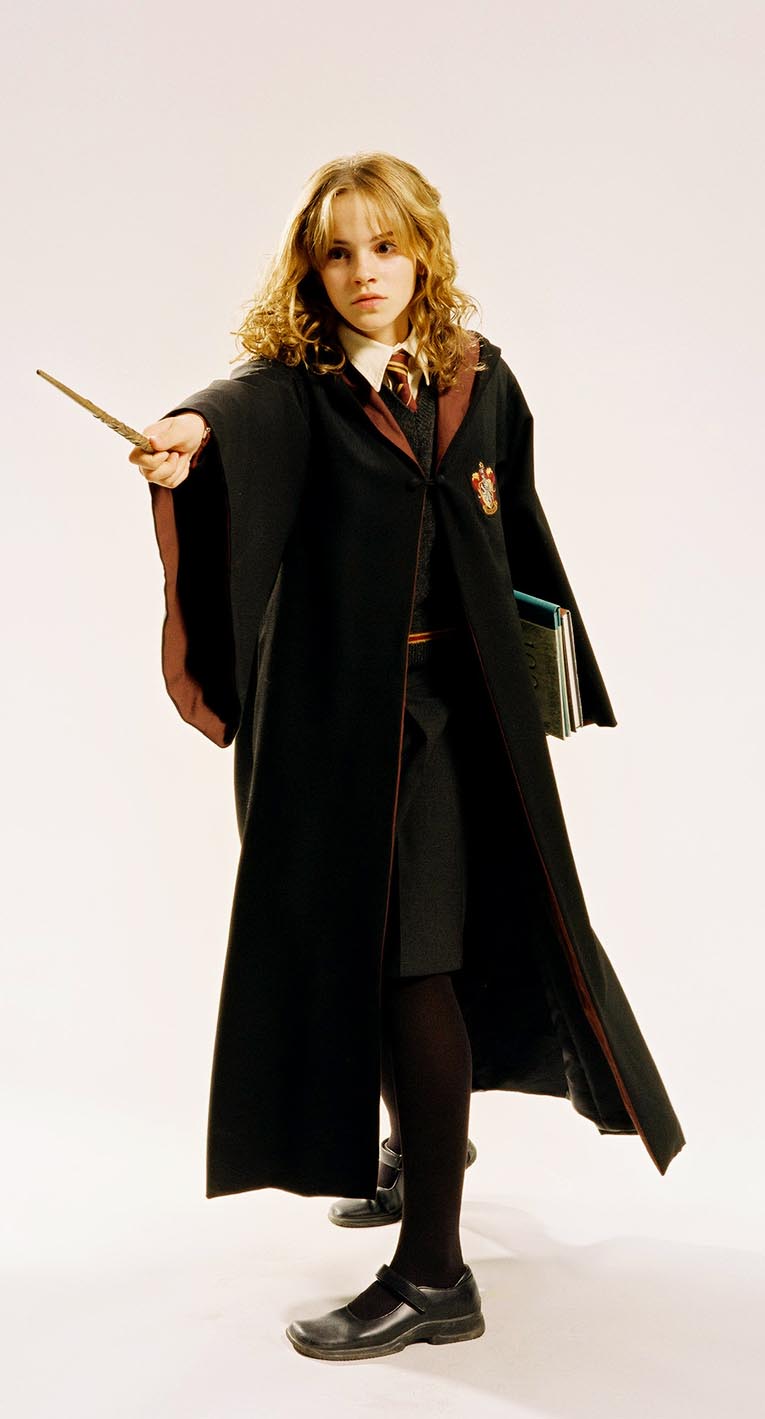
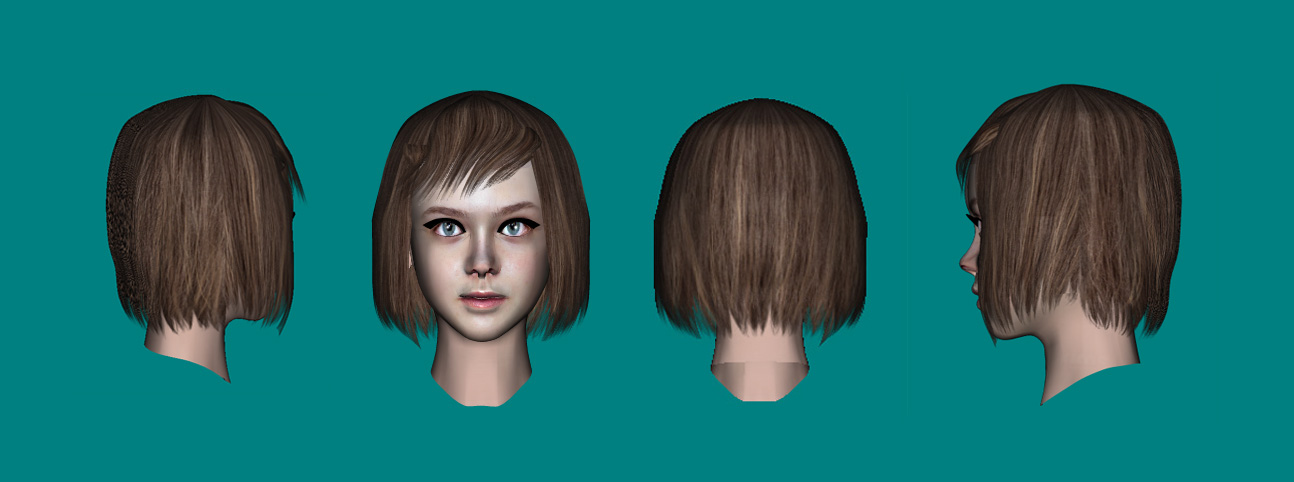
It is supposed to be Emma Watson who played Hermione in the Harry Potter series. The problem in modeling someone like her is that pictures you can use for rotoscopes cover the time from about 9 yrs old to early teens. She obviously changed during that period so you have to just pick one. Attached are two of the pictures that I used.

-
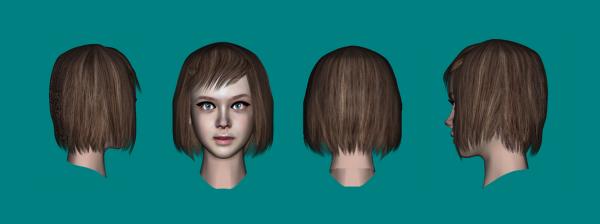
I have attempted to model a real person. You can see the head only on the first .MOV and then the same model with a torso, etc. in the second .MOV. I modeled the head, hair, and props, and borrowed liberally for the torso from a model called Marie Claire/Sister M that was donated by Klaus-Uwe Schomann. Thanks Klaus. I was not concerned with realism at this stage. I just want to see if the person is recognizable
before I go in and clean up the modeling and decals. Does anyone know who it is? I really compressed the size of the video, so I hope it is good enough.
-
Here is a very simple female hair model I use for test-rendering female characters. I thought maybe someone else could also use it as a quick and dirty model. It includes the cookie cut decals (2) and both the basic model (the 4 x 4 grid expanded) and a version of the shaped basic model to fit the Hash supplied Gala character. Just be sure to put the cookie cut decals in the same sub directory as you have for the models. It looks a lot better when you apply bump maps and specular maps, but I am usually not concerned with that level of completion when I use it.
-
Thanks to Fuchur, Rodney, Agep and itsjustme for you feedback, I really appreciate it.
John Bigboote commented on the specular textures. I had some problems getting them to work with all the detail maps. I am going to have to look into better ways of matching the worn parts to specular highlights. I finally took
most of them off and just relied on lighting tricks to get a metal-look.
Actually, the model itself does not look as worn as the choreography rendering.
Attached is a rendering of the side view from the modeling window.

-
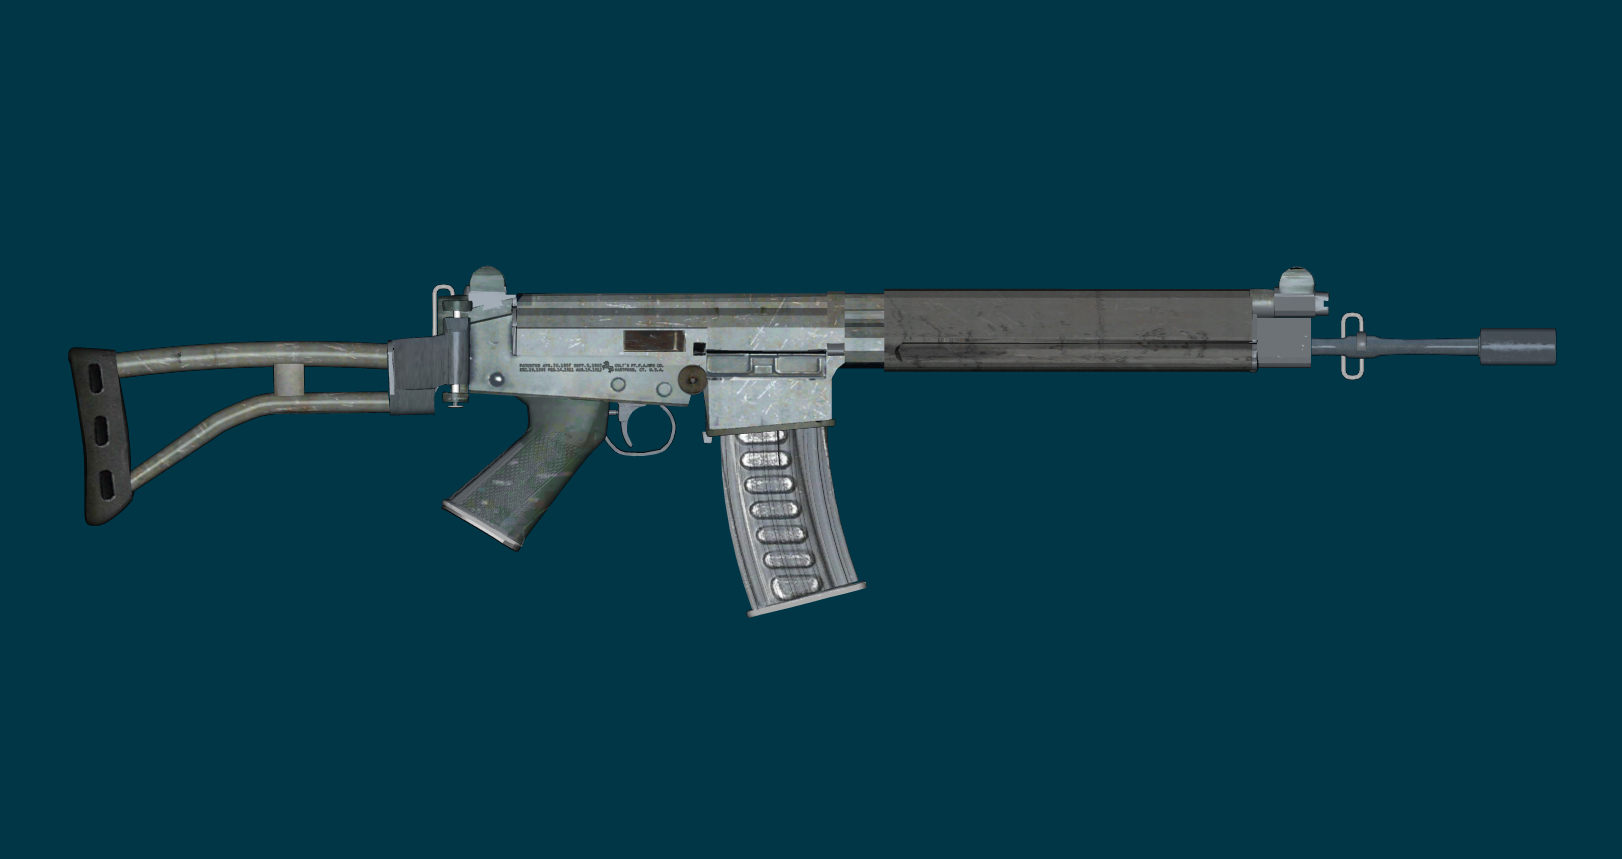
Attached is a rendering of an assault rifle I put together. It loosely resembles a FN FAL assault rifle, but any resemblance to any actual rifle is purely a coincidence. I was more interested in a realistic texture than any mechanical accuracy.

-
Thank you sir.
-
It is time to renew my subscription. I previously used the 32-bit version of AM. I just bought a new Windows 7 Dell 64-bit machine. Does anyone have any
thoughts on the pros and cons of 64-bit AM vs. continuing to use 32-bit AM on a 64-bit machine?
-
Where was she keeping the key?
-
For some reason, when viewing the MOV I just get a green screen with nothing going on. Am I doing something wrong?
-
You might try having him look at the camera as he starts to realize that he is
doomed to failure.
-
Thanks for the very complete response to my post. I think I have experienced some of the issues you cited
when I tried to use IBL. It seemed the best way to make changes was just delete everything and start over.
It is hard to keep track of all the adjustments you are making yourself as you try to get the scene
to look right. But then, that is part of the charm I guess.
-
They all look good. I especially like how you were able to get a unified-color look in all the pictures.
Did you use the same image for the image based lighting in all of them or does each scene have its own
image based light photo?
-
I liked the Stuck shoulder MOV. You did a good job in capturing his frustration in just a few seconds of animation.
-
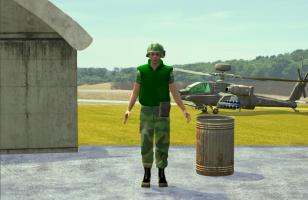
Robcat pointed out that there are problems with single patch ground planes and image based lighting. Once I changed to multi-patch
ground planes, the texturing that wouldn't render in the original post suddenly did appear. So that solved that problem.
Fuchur pointed out I may not have set ambient occlusion settings in the render. I did have it set in the render options but not in the
option that shows up in the image based lighting dialogue. So setting it in both places may have helped, but because of some other
shadow issues, I am not sure.
John Bigboote asked about the status of additional lights in the choreography. There is one klieg light which is the one that is supposed
to make the shadows. It is located above the scene and projects from left to right to match the shadows in the background image.
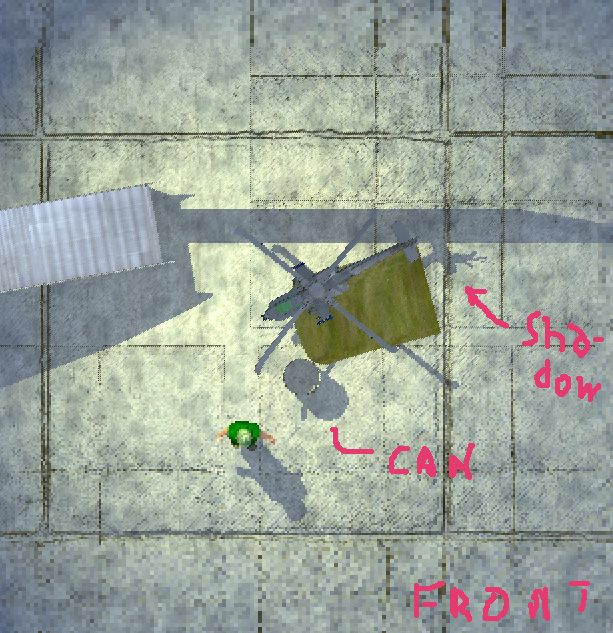
Now that I have some of the initial problems resolved, I now have some additional ones that have occurred. See the new render.
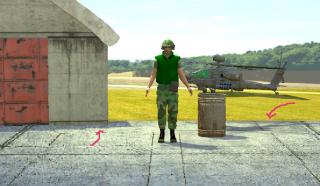
Because the objects in the choreography are so close together, I get a strange-appearing location for the helicopter shadow in the
render from the camera view. I decided to try light lists to see if I could isolate the lighting on the helicopter. I finally figured out
how they work but it seems that the klieg light still renders shadows even if a model is not included in the light list. In the
new render, only the soldier, garbage can and ground planes have light lists.

My question is: am I doing something wrong or is that the way it should be? Does the ground plane light (the shadows part) list override
fact that not all of the models have light lists?
-
 I made a test with image based lighting to see if it helps in integrating Hash models with background photographs. I am happy with the color mixing, but I think the shadows could be better. I added some color distortion in the middle of the image to give it the reflection artifact you tend to see on sun lit pictures. I tried the z-buffer shadow option, but the results were kind of weird. For example, it did not show a projected shadow from the barrel in the scene. I would appreciate it if someone could take a minute to look it over and let me know if you think it looks realistic or needs further work.
-
I loved the attitude. I wanted to see more of the drummer, he looked like he was right on the beat.
-
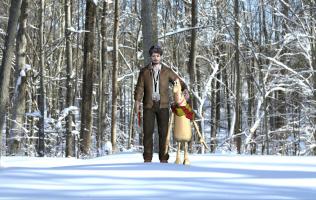
Here is an update. I made the lights more blue per Robcat's suggestion and added a bounce light to the lower left of the models to get a little reflection from the snow
-
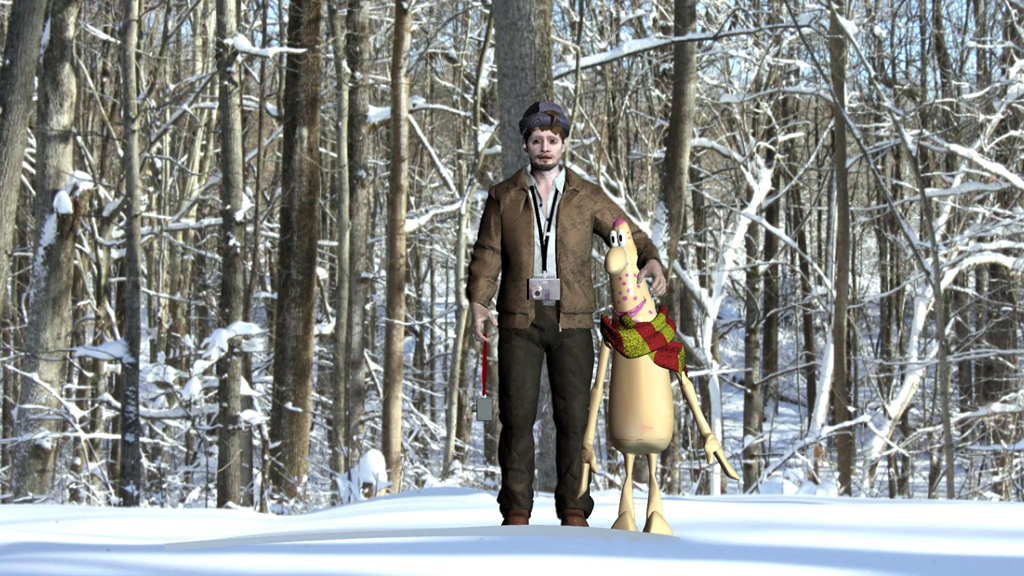
 Here is an image from a lighting study. I am trying to get better at matching shadows and lighting properties with background images.
This one shows me with an old friend I met while hiking (I'm the one on the left in the picture). People who have been around long enough will probably
remember the other guy as Ted from the Hash character set in the 2004-2006 time frame.
-
I really liked the facial expressions and timing on the tire man character.
-
That looks good. If you want a real challenge, try ballroom dance with 2 characters. I have tried it and it is not easy.
-
Thanks to Steve392 and John Bigboote for the encouragement. I am working on another update with sound added. It seems to be
going ok, so I will post another update in a day or so.
-
Here is an updated animation with smoke added. Thanks to Homeslice for the excellent tutorial on smoke/particles. It was
a lot trickier than I thought it was going to be. I hope it looks like residual smoke from firing a pistol.
-
Thanks to Steve392 and Kamikaze for your prompt replies. I am encouraged to go on with more enhancements.
To Robcat, I did experiment with different angles for the finger. The problem is the lighting setup makes for some
funny shadows when you change the angle, so the the one I used was the best compromise. To try to overcome
it, I tried to put a lot of other angles to the hand so the pose at the extreme pointing to the camera was
hopefully obvious because of what happens before and after.
It is a good suggestion to keep the gun shape with the hand with the current animation. But the real purpose of
this was to go to the next phase which is (hopefully) to experiment with the particle/smoke system to apply
to the gun barrel finger. It will be an attempt at humor when he actually has to blow out smoke from the
finger tip after firing at the camera. As always, your suggestions are appreciated.


Attempt At Modeling A Real Person
in Work In Progress / Sweatbox
Posted
Thanks Robcat. This is the stage where I start to get nervous. Once you get a likeness, you run the risk of losing the intangible details that cause
people to recognize the character. You can wind up with a more accurate model in terms of geometry, but the model loses the intangibles that cause
recognition. I fixed up the two rotoscope images and placed them side by side with a profile of the model as it exists now. Then I superimposed
the Hash model profile on the rotoscope. It is not real obvious from these images what needs to be done, but it appears I need a better transition from
side of nose to middle of the cheek, move the bottom of the nose forward a little and experiment with the area between the eyebrows to move it
forward a little. That little protrusion between the bottom of the forehead and top of the nose is kind of unique to her and it appears in a lot of other
profile pictures of her.
Any and all suggestions are welcomed.