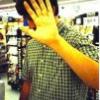
littleandy Posted April 9, 2004 Share Posted April 9, 2004 Alright, so I have this orc that I want to make. I haven't really sketched it out- I'm pretty much winging it this time. But that's ok at this point, because I know how I want the teeth to look. So that's what I've modelled so far. Problem: How do I texture them? I've done the basic geometry for the teeth and gums, and I've used naming conventions pretty carefully, so each tooth is it's own group and all that. Does anyone have suggestions for how to go about texturing? Do I need to do each tooth seperately? Ay, this is going to be a painful process if so... And if anyone has suggestions for the modelling at this point, this'd be a good time to tell me. P.S. I hope you can tell what direction it's facing. The big canines should help with that. -Andrew Quote Link to comment Share on other sites More sharing options...
heyvern Posted April 9, 2004 Share Posted April 9, 2004 This may seem like a lot of work, but I would reccomend using a decal on each tooth. You will spend as much time trying to "flatten" the teeth moving points around etc as you would just applying the decals needed. You may want to try using a cylindrical application method as a test on one tooth. See how it turns out. The gums should be easier to do. You could flatten and apply a texture although that might not be neccessary. Just hide the teeth and create a new pose and in muscle mode IN THE POSE move the cps around so you can more easily apply the decal to the gum area without spots that aren't visible. Decals don't "stick" to splines that are behind other splines when the decal is applied. As for using alpha channels in photoshop for more seamless textures this is fairly easy. Generally I always have a layered PSD (photoshop) file that has my original layers and channels etc etc. You really should avoid using the eraser tool on layers as this will delete the extra color information that you will need later to get a good texture with an alpha without any fringies. I always use a layer mask in photshop to "delete" portions of the layer. Then when I create my TGA file for AM I turn off the layer mask and load it and save it as an alpha channel. In the alpha, white indicates areas of the image that is visible and black hidden. By having the color area extend beyond the alpha channel this will totally eliminate fringies because the soft edges of the alpha will contain the image itself thus creating a soft transition. To create my TGAs I use the duplicate image command in Photoshop, flatten this copy, remove all of the channels except what I need for the image and then save as a TGA. Let me know if this helps or if you need some more specific instructions. I could also send you some simple layered photoshop documents as examples to see the process. Vernon Zehr Quote Link to comment Share on other sites More sharing options...
littleandy Posted April 9, 2004 Author Share Posted April 9, 2004 Hmm... so an alpha channel is DIFFERENT from having an area be invisible? Maybe I'm not understanding photoshop as well as I thought. Ok, what exactly is a channel? Maybe if I understand that, I'll have an easier time with this. Whatever you can send me or elaborate on would be much appreciated! -Andrew Quote Link to comment Share on other sites More sharing options...
littleandy Posted April 9, 2004 Author Share Posted April 9, 2004 oh, and just to give some idea of what I'm shooting for, here's a little doodle I made on the computer. Please don't make fun, I don't have a wacom! -Andrew Quote Link to comment Share on other sites More sharing options...
heyvern Posted April 9, 2004 Share Posted April 9, 2004 okay quick short lesson on channels in photoshop: First you need to find the channel pallete. It is usually on the same pallete with the layers depending on which version of Photoshop you are using. Assuming RGB is in use, any computer image is made up of 3 "channels", red, green, blue. An alpha channel in a tga or any other type of file format that supparts an alpha channel is for "keying" out parts of the image. In photoshop using channels creatively can be considered an art form unto itself. They are very powerful and until the addition of layers in version 3 or 4 I forget, channels were the only way to do sophisticated compositing. In photoshop a channel is basically a selection area, white is selected black isn't. If you create a complicated selection and want to save it you would save the selection as a new alpha channel. Here is where it gets fun, if you have an image and say you want to "erase" parts of the image for use in AM, you can paint on a new alpha (by clicking the eyeball icon on the channel it shows up on the image) masking out those areas using any of the tools you like, paintbrush, pencil etc. By leaving the original image alone, and painting the alpha channel when the image is saved as a targa with an alpha the alpha "hides" those areas that are black and "shows" those areas that are white. If you had deleted those areas of the image, and used the transparency to create the alpha whatever is behind it (default is white) would sort of "bleed" into the alpha channel and show as a fringe around the image area. It is similar to what you do when applying a decal in AM. The decal extends beyond the area you want to cover. Same with Photoshop alpha channels. You want the image to extend beyond the edge of your alpha. Keep in mind you can still make the image as complex as you want in photoshop. You can have all kinds of layers and effects. Then just create a new alpha and paint the areas you want to show or have hidden. Then save as a TGA file making sure include alpha is checked and save as 32 is selected (24 bit, 3 channels rgb, 32 bit includes the alpha). You must have only one "extra" alpha channel. I think it will use the first one as the alpha if you have more than one. I have a friend I have been trying to teach about alpha channels. He is having trouble understanding it as well. I have been doing this for so long it seems like second nature. Hope this helps. Vernon Zehr Quote Link to comment Share on other sites More sharing options...
Zaryin Posted April 10, 2004 Share Posted April 10, 2004 This is a problem I always have as well. Hope you get it figured out. Quote Link to comment Share on other sites More sharing options...
Bill_Y Posted April 10, 2004 Share Posted April 10, 2004 Vern's explanation is quite good, but I'd like to share my idea on how to think of channels. A channel is best thought of a a gray scale image that represents something other than gray values. typically there are 2 types of channels most people will deal with Color Channels and Transparency Channels. When you are dealing with an RGB image as Vern pointed out you are dealing with 3 color channels a red color channel, a green color channel and a blue color channel. How many values of gray are available per channel is dependent on the bit depth of the image. A typical RGB image has 24 bits of data which when divided by the three colors turns into 8 bits per color channel. 8 bits can only represent 256 values, thus each color channel has only 256 values of gray. A 48 bit image typically used for film is usually made up of three 16 bit per channel RGB values. An image isn't limited to only 3 color channels though, a typical image used in publishing houses are made up of Cyan, Magenta, Yellow, and Black color channels. In some circumstances publishers can use even more color channels than these to represent special colors know as spot colors. The primary thing that all color channels have in common is that when they are displayed together on your screen they will mix their channel information with the other color channels to make up the final color image you see on your screen. Also know that despite images having various different kinds of color channels they will all be converted to an RGB representation of the final image on your monitor because a monitor can only display RGB information; however, other mediums such as printers can use these channels so the key thing to remember with color channels is they are only limited to the colors of the device that is going to reconstruct the image. Transparency channels are different from color channels in the respect that their gray values represent levels of opacity. White is typically thought of as opaque, and black is typically thought of as transparent. By picking gray values between black and white you can vary how transparent or opaque any part of an image is. Some people call all transparency channels alpha channels; however, the alpha channel is a single transparency channel that can be saved along with the typical RGB information. When dealing with an 8 bit per channel image this adds an additional 8 bits of channel information to the standard 24 bit RGB file. This brings the total bit count to 32 bits, and is typically referred to as an RGBA image. In film when they add an alpha channel to an image it adds an additional 16 bits of channel data to the existing 48 bits bringing the total to 64 bits of RGBA channel information. Photoshop deals with 8 bit per channel information quite well, and it has some functionality with 16 bit per channel image work; however, it looses it layering functionality when it is in 16 bit per channel mode. This is where programs like Cinepaint step in. They tend to handle high channel data with layers better than photoshop, and carry a much smaller price tag as well (Free). Vern mentioned layer masks. All these are are Transparency channels that are assigned to a specific layer in photoshop. Also note that the photoshop format is one of the few formats that supports an unlimited amount of channels per image; however, if you have to many channels your image will be so large that you may have trouble opening it. Quote Link to comment Share on other sites More sharing options...
heyvern Posted April 10, 2004 Share Posted April 10, 2004 Yeah! What he said! Vernon "man of few words unless I have a lot to say" Zehr Quote Link to comment Share on other sites More sharing options...
littleandy Posted April 10, 2004 Author Share Posted April 10, 2004 Hoo boy! I'm getting a headache. Let me see if I have a grasp on this. Just correct me where I'm wrong, ok? Alpha Channels are Transparency channels. An alpha channel is basically a grayscale image that tells the program how opacical...istic? different parts of the color image are supposed to be based on how dark or light the alpha channel image is at different aresas of the corresponding... um... color image. Am I repeating myself? Anyway, if I have that right, that makes sense to me. If not, I'm very confused. But, oh hey. In any case, will I basically be saving a multilayered file (color, transparency) as a targa? I don't flatten? Help!!! -Andrew Quote Link to comment Share on other sites More sharing options...
littleandy Posted April 10, 2004 Author Share Posted April 10, 2004 Ok, I'm still modelling, so I have a modelling question. sorry if this is vague, but how do people like jim talbot and macb make such smooth models? They all seem to have tons of faces in them, and whenever I put lots of faces in my models, they just get rumpled and wavy-looking. and the more I mess with them to try and make them more smooth, the worse it seems to get. I wonder, do really good A:M modellers out there start out with such dense mesh? or do they do some basic outlines and then fill and fill and fill and fill? And how should I use my bias handles? It seems like the problems always get worse when I use them. -Andrew Quote Link to comment Share on other sites More sharing options...
heyvern Posted April 11, 2004 Share Posted April 11, 2004 But, oh hey. In any case, will I basically be saving a multilayered file (color, transparency) as a targa? I don't flatten? Okay, Bill's post was correct, I was trying to go simplistic with the explanation. You should end up with a completely flattened image (no layers! None!) with ONE alpha channel that represents the transparency (black areas) and opacity (white areas). Remember the only layer showing should be called background in italic in the layer pallette in Photoshop. Keep a layered photoshop file saved with all of the layers intact (psd) just duplicate the document in photoshop and flatten that second document. Then when you save it, save it as a TGA for use in AM. Or, if you have only one alpha channel in your layered photoshop document you can do a "save as" in photoshop. Select the Targa as your file format. Layers are for Photoshop only and applications that can read Photoshop layered files. Although you can save with layers as TIF, I wouldn't recomend it. It just gets confusing. As for the smooth models....that is a tough one. It takes patience and experience to create smooth meshes. Be careful with using bias. As you said this can sometimes make things worse. There is a material on the AM disk called porcelain that smooths out rough meshes. Keep the patch count as low as possible to avoid "wrinkly" meshes. As you get more proficient with AM you will find that modifying the bias of cps can help. Vernon Zehr Quote Link to comment Share on other sites More sharing options...
Ross Smith Posted April 11, 2004 Share Posted April 11, 2004 Hey Andy, I can't speak on behalf of our community's titans (like Jim), but I can tell you my strategy for making smooth meshes. Seems to me there are three rules: 1) start simple, 2) tweak endlessly, and 3) don't touch the bias handles. So 1, if your character's body is supposed to be a smooth basic shape, start with that simple shape and learn how to build on it. To set an eye in a spherical head, for example, you can use the Add CP tool to subdivide one big patch into smaller patches, make some circular splines (and hooks and 5-point patches in the process), and extrude that circular spline into the head to make a cavity for the eye. Then tweak into shape. There was a great example of that elsewhere in the WIPs recently, with a teardrop-shaped character, but I'm not sure what thread it was, and I'm lazy. Tweak endlessly. I do this in shaded wireframe preview mode and make heavy use of the 4 and 6 keys above the letters. 4 moves a CP along a selected spline, and 6 moves the CP along the normal (the axis perpendicular to both splines -- "out" and "in", in a sense). I try to coerce my splines into flowing, rectangular patches whenever I can. Seems to help. Don't touch the bias handles. It's a superstition of mine, but I figure if you let the bias handles do the interpolation work, there's no way you will have _definitely_ messed up a smooth mesh (it wouldn't prevent all problems, just some). Rule of thumb, I guess. Hope that helps! The teeth look real nice, by the way. Quote Link to comment Share on other sites More sharing options...
littleandy Posted April 11, 2004 Author Share Posted April 11, 2004 Thanks for the tips! Hey Ross, I just went to your website and found you started on RayDream too! I didn't think anyone knew about that program. Oh, I seem to have trouble with the porcelain material. Whenever I try to use it in my own projects, the program interface starts to mess up so badly I have to shut it down. Does anyone else have trouble bringing the porcelain into your own projects? How can I do this? Anyway, porcelain or no porcelain, I'm going to try to have my progress on the face up by the end of the day. -Andrew Quote Link to comment Share on other sites More sharing options...
Ross Smith Posted April 11, 2004 Share Posted April 11, 2004 Yep! RayDream was fun stuff. That's actually where my avatar pic came from. I'll remake him in A:M in due time, along with my other robots. Anyway, looking forward to your update. Quote Link to comment Share on other sites More sharing options...
littleandy Posted April 12, 2004 Author Share Posted April 12, 2004 Ok, I guess i'm about a day late, but I spent all yesterday doing Easter stuff and starting and restarting my orc face because I was never happy with it. So anyway, what you see here is only about 6 hours of work. Any crits or critiques are more than welcome! -Andrew Quote Link to comment Share on other sites More sharing options...
VeridisQuo567 Posted April 12, 2004 Share Posted April 12, 2004 Very nice! you model ten times better than i do, kudos! Quote Link to comment Share on other sites More sharing options...
Ross Smith Posted April 12, 2004 Share Posted April 12, 2004 Friend, I think you've got a real knack for this. That looks _awesome_. My only crit is that there's some bad pinching at the corners of the lips, and that you have perhaps too many splines above the eyebrow. But hey, if he'll be using those a lot in animation, maybe it's just enough. Looking forward to more! Quote Link to comment Share on other sites More sharing options...
Bill_Y Posted April 13, 2004 Share Posted April 13, 2004 Seems to me there are three rules: 1) start simple, Sounds like good advice 2) tweak endlessly, and IF you plan your model a bit, or have some experiance under your belt this can be avoided, but it's also prety good advice. 3) don't touch the bias handles. Ok Buzzer is going off on this one. You shouldn't touch your bias handles till you've got your model fairly well shaped with the CP's, but bias handles are always worth tinkering with if you feel comfortable with them. They can easily save you from wasting splines in areas that don't need them. Sure there once was a problem where it was difficult to animate bias adjusted CP's, but seeing as thats no longer a problem then there is no reason not to play with bias handles. Quote Link to comment Share on other sites More sharing options...
littleandy Posted April 13, 2004 Author Share Posted April 13, 2004 3) don't touch the bias handles. Ok Buzzer is going off on this one. You shouldn't touch your bias handles till you've got your model fairly well shaped with the CP's, but bias handles are always worth tinkering with if you feel comfortable with them. They can easily save you from wasting splines in areas that don't need them. Sure there once was a problem where it was difficult to animate bias adjusted CP's, but seeing as thats no longer a problem then there is no reason not to play with bias handles. Well, I'm pretty happy with how not tampering with bias handles is going for me so far. And as all my experience with biases has ended with very weird results, I have concluded that they are basically either very difficult to work with successfully, or I just don't know how to use them. Besides, for the meantime, I like being able to tweak my geometry in big swoops. I like selecting points on either side of the face, or just in groups, and messing with them. With bias handles, that sort of thing gets kind of tricky. Thanks for the crits! Stand by for next post! -Andrew Quote Link to comment Share on other sites More sharing options...
DarkLimit Posted April 13, 2004 Share Posted April 13, 2004 Andy this guy looks great so far..... I look forward to more updates... Have a look at the "Orc" Joe Cosman modeled maybe it will help you along the way.. I hope it's ok to post his pic here. Quote Link to comment Share on other sites More sharing options...
Bill_Y Posted April 13, 2004 Share Posted April 13, 2004 Well, I'm pretty happy with how not tampering with bias handles is going for me so far. And as all my experience with biases has ended with very weird results, I have concluded that they are basically either very difficult to work with successfully, or I just don't know how to use them. Besides, for the meantime, I like being able to tweak my geometry in big swoops. I like selecting points on either side of the face, or just in groups, and messing with them. With bias handles, that sort of thing gets kind of tricky. Thanks for the crits! Stand by for next post! -Andrew Bias handles in their free state can be either a blessing or a nightmare. There are times where being able to adjust the magnitude, alpha and gama all at once can be very useful, but most of the time I find it much easier to work with one aspect of the bias handles at a time. There are hotkey's that you can hold to lock out certain aspects of the bias handles, but for the most part I find my self adjusting the bias handles by simply dragging on the attribute I want to change in the properties panel. Magnitude adjusts the weight of a specific handle Gama most of the time adjusts the spline in and out agains the surface Alpha most of the time adjusts the spline back and forth along the plane of the surface There are times when alpha and gama can reverse their roles, but most of the time this only happens around 5 point patches If you want to see what these attributes do better, lathe your self a sphere, select a point, and start playing with each of the values. It will become a lot clearer what they do, and they shouldn't be feared like the black plague Quote Link to comment Share on other sites More sharing options...
littleandy Posted April 13, 2004 Author Share Posted April 13, 2004 OH, I didn't know biases had different things that they did... I'll have to check that out. Here's the problem I'm facing now though. It's something I've been successfully fighting through this whole orc modelling thing, but it's really starting to wear on me. Every once and a while, I'll create a patch that just doesn't seem to want to cooperate. I don't know how to describe it, so I'm posting a couple pictures. It's like a plague. I put one rectangle together and it looks all black and screwy on the edges, so I'll delete some of the lines I used to put it together and it just spreads the screwiness over to the next patch. And the five point patches have about a 50/50 chance of working. The other half of the time they do the same thing. Is this something unique about porcelain? Because it's the first time I've used it. And I don't recall having this trouble before porcelain. Anyone know what to do? I've managed to fix all of my problems up to this point, but I don't think I've found a consistent solution. -Andrew Quote Link to comment Share on other sites More sharing options...
Zaryin Posted April 13, 2004 Share Posted April 13, 2004 I just had a similar problem. Some of my patches mormals were facing the wrong way. All the patches where the normals were facing the wrong way had this problem. I would think it's the same with you. In case you don't know how hit Shift + 1 to show the normals. Look at those bad patches. If the yellow arrow is facing backwards, grab the points that make up the patch and Right-Click and select "Flip Normals". That should do it. Quote Link to comment Share on other sites More sharing options...
heyvern Posted April 13, 2004 Share Posted April 13, 2004 Yes! those are flipped normals! I use the patch select tool. It will select 5 point patches in one click as long as they are legal patches (created with the 5pt patch button). So I click on the patch (with view normals turned on) and hit the "F" key (shortcut to flip normals). Turning off show backfacing patches is also a big help. The flipped normals "dissapear" when you "look" straight at them. Easier to find than with view normals in my opinion. I had a model with tons of flipped normals. That is when I learned the keyboard shortcuts let me tell you sonny bob yesiree! Vernon "Flipped my normals" Zehr Quote Link to comment Share on other sites More sharing options...
Zaryin Posted April 13, 2004 Share Posted April 13, 2004 Ugh! Patch Select Tool. I totally forgot there was one! Man, just shows you, doesn't matter how long you use the program you still learn. Quote Link to comment Share on other sites More sharing options...
littleandy Posted April 14, 2004 Author Share Posted April 14, 2004 Lol, well I tried messing with that stuff and it didn't seem to do anything but then I reopened the program and opened my model up again and it was all better. But anyhoo, here's my new post. I can't believe the ears and back part of the head have taken me as long as the entire face, but oh well. The head modelling is almost done. Again, I love crits, so have at it! Oh, but as I look at it, I know I still have to mess with that tiny little area below the earlobe, I have yet to actually pierce the guy's earring ear, and... um, I'll fix that little caved in part on the lower lip. So don't tell me about those things. I already know. -Andrew Quote Link to comment Share on other sites More sharing options...
Alien_Films Posted April 15, 2004 Share Posted April 15, 2004 Andy, That is some Awesome work!!! Can't wait to see the final model!! Also by the way I loved your Animation #24 in the contest it was Vary life like & the little Andy character in the animation actually had emotion. It would be cool to see what he did see when he opened the door. It reminded me of a kid on chistmas morning. Well done!! Quote Link to comment Share on other sites More sharing options...
Ross Smith Posted April 15, 2004 Share Posted April 15, 2004 To be fair, Bill, I did say I'm no pro at the bias handles. But I'll take your advice and fiddle with the handles on a sphere. I'd certainly _like_ to figure them out. It's looking great, Andy! But now you've made a big problem for yourself -- you have to texturemap it as well as you modeled it. Quote Link to comment Share on other sites More sharing options...
heyvern Posted April 15, 2004 Share Posted April 15, 2004 It's looking great, Andy! But now you've made a big problem for yourself -- you have to texturemap it as well as you modeled it. Yes! That is why I, Vern is here to help with any Photoshop advice! When you get closer to needing more Photoshop help you know I will be keeping an eye on this thread. In the meantime check out these fantastic head texturing tutorials by Jim Talbot! http://www.lowrestv.com/arm/search4.asp?tutid=471 Tutorial ID number 471 on the ARM. this link takes you right to it on the ARM. Vernon "!" Zehr Quote Link to comment Share on other sites More sharing options...
zandoriastudios Posted April 15, 2004 Share Posted April 15, 2004 Looks great!! Quote Link to comment Share on other sites More sharing options...
littleandy Posted April 15, 2004 Author Share Posted April 15, 2004 Andy, That is some Awesome work!!! Can't wait to see the final model!! Also by the way I loved your Animation #24 in the contest it was Vary life like & the little Andy character in the animation actually had emotion. It would be cool to see what he did see when he opened the door. Hey, thanks! And I'm glad you liked the animation, too! I was sort of pressed for time by the end of it, so that's why he didn't get to do anything more than open the door. And I think I was very loosely interpreting the word "space." I'm hoping to use this guy for the "mad" contest if I get him done soon. Vern, I am really going to need help with the photoshoping stuff. I've already seen the first two Talbot tutorials, and that's how I was able to texture my bug, but I don't think he did anything with fading the edges to plaster decals from every which way. Which is what I'm going to be doing, I'm afraid. And I'm only using Photoshop version 5.0 LE. Glad you and photoshop go way back. Thanks for the support everyone! I'm hoping to have the neck and shoulders done by the end of the weekend. Then we'll see about texturing... -Andrew Quote Link to comment Share on other sites More sharing options...
littleandy Posted April 16, 2004 Author Share Posted April 16, 2004 Well, neck and shoulders didn't take as long as I thought they would. So here's the torso. I'm still sort of thinking of giving him some upper body armor which is why he isn't really super detailed below the collarbone, but I DO want it to look good. So if anything sticks out at any of you, it'd be great to hear! Of course, if you just think it looks fine the way it is, that's always nice to hear too! -Andrew Quote Link to comment Share on other sites More sharing options...
littleandy Posted April 16, 2004 Author Share Posted April 16, 2004 And the back... Quote Link to comment Share on other sites More sharing options...
Ross Smith Posted April 17, 2004 Share Posted April 17, 2004 Umm... dang. Color me impressed... The back of the neck looks a little too stair-step-like, but other than that, there's no reason I shouldn't be taking your advice instead. Quote Link to comment Share on other sites More sharing options...
Zaryin Posted April 17, 2004 Share Posted April 17, 2004 I actually like the back of the neck. I think the chest is too boxt and pointy on the bottomw outside corners. It is looking awesome, especially the collarbones. Quote Link to comment Share on other sites More sharing options...
littleandy Posted April 17, 2004 Author Share Posted April 17, 2004 Thanks, that was good advice. Ross, I tried to smooth out the back of the neck a little bit, but I didn't get a picture. But here's the chest that I tried to fix. Is it ok yet? -Andrew Quote Link to comment Share on other sites More sharing options...
Ross Smith Posted April 17, 2004 Share Posted April 17, 2004 Lookin' good. Want to post a wireframe? I want to see how you did this torso. Quote Link to comment Share on other sites More sharing options...
littleandy Posted April 17, 2004 Author Share Posted April 17, 2004 Ok, I hope this isn't dissappointing. I got tired of trying to come up with clever ways of doing five point patches, so this is all pretty rectangel-ish. But I think it's working ok. -Andrew Quote Link to comment Share on other sites More sharing options...
3DArtZ Posted April 17, 2004 Share Posted April 17, 2004 LittleAndy, this looks friggin great!!!! My only crit, and I think its just a personal preference.... Looks a little spline heavey. I know you can get the same detail with fewer splines, may not seem like a big deal now, but upon animation you would probably notice the difference, especially when assigning bones/control points and smartskinning, if you use it. But the model looks great, I totally appreciate the detail on the neck and base of skull. Looking forward to seeing more! Mike Fitz www.3dartz.com Quote Link to comment Share on other sites More sharing options...
littleandy Posted April 17, 2004 Author Share Posted April 17, 2004 I know what you're saying. But I'm sort of purposely giving it tons of geometry now to avoid messing with the bias handles. At least at present, bias handles and myself don't get on. But when I get the geometry done, I'll go back and prune the splinage down where I can. Glad you like it! -Andrew Quote Link to comment Share on other sites More sharing options...
OzTiff Posted April 18, 2004 Share Posted April 18, 2004 This is one mean looking dude And as smooth as a whistle to boot. Well done! Quote Link to comment Share on other sites More sharing options...
Zaryin Posted April 18, 2004 Share Posted April 18, 2004 THe cheast is looking alot smoother. I sometimes do that as well; giving more splines than needed, before cleaning put the geometry. It's looking awesome. Quote Link to comment Share on other sites More sharing options...
Alien_Films Posted April 18, 2004 Share Posted April 18, 2004 Man it will be awesome if you can finish this in time & put him in the Animation contest (topic mad) I think you'll have a really good chance at winning!! Quote Link to comment Share on other sites More sharing options...
Recommended Posts
Join the conversation
You can post now and register later. If you have an account, sign in now to post with your account.
Note: Your post will require moderator approval before it will be visible.