Dpendleton77 Posted January 16, 2015 Author Share Posted January 16, 2015 Well I redid everything last night and I tried to load it up on here and it seemed like the site was slow. I will do another reload when I get home. I think you will like what I did. Hopefully. Quote Link to comment Share on other sites More sharing options...
Dpendleton77 Posted January 16, 2015 Author Share Posted January 16, 2015 Here is the movie not finish of course. New_Shaggy_01.mov The Door's Stuck_take_03_a.prj Quote Link to comment Share on other sites More sharing options...
Admin Rodney Posted January 17, 2015 Admin Share Posted January 17, 2015 I haven't had a chance to download yet but I will first thing in the morning. Looking forward to it! Quote Link to comment Share on other sites More sharing options...
Dpendleton77 Posted January 17, 2015 Author Share Posted January 17, 2015 Here is the latest with camera work. The Door's Stuck_take_03_b.prj Quote Link to comment Share on other sites More sharing options...
Dpendleton77 Posted January 17, 2015 Author Share Posted January 17, 2015 I skipped a couple of projects just to take a small break from that animation. customcar.mdl Car_model.prj Quote Link to comment Share on other sites More sharing options...
Dpendleton77 Posted January 17, 2015 Author Share Posted January 17, 2015 Flying south. Flock.mov flying_south_02.prj Quote Link to comment Share on other sites More sharing options...
Admin Rodney Posted January 18, 2015 Admin Share Posted January 18, 2015 I had a look at your latest and it's good to move on/take a break. While I do see some performance hits that enhance the over all performance the flow from action to action (pose to pose) isn't as crisp as in your earlier attempts. It is common for animators to over-animate right out of the gate and you didn't have that issue initially but I'd say that the last revisions try to do too much in too little time. A few take aways (as relates to The Door's Stuck_15_B.prj): - I'm impressed by your organization of keyframes (not something seen early on in most animation) - The story gets told in an economy of time (no extraneous meaderings and not a lot of keyframes that don't serve any purpose A few goals you should strive for in the future: - Really refine those poses to get maximum silhouette (we brushed past this aspect from page 29 which discusses the principles of animation (outlined as 'ingredients' for our purposes in TaoA:M). John Lasseter understood this early on and used his knowledge to propel him to the top of computer animation. Here's what he had to say about silhouettes and staging all the way back at the dawn of computer animation: StagingStaging is the presentation of an idea so that it is clear. This idea can be an action, a personality, an expression, or a mood. The key idea is that the idea is made clear to the viewer. An important objective of staging is to lead the viewers eye to where the action will occur so that they do not miss anything. This means that only one idea at a time occur, or else the viewers may be looking at the wrong thing. So, the main object should be contrasted in some way with the rest of the scene. A good example is motion, since the eye is drawn to motion in an otherwise still scene. In a scene with everything moving, the eye is drawn to a still object. The animator must use different techniques to ensure that the viewer is looking at the correct object at the correct time. For example, in Luxo, jr. The Father appears first, and so is the center of attention. Then the son bounds in, moving rapidly, so the center of attention shifts to him. At a certain point the son stops and looks up at the father, refocusing the attention on the father. In the early days at Disney all characters were black and white, with no gray. All action was shown in silhouette (to the side), because if a character moved its black arm in front of its black body it would disappear, so the action had to be against the white background. The Disney animators realized that even without this technological limitation action was more clearly visible in silhouette. Even with modern color 3D graphics, silhouette actions are more clearly delineated and thus to be preferred. over frontal action. An example would be a character waking up and scratching its side, it is easier to understand what it is doing than if it scratched its stomach. Reference: John Lasseter, "Principles of Traditional Animation Applied to 3D Computer Animation", Computer Graphics, pp. 35-44, 21:4, July 1987 (SIGGRAPH 87). While several of the principles work hand in hand with timing another aspect of clarity is the pacing of a performance. Specifically this refers to the fast and slow of a movement and overlapping action as well. Consider Shaggy pulling back on the door. Let's say he pulls three times before moving on to some other tact. The first time he pulls unaware that the door won't open (perhaps he has no prior experience to suggest otherwise... although we in the audience might know better). The second time he pulls harder (and a visual cue might also be seen in the slight grimace on his face). The third pull then is a sustained pull where he really puts all of his energy into the attempt (this is that ever important aspect of Exaggeration that sells the entertainment). You have this exaggerated pull but don't quite linger enough to suggest the extent of Shaggy's energy that he puts into the effort. Let me address the remainder of my thoughts via the 'ingredients' found on page 29: Pose to Pose - get as much exaggeration of each individual pose as possible to make each utterly convincing - think also in terms of posing in the extremes of squash and stretch... tucked into a tiny ball prior to pulling on the door versus completely stretched out at the peak of his effort Anticipation and Overshoot - While some of this applies to your current animation it seems to me that this goes back to my initial comment on thinking in terms of three acts. Shaggy approaches door without a care in the world (our anticipation of further action is to see the door and wonder what shaggy will do with it). Overshoot implies going beyond the pose and then settling back. In story terms it might return Shaggy to where he started out. You have a target you want to hit and you hit it but before you do... more performance... more movement... additional follow through on motion and action... and for a laugh; unexpected action! Follow Through - I'll take a slightly different look at this one in that I'd suggest the follow through of certain actions be allowed to breathe and have their moment before moving on. This relates to Overlapping Action as well and I'm sure you've heard of the term 'Moving Hold'. If Shaggy's head rests on the door for a moment the remainder of his body could be slowly lowering down. In your last take you have an element where Shaggy's head appears to squash slightly against the door at the third head butt but it isn't there long enough to register. The follow through in this I speak of here would almost be as if Shaggy's head becomes stuck to the door for a moment before it's released and follows the rest of his body back down to the ground. This progressive release of body parts (due mostly to gravity) is effected by Shaggy's muscles. He's purposefully holding his head to the door on the last head butt (perhaps as if the lightbulb of understanding of how to get through the door has finally come on). That' isn't your premise but I hope you'll see what I'm talking about. Exaggeration - I think I've covered this and you've got some nice exaggeration in the final pull backward. Don't be afraid to hold that pose for a little longer... exaggerate your exaggeration! Timing - I've touched on this and it's the one element that will really enhance your animation and set it apart. Get those Fast and Slow movements in there to emphasis your character's motivations and thoughts. Is he getting tired or exasperated after struggling against that door? Character's that start off energetic move fast but when they get tired they slow down. Then when freed from their situation they might reenergize again and move out. Shaggy appears to be this type... nothing fazes him for long. He just brushes everything off and gets back on (his) track. Balance and Weight - Additional elements of exaggeration/squash and stretch would help with this. When he's on the ground you could also lower his hips a little and move him back and forth a little sideways when he's up off the ground. Consider where his feet and hands are planted. Secondary Action - There isn't a lot of opportunity for secondary action here other than perhaps the door moving more in concert with Shaggy's pulls. I'll have to look again but my memory says that the door isn't ideally modeled for bulging outward. Attitude - This is something that would appear in Act 1 as Shaggy approaches the door. He's hasn't a care in the world until he encounters this obstacle. His orientation is 'going through the door' because he's not the type to just step around it. The entertainment is in seeing the change in his attitude/orientation. We begin to see him think... struggle...grrrr... he's committed to the task. Staging - I talked about this above and it's also the reason I suggested the camera move as we were missing out on too much of the action. Squash and Stretch - great opportunity to exaggerate that in this animation! Final verdict: You've successfully navigated 'The Door's Stuck' and are ready to tackle bigger and better things. Return to this one if you can. Tell a different story. Use a different character. Provide feedback, suggestions and observations to others that take on the exercise as you can. Quote Link to comment Share on other sites More sharing options...
Dpendleton77 Posted January 18, 2015 Author Share Posted January 18, 2015 Thanks again Rodney. I honestly did like my first take better. I will make sure I tackle this again down the road. I had fun doing this an the animation is so much more fun doing it in A:M than it is in other programs. Quote Link to comment Share on other sites More sharing options...
Dpendleton77 Posted January 19, 2015 Author Share Posted January 19, 2015 How do you extrude the lines in the make a face tutorials? I can't seem to get them straight for some reason. Quote Link to comment Share on other sites More sharing options...
Admin Rodney Posted January 19, 2015 Admin Share Posted January 19, 2015 How do you extrude the lines in the make a face tutorials? I can't seem to get them straight for some reason. You may need to be just a little more specific. I assume you are at or about at page 142. If you skipped over the 'Flower Power' exercise it covers extrusion. Once a spline is selected whack that E key to extrude the spline The direction/distance the extrusion will be created at will depend on your settings in Tools/Options on the Units tab. In the lower right corner of the dialogue box you'll see the paste/extrude settings.** Once the new spline is extruded you can use the scale manipulator (shortcut key S) to align/straighten any spline. I may not be answering your specific question here... so please advise. **We can also just unselect the checkbox to maintain our desired offset but not use it presently. I had forgotten how mice it feels to extrude quickly in place rather than offset. Extrude/Move/Extrude/Scale/Move/Extrude/Rotate/Scale/Move etc. works great! Even better yet Extrude/Turn/Extrude/Turn etc. That feels like sculpting clay. Quote Link to comment Share on other sites More sharing options...
Dpendleton77 Posted January 20, 2015 Author Share Posted January 20, 2015 I am working on the flower now. I will put it up tonight. I have some questions about that one also. Quote Link to comment Share on other sites More sharing options...
Dpendleton77 Posted January 25, 2015 Author Share Posted January 25, 2015 Here is the flower power. Flower_finished_01.prj Quote Link to comment Share on other sites More sharing options...
Dpendleton77 Posted January 27, 2015 Author Share Posted January 27, 2015 Here is some fire. Smoke_finished_01.prj Quote Link to comment Share on other sites More sharing options...
Dpendleton77 Posted January 27, 2015 Author Share Posted January 27, 2015 Going bowling...........Woot!!!!! Cosmic Bowling_02.prj Quote Link to comment Share on other sites More sharing options...
Admin Rodney Posted January 27, 2015 Admin Share Posted January 27, 2015 I've fallen behind in feedback for your exercises but I'm glad to see you are charging ahead! Here are a few notes on 'Flower Power': - You modeled the flower in near perfect form. Nicely done! - It looks like at the very end (or was that the middle?) you strayed just a bit from the instructions and that led to the two Leaf Bones not getting named and properly assigned to their stem locations. The result being that when the flower is animated/moved some of the geometry goes with it while the majority of the leaves do not. The fix is to drag/drop Leaf A bone under Stem 1 and Leaf B under Stem 2. Note that I believe you have LeafA named "petal. - At the top it appears you are missing a Bulb bone. You've made due without it by assigning the flower petals to Stem 4. This works but note that it keeps the bulb and petals from being able to rotate freely without effecting the stem. Note: The text inside the yellow box at the bottom of page 100 goes into detail on bone hierarchy relationships and the fix to most bone relationship woes: drag and drop the bones to the proper location. There is a lot of useful material in this exercise and it's easy to lose the importance of it in the simplicity of the model presented and the subject matter itself but Group and Bone naming conventions as well as hierarchy fundamentals seen in this exercise will serve you well as you begin to tackle your own character rigging later. I see from your Project file that you have several actions created (presumably to test smartskin etc.). This is that ever important step after (or during) modeling and rigging that allows us to see whether our bone placement, orientation and relationships are working. As far as 'fixing' this goes there are several approaches and at least in this case that would entail looking to the TaoA:M text and addressing those. I believe the easiest to address the missing Bulb bone would be to rename Stem 3 as Bulb and then create a new Stem 4 bone. This would keep you from having to reassign all those petals to a new bone! Then it would be just a matter of reassigning the stems top-most Control Points to Stem 4. No 'grades' are given in this course but if they were I believe your modeling would be A+. The rigging represents one of the reasons grading isn't the best measure for success. In the computer animation world... ahem... bones... rigging... if it don't work... it don't work. One of the reasons TaoA:M online follows more of a GO/NO GO approach. I've attached a brief video of the issues I've noted above. Let me know if you've got any questions. Quote Link to comment Share on other sites More sharing options...
Dpendleton77 Posted January 27, 2015 Author Share Posted January 27, 2015 Yeah I had a rough go with the flower power and it out powered me. I think that is my fault for rushing it, I actually like doing this so I know I will give it another shot. Quote Link to comment Share on other sites More sharing options...
Hash Fellow robcat2075 Posted January 27, 2015 Hash Fellow Share Posted January 27, 2015 Rodney got a microphone. Hooray! Quote Link to comment Share on other sites More sharing options...
Dpendleton77 Posted January 28, 2015 Author Share Posted January 28, 2015 Redo. Flower_power_06.prj Quote Link to comment Share on other sites More sharing options...
Dpendleton77 Posted January 28, 2015 Author Share Posted January 28, 2015 Okay how do I get from the first image to the second image? I can't seem to scale at all in the top view,did I miss something? Thanks. Quote Link to comment Share on other sites More sharing options...
Admin Rodney Posted January 28, 2015 Admin Share Posted January 28, 2015 did I miss something? It appears that you have. It's a bit hard to tell from the image but it appears you have only a single spline outline of the side view... nothing to scale in either Z or X direction (only up and down in the Y direction). If you created the nine point spline that matches the front roto (from page 106) you wouldn't have a flat spline from the top view. Extruding that circular shape then should have created more of a cylinder. You could save and upload the model but it appears to me that you've skipped the intitial steps of creating the fuselage. If you are only going by the textbook/manual you may want to view the video tutorial for Exercise 10: http://www.hash.com/video-tutorials-23-en Quote Link to comment Share on other sites More sharing options...
Dpendleton77 Posted January 28, 2015 Author Share Posted January 28, 2015 I feel stupid lmao. I figured a step was missing. Quote Link to comment Share on other sites More sharing options...
Dpendleton77 Posted January 29, 2015 Author Share Posted January 29, 2015 Okay the video helped a lot(whew). Here is my work on the plane(Boss)the plane. Quote Link to comment Share on other sites More sharing options...
Dpendleton77 Posted January 29, 2015 Author Share Posted January 29, 2015 What in the blue tar nation is this??? Quote Link to comment Share on other sites More sharing options...
Admin Rodney Posted January 29, 2015 Admin Share Posted January 29, 2015 What in the blue tar nation is this??? Why, that is blue tar nation rotoscoping of course! You can safely delete all those extra entries but this might also be a good time to cover the option to open a file in a text editor and edit that file to remove those. I'll recommend a text editor such as Notepad+ as it is quite useful (and extensible) If you do go the route of editing the Model, Project, Action... whatever... it is always best to save the file first and then edit a copy. In this way you can always return to the previous state. Robert Holmen has a video tutorial or two that covers editing of files directly but if you post the file I'll be glad to take a look. How did the file get corrupted with extra rotos? We don't have enough information at present to know. Added: I should have also said that it is often wisest to save your file, close down A:M and start up/load the file again before doing anything else. This will ensure that what you are seeing isn't some crazy carry over/glitch from your graphics card and those extra entries aren't really there in the first place. Here is my work on the plane(Boss)the plane. It looks like you are right on track there! Quote Link to comment Share on other sites More sharing options...
NancyGormezano Posted January 29, 2015 Share Posted January 29, 2015 (edited) How did the file get corrupted with extra rotos? We don't have enough information at present to know. That is an old bug (ver 15j+, and earlier) that has been solved since. I believe it was solved in ver 16? see A:M report http://www.hash.com/reports/view.php?id=5605 And yes you have to text edit all projects, models, materials, etc files that are involved for it to be truly gone. Nasty. Deleting those phantom rotoscopes in A:M will not solve the problem. They will just come back with a vengance the next time project is opened, and any of the models have the potential to corrupt future projects. Edited January 29, 2015 by NancyGormezano Quote Link to comment Share on other sites More sharing options...
Dpendleton77 Posted January 29, 2015 Author Share Posted January 29, 2015 Sweet goodness. I did not know this was a big problem first time seeing it to be honest. I am just glad I save a lot. Quote Link to comment Share on other sites More sharing options...
Hash Fellow robcat2075 Posted January 31, 2015 Hash Fellow Share Posted January 31, 2015 Are you using an old version? Quote Link to comment Share on other sites More sharing options...
Dpendleton77 Posted February 1, 2015 Author Share Posted February 1, 2015 I am using VER. 18. Quote Link to comment Share on other sites More sharing options...
Dpendleton77 Posted February 1, 2015 Author Share Posted February 1, 2015 Take this apart please. Plane_06.prj Quote Link to comment Share on other sites More sharing options...
Hash Fellow robcat2075 Posted February 1, 2015 Hash Fellow Share Posted February 1, 2015 Is there really no center spline on the body in that project? Quote Link to comment Share on other sites More sharing options...
Dpendleton77 Posted February 1, 2015 Author Share Posted February 1, 2015 I just followed the video. I did not know there was suppose to be a center spline. Quote Link to comment Share on other sites More sharing options...
Hash Fellow robcat2075 Posted February 1, 2015 Hash Fellow Share Posted February 1, 2015 I'd have to look at it again. Normally you'd plan there to be one for something that is symmetrical like that. Quote Link to comment Share on other sites More sharing options...
Admin Rodney Posted February 1, 2015 Admin Share Posted February 1, 2015 In the video Steve does emphasize the shape of the ring that will be extruded and notes the importance of shaping it because the entire model will be built upon that. Here's a screen capture of where Steve is forming the ring and it does have Control Points at the 12 and 6 o'clock positions, which will create a center spline when extruded. Of course there are many ways to create the basic shape to include lathing... but Steve's emphasis for this exericese is "Extrude, Extrude, Extrude". If I was going to create the body I'd likely lathe the initial shape and then adjust from there to match the rotoscope. Edit: It's a bit hard to see the CPs in the image but easier to see him place them in the video. Quote Link to comment Share on other sites More sharing options...
NancyGormezano Posted February 1, 2015 Share Posted February 1, 2015 Interesting - one would have thought he would have used copy, flip, attach at some point. But then again, these exercises were created way back in the olden days... Quote Link to comment Share on other sites More sharing options...
Dpendleton77 Posted February 1, 2015 Author Share Posted February 1, 2015 I was thinking the same thing as I was going through these Nancy. It worked so I went with it. Now the decal parts are what I don't like. Quote Link to comment Share on other sites More sharing options...
Dpendleton77 Posted February 4, 2015 Author Share Posted February 4, 2015 Well I am now working on the make a face video. Here is half of it in all it's glory. I drew this face so forgive me it is not pretty. Drawing_07.prj Quote Link to comment Share on other sites More sharing options...
Hash Fellow robcat2075 Posted February 4, 2015 Hash Fellow Share Posted February 4, 2015 Here are some notes from me on the head... clip3620DougsHead.mov Quote Link to comment Share on other sites More sharing options...
Admin Rodney Posted February 4, 2015 Admin Share Posted February 4, 2015 Great video Robert, you hit some excellent points. Where you suggest not creating Control Points between high and low points is something I need to add to my repretoire. Douglas, I'd say that given the state of the initial face you're well on your way to a mastery of splines. I can't image too many people launching off and creating that kind of face right out of the gate. Given this is an early attempt I'm really looking forward to what lies ahead! Quote Link to comment Share on other sites More sharing options...
Dpendleton77 Posted February 4, 2015 Author Share Posted February 4, 2015 Thanks a lot Rob. I really needed them pointers, I do need to try and dial on the splines in the face. I am going to do another one but this time I will be cheap on the splines. Thanks a lot again now I know how to go about doing the splines around the mouth. Quote Link to comment Share on other sites More sharing options...
Dpendleton77 Posted February 7, 2015 Author Share Posted February 7, 2015 So I dug in the crates and did this Malo style plus I was influenced by Largent's superman. Question how do I get rid of these splotches and how can I form this nose for this character?? Thanks in advance. Face_05.prj Quote Link to comment Share on other sites More sharing options...
Hash Fellow robcat2075 Posted February 7, 2015 Hash Fellow Share Posted February 7, 2015 the dark things near the corners of five-point patches are because not all patches are facing the same direction. If you set your real time render to not show backfacing patches (Shift-6) it is easy to see which ones are inside out. Quote Link to comment Share on other sites More sharing options...
Dpendleton77 Posted February 7, 2015 Author Share Posted February 7, 2015 Thank you my friend. It worked like a charm. Quote Link to comment Share on other sites More sharing options...
Dpendleton77 Posted February 7, 2015 Author Share Posted February 7, 2015 Yes indeed shift 6 works and knowing is half the battle. Quote Link to comment Share on other sites More sharing options...
Dpendleton77 Posted February 7, 2015 Author Share Posted February 7, 2015 I did it with the shift and all that. Quote Link to comment Share on other sites More sharing options...
Hash Fellow robcat2075 Posted February 7, 2015 Hash Fellow Share Posted February 7, 2015 That's certainly fewer splines! My motto for five-pointers is that they like to be "fat and flat". They work best when they are as close to five even sides as possible and when they have to curve as little as possible. Quote Link to comment Share on other sites More sharing options...
Dpendleton77 Posted February 7, 2015 Author Share Posted February 7, 2015 You know I don't give up easy. I added a couple of extra splines. Face_09.prj Quote Link to comment Share on other sites More sharing options...
Hash Fellow robcat2075 Posted February 8, 2015 Hash Fellow Share Posted February 8, 2015 the chin on your model looks way larger than the chin inthe reference drawing. Quote Link to comment Share on other sites More sharing options...
Dpendleton77 Posted February 8, 2015 Author Share Posted February 8, 2015 Yeah I am going to tweak it a bit more. The drawing is a bit off. Quote Link to comment Share on other sites More sharing options...
Dpendleton77 Posted February 9, 2015 Author Share Posted February 9, 2015 I need help on how to make a hand for this fellow. Thanks a lot. Here he is. man_08.prj Quote Link to comment Share on other sites More sharing options...
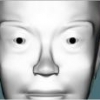
Dpendleton77 Posted February 9, 2015 Author Share Posted February 9, 2015 How can I fix this little problem after I copy and flip? Thanks troops. Quote Link to comment Share on other sites More sharing options...
Recommended Posts
Join the conversation
You are posting as a guest. If you have an account, sign in now to post with your account.
Note: Your post will require moderator approval before it will be visible.