Dpendleton77 Posted April 19, 2013 Share Posted April 19, 2013 I know this might not be the place but who did this tutorial? http://www.hash.com/amtutes/Bootcamp/five.html I also want to know if somebody could help me understand this a bit more. The explanation in some of this seems to leave out some info. Quote Link to comment Share on other sites More sharing options...
Admin Rodney Posted April 19, 2013 Admin Share Posted April 19, 2013 That tutorial was put together by Alonso Soriano who probably won't see your query here. If you can elaborate on the parts of the tutorial where you are confused others will be able to assist you though. Quote Link to comment Share on other sites More sharing options...
Dpendleton77 Posted April 19, 2013 Author Share Posted April 19, 2013 I will look through them again and let you know. Okay I have one he does not say how man control points he puts into the body before he lathes it the first time. I will be back with more once I go through it again. Quote Link to comment Share on other sites More sharing options...
Hash Fellow robcat2075 Posted April 19, 2013 Hash Fellow Share Posted April 19, 2013 I have one he does not say how man control points he puts into the body before he lathes it the first time. You can't count them on the spline? I haven't read the whole tut. Quote Link to comment Share on other sites More sharing options...
Dpendleton77 Posted April 19, 2013 Author Share Posted April 19, 2013 You know I tried but it is so small on the screen. Quote Link to comment Share on other sites More sharing options...
Admin Rodney Posted April 19, 2013 Admin Share Posted April 19, 2013 On this page it appears Alonso used 8 sections: http://www.hash.com/amtutes/Bootcamp/one.html Quote Link to comment Share on other sites More sharing options...
Hash Fellow robcat2075 Posted April 19, 2013 Hash Fellow Share Posted April 19, 2013 Simple rule of lathing... use as few cps as needed to make the shape. If you need another ring somewhere later it's still easy to stitch it in manually. Quote Link to comment Share on other sites More sharing options...
Dpendleton77 Posted April 19, 2013 Author Share Posted April 19, 2013 Rob how many do you suggest? I am also at a loss at how he got the legs to open up at the top, he just seem to skip that part. Quote Link to comment Share on other sites More sharing options...
Hash Fellow robcat2075 Posted April 19, 2013 Hash Fellow Share Posted April 19, 2013 Rob how many do you suggest? I haven't read it closely. Just try to approximate what he has. I am also at a loss at how he got the legs to open up at the top, he just seem to skip that part. Open up? Quote Link to comment Share on other sites More sharing options...
Dpendleton77 Posted April 21, 2013 Author Share Posted April 21, 2013 That tutorial was put together by Alonso Soriano who probably won't see your query here. If you can elaborate on the parts of the tutorial where you are confused others will be able to assist you though. Rodney I have been going through it and it seems like I just have to crack down just do it. I am trying to problem solve and it is helping. Quote Link to comment Share on other sites More sharing options...
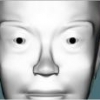
Dpendleton77 Posted April 21, 2013 Author Share Posted April 21, 2013 4.Now you can see things in render mode (keyboard 9 or 10). Close off the inside ring (I just ran two splines across it and connected them). Group and name that part Pupil. All groups of the eye should be shiny, so put some specular size and intensity in each group. I don't understand what he did here. Quote Link to comment Share on other sites More sharing options...
Hash Fellow robcat2075 Posted April 22, 2013 Hash Fellow Share Posted April 22, 2013 Where are you seeing that? I see this for step 4 4. Always model from a multiple views. Instead of having 2 modeling windows open I use the numpad hotkey's to jump around and check, thereby allowing me to have the biggest screen workspace. You could go to Window->New Window and then ->tile vertically to have 2 windows open at once. Select the model (either click and drag which will pull a selecting box around it, or click anywhere on it and hit / on the keyboard) Hit S to scale it (or find the scale button) Go to a side view and click drag the circled part towards the middle, this should make it skinnier from the side but look untouched from the front. Quote Link to comment Share on other sites More sharing options...
Dpendleton77 Posted April 22, 2013 Author Share Posted April 22, 2013 Where are you seeing that? I see this for step 4 4. Always model from a multiple views. Instead of having 2 modeling windows open I use the numpad hotkey's to jump around and check, thereby allowing me to have the biggest screen workspace. You could go to Window->New Window and then ->tile vertically to have 2 windows open at once. Select the model (either click and drag which will pull a selecting box around it, or click anywhere on it and hit / on the keyboard) Hit S to scale it (or find the scale button) Go to a side view and click drag the circled part towards the middle, this should make it skinnier from the side but look untouched from the front. I am sorry that was on the section for the eye. I am past the part 4 of the body. Quote Link to comment Share on other sites More sharing options...
Hash Fellow robcat2075 Posted April 22, 2013 Hash Fellow Share Posted April 22, 2013 4.Now you can see things in render mode (keyboard 9 or 10). Close off the inside ring (I just ran two splines across it and connected them). Group and name that part Pupil. All groups of the eye should be shiny, so put some specular size and intensity in each group. I don't understand what he did here. If you mean adding the specularity, do that inthe rpoerties for the group. I f you mean filling in the hole... FillingLathedHole.mov Quote Link to comment Share on other sites More sharing options...
Dpendleton77 Posted April 22, 2013 Author Share Posted April 22, 2013 4.Now you can see things in render mode (keyboard 9 or 10). Close off the inside ring (I just ran two splines across it and connected them). Group and name that part Pupil. All groups of the eye should be shiny, so put some specular size and intensity in each group. I don't understand what he did here. If you mean adding the specularity, do that inthe rpoerties for the group. I f you mean filling in the hole... FillingLathedHole.mov That is exactly what I was looking for thank you. Quote Link to comment Share on other sites More sharing options...
Fuchur Posted April 22, 2013 Share Posted April 22, 2013 4.Now you can see things in render mode (keyboard 9 or 10). Close off the inside ring (I just ran two splines across it and connected them). Group and name that part Pupil. All groups of the eye should be shiny, so put some specular size and intensity in each group. I don't understand what he did here. If you mean adding the specularity, do that inthe rpoerties for the group. I f you mean filling in the hole... FillingLathedHole.mov That is exactly what I was looking for thank you. In Roberts video-capture: You can create more legal patches if you are connecting the dead ends on the half ot ehs pline between them too... it will result in a 3 point / 4 point-patchsituations so. Another way is to make the whole really small and then using the Stitch-feature (I tend to do this). You get a "plain" area then, but since it is that small it will not matter, but it still will not let you look through... See you *Fuchur* Quote Link to comment Share on other sites More sharing options...
Dpendleton77 Posted April 23, 2013 Author Share Posted April 23, 2013 How do I fix this. I was rolling along good till bam. I deleted a par to put in the are and when I went to shaded mode the stuff looked like I never deleted it. Then I go this mess. Quote Link to comment Share on other sites More sharing options...
Hash Fellow robcat2075 Posted April 23, 2013 Hash Fellow Share Posted April 23, 2013 I'm not sure what you are trying to do. Quote Link to comment Share on other sites More sharing options...
Dpendleton77 Posted April 23, 2013 Author Share Posted April 23, 2013 I'm not sure what you are trying to do. I wanted to close those spaces,some weird stuff happened when I broke and deleted the spline for the arm space it looked like it was gone but then when I unhide everything it seemed that the splines was never deleted. Quote Link to comment Share on other sites More sharing options...
Hash Fellow robcat2075 Posted April 23, 2013 Hash Fellow Share Posted April 23, 2013 I can't tell exactly but maybe you left some five-point areas when you deleted a spline. The other splines would still be there but not fill in. If there's something there you don't want, you can still select it and delete it. Quote Link to comment Share on other sites More sharing options...
Recommended Posts
Join the conversation
You can post now and register later. If you have an account, sign in now to post with your account.
Note: Your post will require moderator approval before it will be visible.