ericsh6
-
Posts
273 -
Joined
-
Last visited
ericsh6's Achievements
Craftsman (5/10)
0
Reputation
-
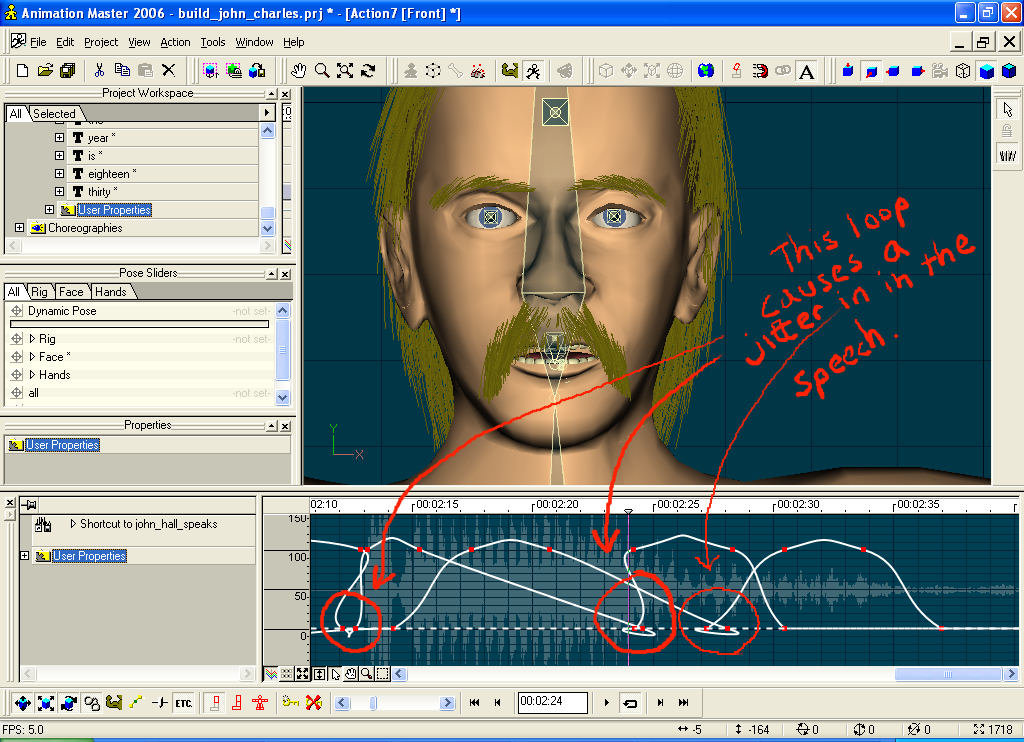
Some of the mouth chatter is a bug. In the attached image you can see the chanels loop back in time and cause a sudden phonem transition. I saw this same bug back in v11 and reported it but it appears to be back. I think the dopesheet method would look at least 80% better if this bug were gone.
-
I used the dopesheet with the dictionary. It is so fun to use I have a hard time resisting but I read that it is better to manually lipsync with phoneme poses. Or maybe not? Actually, the cloths are a separate model with their own bones. The cloths bones match the character's bones. In a choreography I constrain the cloths bones to translate and orient like the character's bones. This way I can have one character but many different wardrobes.
-
I have been reconstructing my great great grandfather, John Charles Hall, while waiting for some decal fixes so I can make some cool mountains. Critiques are welcome. I rendered with V13c netrender on three slaves. Looks like there is a bit-o-jitter in the hair on the left. http://markopuff.com/animations/charles.wmv
-
Yes it is AO. I didn't render this in netrender because it wasn't available in v13 back then but now it is. I have rendered other animations with AO in netrender and they work great. Netrender should be available in the latest version of V13. You don't have to do anything different with your project file to render AO in netrender.
-
Of course you can. While in model window, click on the hair button (usually to the right of the bones button). Then you will see the hair guides. Some hair tool buttons appear on the right including a brush and others. just grab a control point on the hair and style the hair. By default there are many hairs associated with a hair guide so if you move the hair guide, you move a group of hairs. If you want more hair guides then make the mesh denser. In the hair material you can increase the number of control points on each hair guide so you can make more complex hairdoos. When done then go back into model mode.
-
Yes, I did render this with AO. Now it would be a piece of cake to render since netrender is now in beta 3 and above. I am reconstructing a small mountain village right now. I am finding that pixel displacement can be used with AO if done right. I will post some stills soon.
-
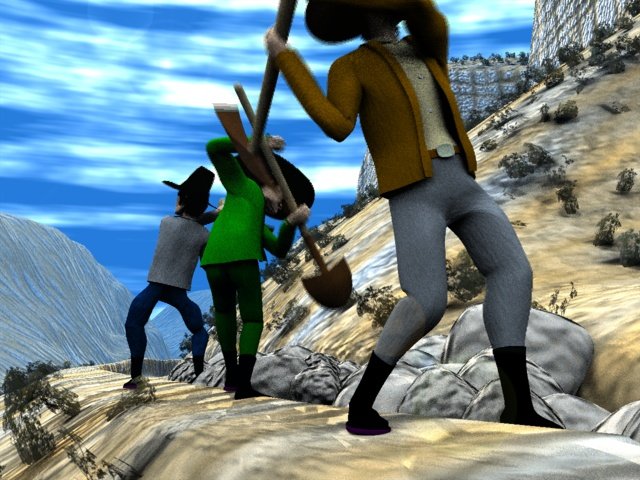
I think I understand, at least I can see that there is something wong when he realizes the rocks are upon him. Those secondary actions are still mysterious to me. By the way, I used repeatable actions with transitions to the max here. I love repeatable actions.
-
I fixed the link - just click on it.
-
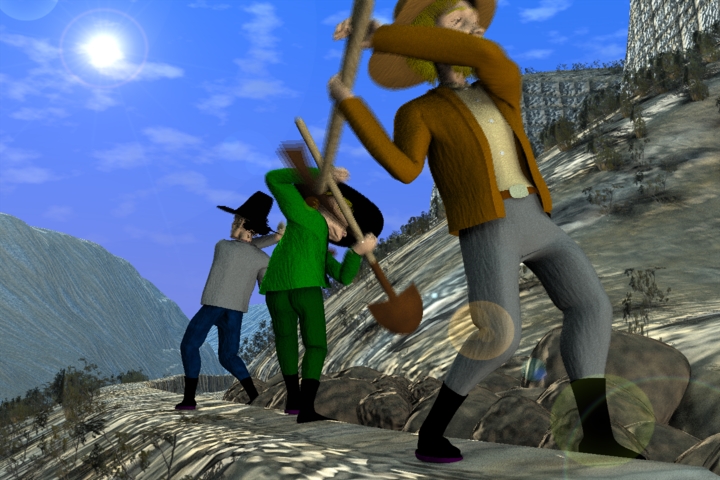
I finished this a few weeks ago for a video documentary. The rockslide is all Newton - I shaped the mountainside to direct the rocks onto our slow response digger worker. Thankfully, he survived the incident. link to video
-
Mountains with V13 beta Ambient Occlusion
ericsh6 replied to ericsh6's topic in Work In Progress / Sweatbox
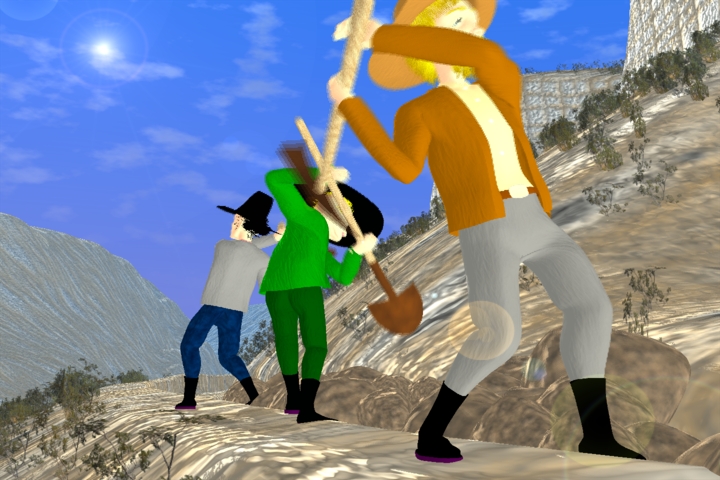
Thanks everyone for the encouragement! I made a few fixes to the model since my last post - getting ready for the final render of the 15 second animation. I can't wait till v13 netrender is available - or is it already available? Anyway, here is the scene without AO and the scene with AO as requested. In the scene without AO I have the default choreography light setup (one key light for the sun with ray traced shadows and one key filler light which I think I had too much intensity). In the image with AO, I have one kleg light with ray traced shadows and AO at 100% intensity, 100% occlusion and 15 samples.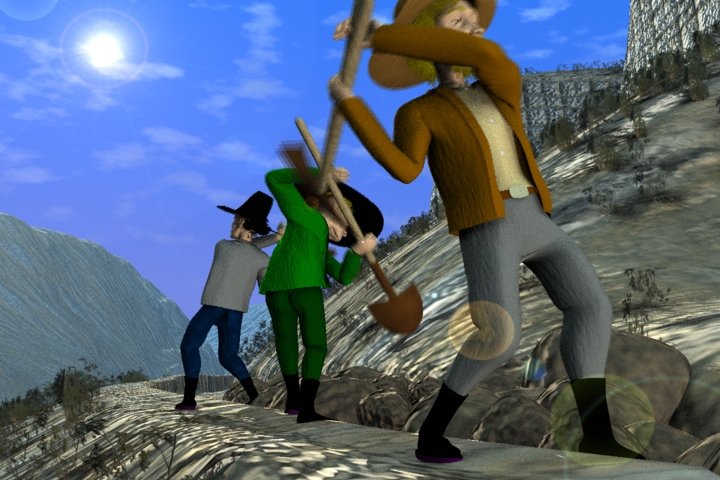

-
I rendered this with multipass (4 passes) with occlusion sampling at 20%. It took 35 minutes to render. I am so grateful to the Hash team for AO. Even teh vegetation looks great. There is room for improvement and I welcome it. Now one thing, I wasn't able to render with pixel displacement and ambient occlusion - the computer memory gets completely consumed and I reported this. What you see here is bump in V13beta but bump in beta looks way better than v12 I think.
-
Its only 1.4Meg but I read that the forum doesn't take .wmv files. I will have to convert it to quicktime but don't have the software handy - will have to do it later.
-
I apologize for this being in windows media format although I believe there is a way for Apple to view this. I put this here because I couldn't post it in the Cloth forum. It needs lots of smart skinning and other tender loving care but I wanted to show the full body cloth I have done. Hmmm, for some reason my file isn't posting.
-
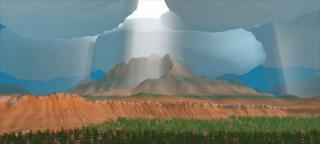
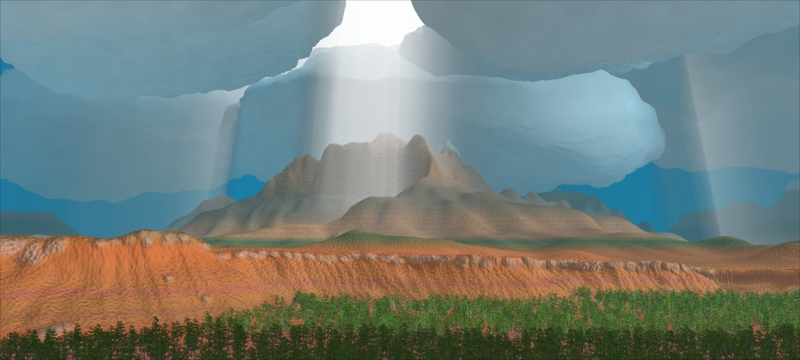
Mount Sinawava - 200% more glorious
ericsh6 replied to ericsh6's topic in Work In Progress / Sweatbox
Nancy, Thankyou for the encouragement and ideas - I am a big fan of your work. I can't add transparency to the clouds with the volumetric light shining on it - A:M crashes (I reported it). But I am experimenting with clouds and will test out the transparency map. Paul, The tearing can be seen in any view. It looks like an entire group of patches removed and floating above the rest of the model. I think it happens when I stretch the mesh in an action and apply the displacement decal to the stretched mesh. It doesn't seem to happen if I apply the displacement decal in model view. -
I rendered this scene with v13 r5 with pixel displacement and global ambience. I discovered that Global ambience is key to having realistic looking clouds. I don't know how I lived without pixel displacement - I used it on the canyon walls and clouds. I know v13 is beta but I must say that decals with pixel displacement sometimes cause patches to tear. You can't see it in this picture because the trees cover it up but there is a tear in the canyon wall just below the rocks. The higher the displacement value, the greater the tear. Anyone know how to fix this? These are my global ambience settings: Global ambience type = color ambience color = white ambience intensity = 60% ambience occlusion = 60% and on the camera occlusion sampling = 15%.