Epoch
-
Posts
61 -
Joined
-
Last visited
Content Type
Profiles
Forums
Events
Everything posted by Epoch
-
Digital Sculpting Displacement/Normal Test
Epoch replied to Epoch's topic in Work In Progress / Sweatbox
Filip - There is another app out there for displacement painting called 3D brush that, on the fly - alters the normal maps rather than displacement sculpting. It makes it less process intensive to work with. Maybe try taking a look at it? It may give you some ideas in how to tackle a form of realtime displacement/normal map for 3dPaint. It should would be nice to have a feature like this work directly with A:M to add that extra detail level to our models. -
Digital Sculpting Displacement/Normal Test
Epoch replied to Epoch's topic in Work In Progress / Sweatbox
I believe the only reason they would export the mesh is so they can retopolize it with lower polygons - which to me is a butt load more work than getting it right prior to taking it into the digital sculpting apps. When you increase the rez on the models to do more sculpting you have to subdivide the mesh more and more which takes the polys up to the gigapoly levels. Millions upon millions of polygons just on a single object. You can keep the lower levels of the mesh for exporting to an application and still use the higher level displacement maps once you generate them - but it comes back to the original statement... that you have your mesh the way you want it prior to exporting , and just using the maps for rendering purposes. You could probably reimport the lower level mesh back into animation master but the problem there is that the polygons don't really translate that well back into A:M. Its perfect going out but coming back in creates a lot of issues in terms of the direction of splines, hooks, creases etc. which will in turn destroy your hard work on the texture mapping and displacement painting. It's kind of why I've suggested getting the model right prior to exporting and just bringing the map back in so everything stays the way it was and doesn't mess with how A:M handles its models... so that you still have a nice patch count, everything looks great, and its still animatable. This is of course just my theory on what would happen, as I'm not able to test out z-brush myself (don't have it) but I have a few other displacement painting/sculpting apps and they mostly work the same. One is usually just able to go higher in resolution/polycount than others. Does the 3dPainter app that A:M works well with contain a form of displacement painting/sculpting? -
Digital Sculpting Displacement/Normal Test
Epoch replied to Epoch's topic in Work In Progress / Sweatbox
Thanks Fuchur - I hope to use this on some of my models soon jakerupert - I think that method may not work. Seeing as how ZBrush takes models to the gigapoly level it would be insane (and quite unnecessary) for A:M to try and import a file with so many polys... Which is one reason why the splines are a bit better for the organic modeling in not needing so many patches. I think for the extra detail it would probably be better to take just the displacement map onto the mesh to 'simulate' the extra details than having to bulk it up with more patches. So long as the basic model is near what you'd like in A:M the displacement maps and/or normal maps should really take the model a step further without all of the unnecessary model exporting/importing headaches. -
Digital Sculpting Displacement/Normal Test
Epoch replied to Epoch's topic in Work In Progress / Sweatbox
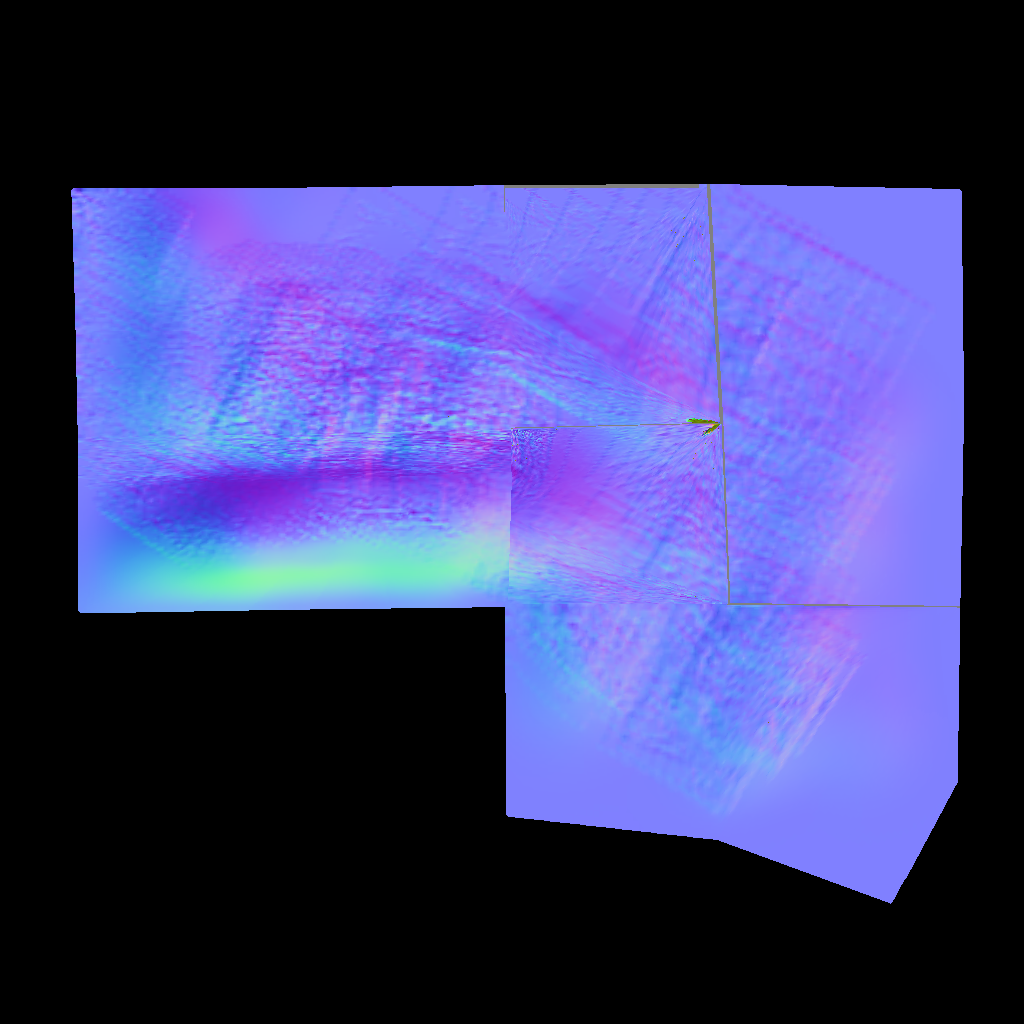
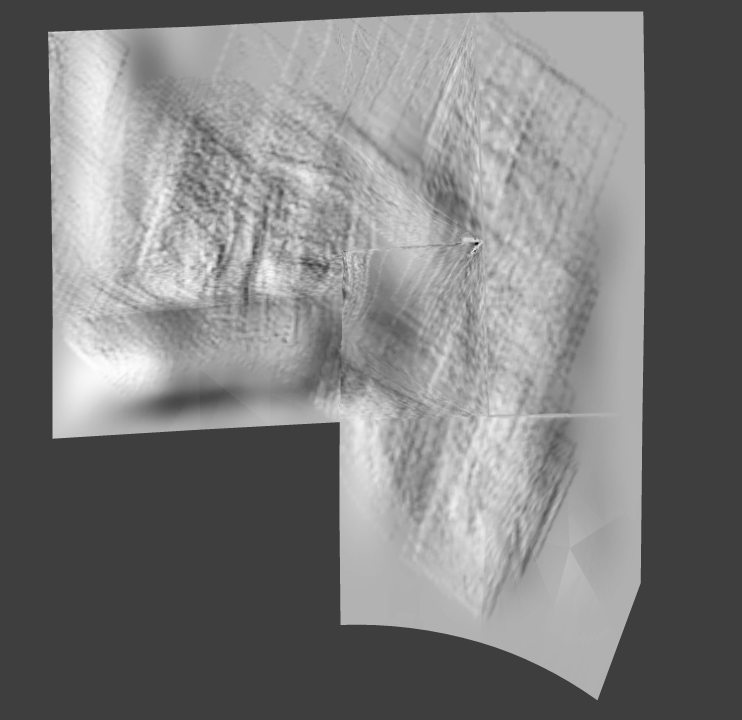
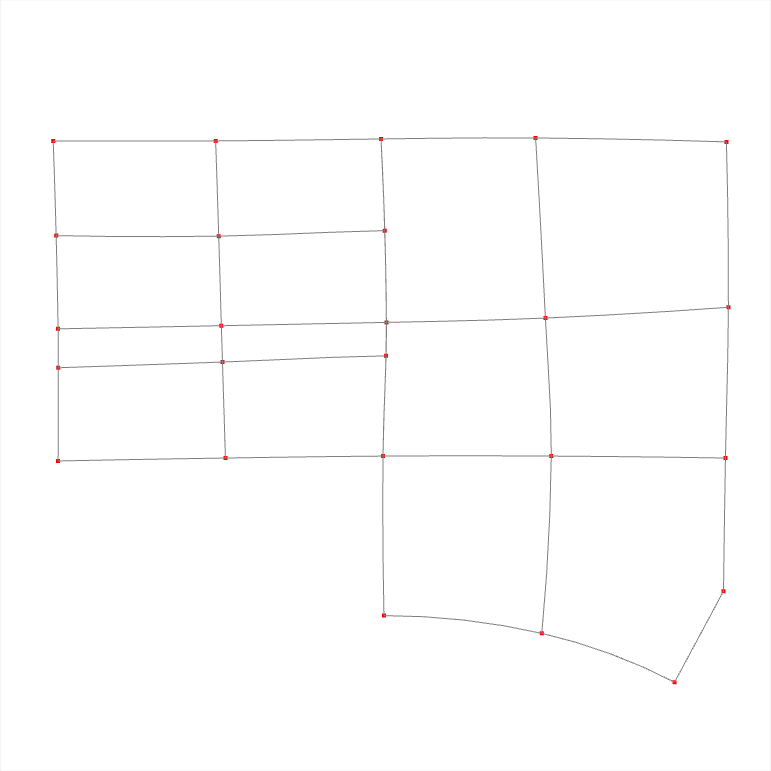
Here is the new test All files included I've used two hooks and a 5 point patch. Everything seems to work out pretty well. The lines in the normal map this time are most likely due to the limitations of the sculpting app that I was testing on. A:M seems to load these up and export perfectly. The only issue that I had with exporting to sculpt in the details were in multiple hooks. If you use two or three hooks into one patch the polys aren't handled correctly. You will have some triangulated polys that overlap each other and cause an issue. The five point patch and hook easily translated into a simple triangle which worked out fine. test.mdl

-
Excellent work as usual All of those details you manage to put into your models really makes them shine. Someone give this man a job
-
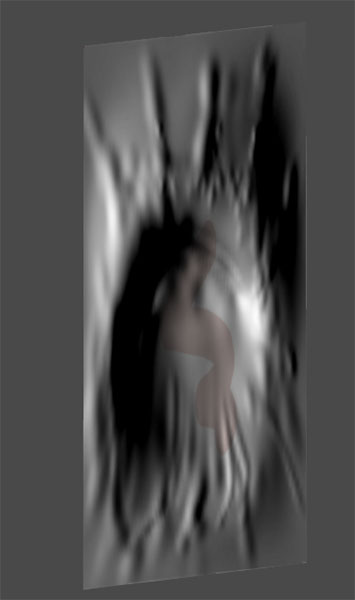
Thought I'd try something today just for kicks. I had noticed in v14 that you can export OBJ files... I don't recall in previous versions of having a workable feature of this. So - I decided to test it out in getting some displacement and normal map textures for a model. I started with a basic 4 point patch and unwrapped it for texturing purposes - and so that when I export the model I'd have it already unwrapped for whatever program I use to sculpt the texture details in. Once I exported this patch I loaded it up in my sculpting app.. For this test I used Silo. I sculpted in a sort of - I guess you'd call it an eye and then exported the displacement map and Normal map for A:M Since they're still in beta I couldn't get the displacement working too well so in the images I'm posting you'll just see the normal map results I didn't have to import anything back into A:M which is great because I won't have to lose my splines or have to mess around with polys etc. I simply applied the normal map that was generated and there we go... These renders are straight from the modeling viewport - no choreography or lights added... so keep that in mind. I've included the model as well just in case you want to take a look at it. I'm sure if you use ZBrush or those other costly apps you could implement it into the workflow Lend me your ideas on this - as I haven't read anything about it here for some time. test.mdl


-
Thanks for the comments @Zaryin- I actually sped up the swing, as it was even slower than that. Guess she needs a bit more? @phatso- I see your point. I may add some more to the end of it so that she slows down some. I'll resolve that peek issue by altering my weighting. Or maybe covering the woman up more I didn't see any preroll... as you can tell at the beginning the dynamics throw themselves further than it should. Could anyone confirm an auto preroll in a test?
-
Here is a simple sword slash animation just for fun Sword model was thrown together so it has no details or textures Her hair has no collision so it goes through her face in the beginning... Other than that - let me know what you think Also - does anyone know if there is a way to preroll dynamic constraints? Sword_Slash.mov
-
Excellent work! I really look forward to seeing more progression in this model, keep it up
-
Looking good I think what will really make him stand out is the textures - you seem to have nailed the overall shape so far
-
Thanks for all of the great replies and feedback I've taken all of them into consideration and modified her mesh. I've cut down quite a bit on the splines and reworked some areas that I thought needed it. I've also discarded the mapped hair and used particle driven hair now. I have applied her amazonian rags and will later model her sword and shield. I've attached a new quick render of her... the lighting was a bit off and made her a little bright but it'll do for now to show a closer view. I've also created a quick walk animation. It's a bit rough but I wanted to see if she would deform properly in movement. There's no smartskin applied yet, and dont think I'll use it much at all. I've mainly used fan bones and CP weighting to get the current results. She also has a few dynamic constraints applied but they are very subtle for secondary movement. I'd appreciate any feedback On a final side question - I'd like to know if anyone knows of a way to have non-destructive mapping. for instance, say you have UV'ed a face and do some tweaks later on. Deleting splines etc. Is it some way possible to bring up the stamp with the updated mesh? or add the CPs and splines into the stamp rather than having to reflatten the mesh? Many Thanks Alexis_Walk.mov
-
Very nice work so far - I like the SSS tests you have going, it really gives it that extra 'pop' Excellent texture work as well I look forward to seeing the progression on this one
-
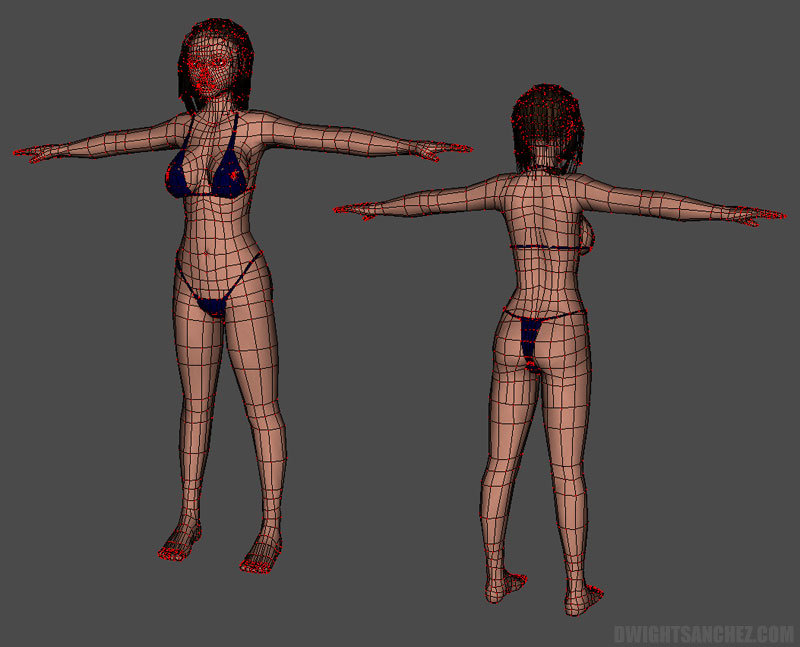
@phatso - Thanks! @jon - Thanks for commenting - She was to be stylized but I didn't intentionally make her have thick wrists etc. This was just the result that I liked. I went back to try and modify it after reading the comments about the wrists and it just didn't look right to me. So she's staying as is @PeterS - Thanks - The hair was a 6 patch plane which I UV'ed/stamped and positioned. I then cloned and styled the rest of the 'strands' to fit her hair style. @paradymx - Thanks. For the lighting, I used a 3 bulb light setup, two on her left and one on the right with a hint of reds and blue tints casting shadows. I then set on global ambience with an intensity of 100% and occlusion of 80% with 10% sampling. @the_black_mage - I've attached wires to her - the belly button was due to some reversed normals that I didn't notice, it's fixed now. @Mr. Jaqe - haha thanks! The wireframe shots are just screen caps. For some reason I couldn't render out the wires, I even took into v14 and tried... it crashed when I tried to render wireframes... so here are some dirty screens
-
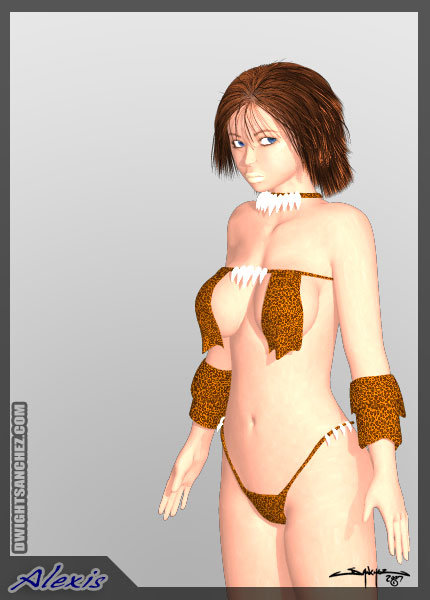
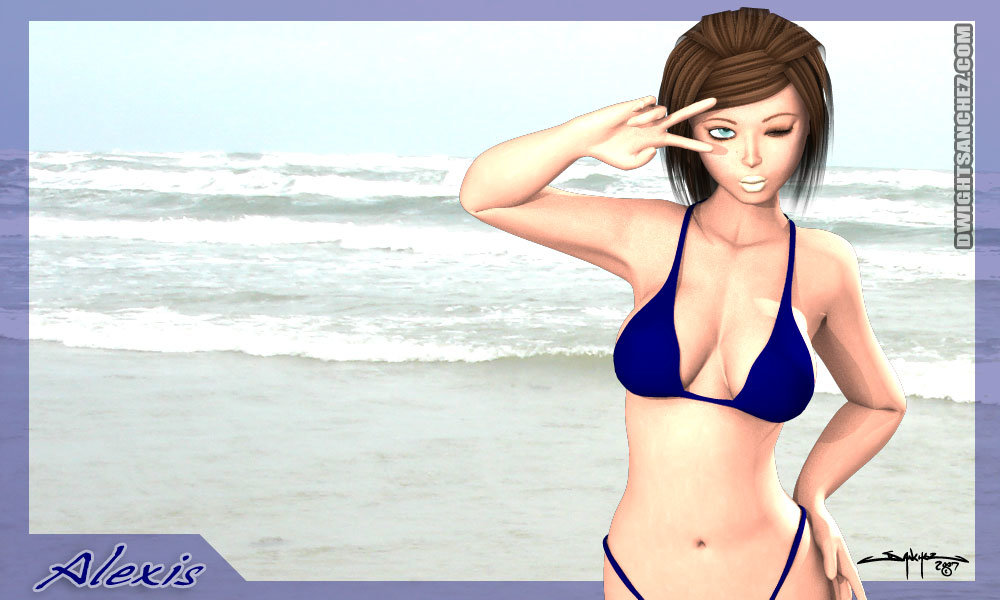
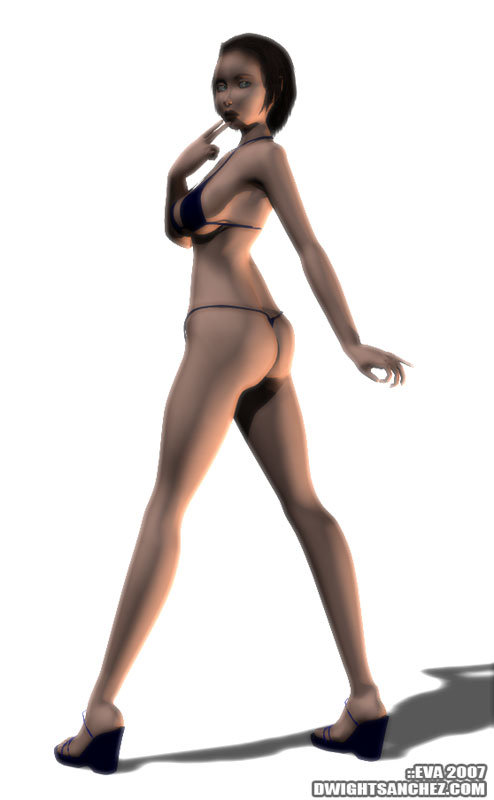
Here is my latest character named Alexis It's composited over a photograph a friend took for me of a beach, the rest is pure A:M with no touch ups Comments are most welcome - I posted this here in the wip as well as the stills because I'll be posting other poses and such in this thread so keep an eye out. *Edit - Updated with new render of fixed bellybutton - thanks for the heads up the_black_mage
-
I like where you're going with this one Reminds me of the quality of character from boondocks I do have to agree with the scale though - I would make the arms and neck a little thicker to better relate to the size of the legs
-
Thanks gschumsky I've fixed the video and it fits nicely now - link is edited in my original post
-
New work I've just finished - wasn't really sure if I considered the render a "Finished" image so I'm posting here to get a little feed back The video is a simple little dance-ish animation to test the deformation in her shoulders, I think it turned out well. Now to decide what to do with her Comments most welcome! Animation
-
Thanks aen916 New update... a quick test walking animation. It's a slightly sexy walk, a little rough but it's as much tweaking as I'd like to put into a test... just to see if she'll deform properly, and she passed I believe Thoughts are most welcome MistyWalk.mov
-
Dhar: Down boy! Thanks for the feedback and link on the CP weighting.. worked like a charm. It was a lot easier than I thought it would be. Here are some new shots of her - Fully rigged, although I haven't added any facial morphs. I'll probably unwrap and texture her next just for the fun of it. How do you like the hair? I'm also trying to decide whether or not I should keep it or use something more stylized and modeled rather than the dynamic particle based hair... Feedback welcome of course, and thanks again for the comments thus far

-
I really like the style of this character. The render also has a nice clean light setup - good work
-
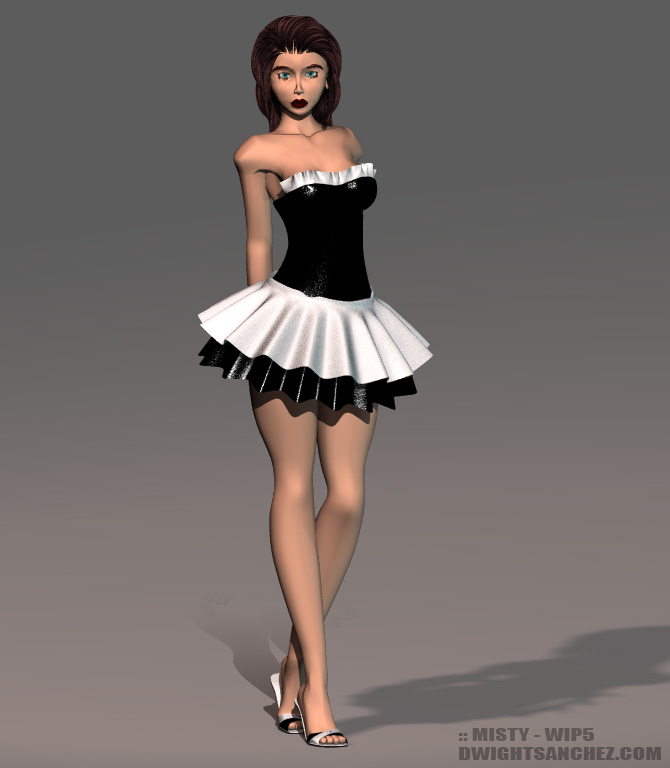
jon & steve392 : thanks , I'm glad you like her progression so far Here is the latest progress. I've finished her high heels, added a bit of tweaking on her uniform. I have also applied a simple rig to her the hair is closer to its final state, and adjusted her textures. I need to now add a bit of smart skinning to her and also fix that shoulder area thats squaring off. Speaking of which... has anyone any knowledge as to whether I can manually adjust the falloff that a bone has assigned to its cp weights? Not by using the envelopes but by selecting and say for instance telling A:M that I want these points to have 50% of this bone affected, and these others here 30% - so on and so forth. Hope you like her so far... More updates to come soon
-
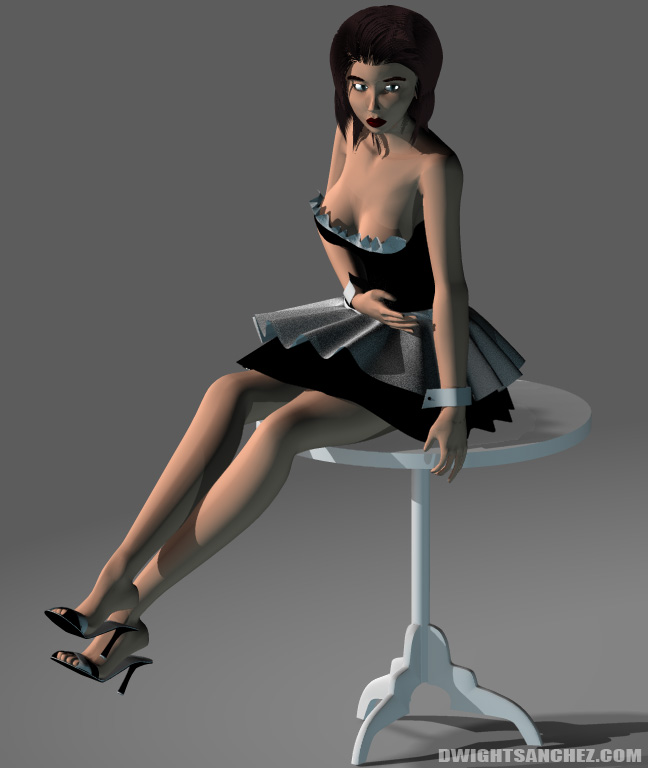
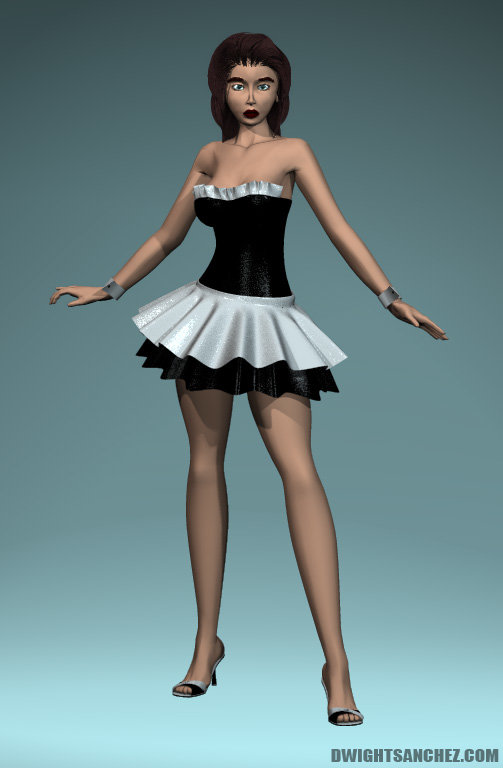
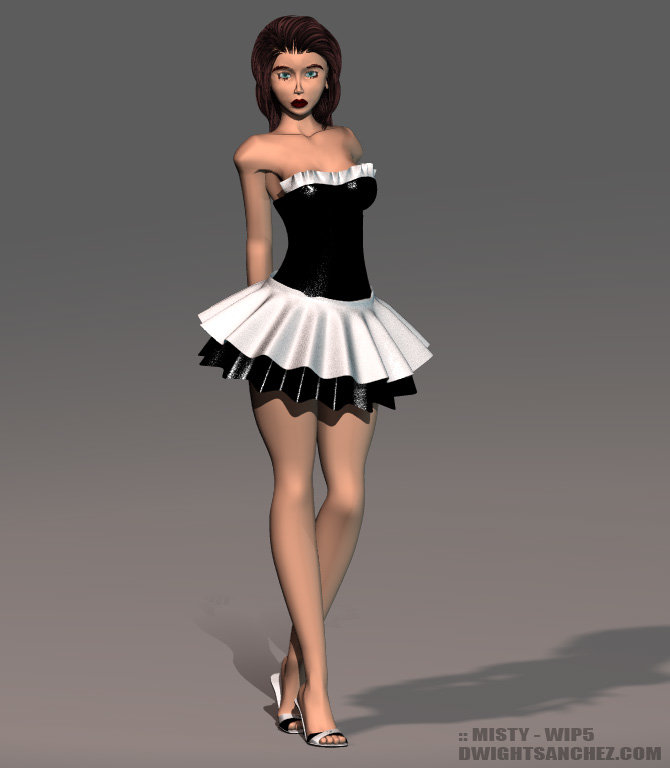
cfree68f: thanks - I've modified her calves in this new version KenH: thanks - modified that too I appreciate the feedback I modified quite a bit, remodeled some that I didn't quite like...like her feet and a lot of her topology in the face. Also reduced her bust size and did a lot more tweaking here and there. After that - began her clothes.. Here is the current status of her. Shes a maid.. well dressed up as one. A character I painted a long time ago named Misty. I have the cuffs and a collar to model, then I'll begin assigning materials and painting her. The hair is just a placement for now so that she doesn't look bald while I'm working on her, also getting a general idea of how I want it to look - as she originally had long black hair. Comments most welcome, let me hear what you think Thanks

-
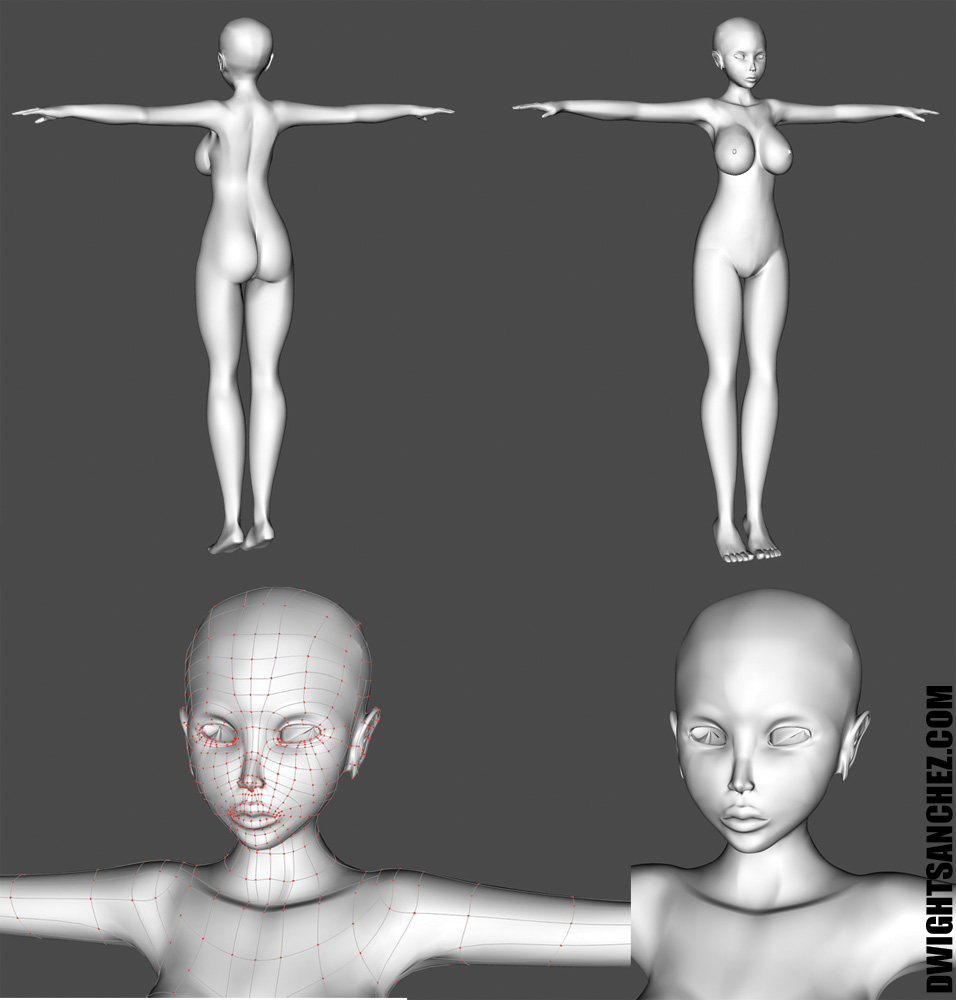
Hey there - long time no type Finally received some decent time to do my own work again and fired up A:M This is loosley based off of a character I painted some time ago. Although it is stylized I'd still like to have some feedback on my spline flow especially for the head. I think I may have too many splines? I'd like to smooth it out more and of course she will have some here and there tweaks before I add her hair and attire. Comments most welcome Thanks

-
Thanks Noah - Glad you like her I will attempt a human soon after her and the little rat guy I have going. May consult you with some tips if you dont mind
-
Thanks XTaz Shes my favorite creation... (been working on her long enough )