Emotive Images
-
Posts
21 -
Joined
-
Last visited
Emotive Images's Achievements
New User (2/10)
0
Reputation
-
New Character model - Tara
Emotive Images replied to Emotive Images's topic in Work In Progress / Sweatbox
Thanks Rich, At this stage I am keen just to develop my skills. If I can do that to a point where I feel confident to put a short together I have a few story ideas up my sleeve. I wanted to build a character from scratch and make it as good as I was able. If I can rig it well and complete a couple of character animation and lip-synching test shots to my satisfaction, then I'll take it to the next stage. I have the DESIRE to animate, but I may not have the required skills. -Mark. -
New Character model - Tara
Emotive Images replied to Emotive Images's topic in Work In Progress / Sweatbox
OK, I've started to add a few decals to my Tara model. It's slow progress I know, but I don't get a lot of time to work on her. The face just has a colour map at the moment. The eyelashes are a transparency map. The hair is still temporary and I need to add lower eyelashes and to tweak the shape of the upper lashes. Any other thoughts? Mark.
-
Looks pretty good to me. Maybe the palm could be a little more hollow shaped, but that's it. -Mark.
-
New Character model - Tara
Emotive Images replied to Emotive Images's topic in Work In Progress / Sweatbox
Finished tweaking the eyelids and tucking the top lids under the brow. I also rerouted a few splines across the cheek and up the side of the nose. There was a rather large 5 point patch sitting right on the cheekbone and causing a big flat spot. I'm quite happy with the look and the smoothness of the mesh now. Mark.
-
New Character model - Tara
Emotive Images replied to Emotive Images's topic in Work In Progress / Sweatbox
Oops, forgot to include the image. Mark.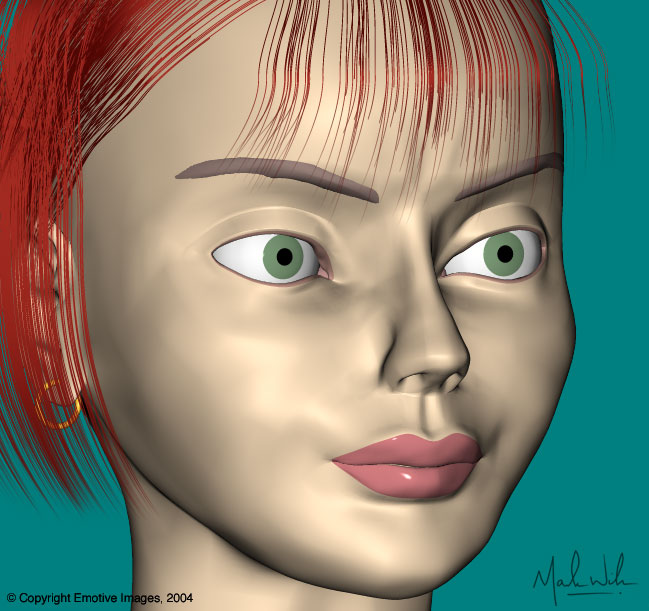
-
New Character model - Tara
Emotive Images replied to Emotive Images's topic in Work In Progress / Sweatbox
Thanks Brandon! I'll have a look at the lower lids, I've been tweaking the upper lids, ear and bridge of the nose (there was a dead end spline I wanted to get rid of). I've also added the neck and a bit of hair just to help visualise things. Mark. -
New Character model - Tara
Emotive Images replied to Emotive Images's topic in Work In Progress / Sweatbox
OK, here's the wireframe. I need to work on the eyelids, I'm still not happy with them, especially where the brow meets the upper lid. Also, the front edge of the upper lid is too rounded. Are there a few too many hooks in this model, do you think? Thanks. Mark.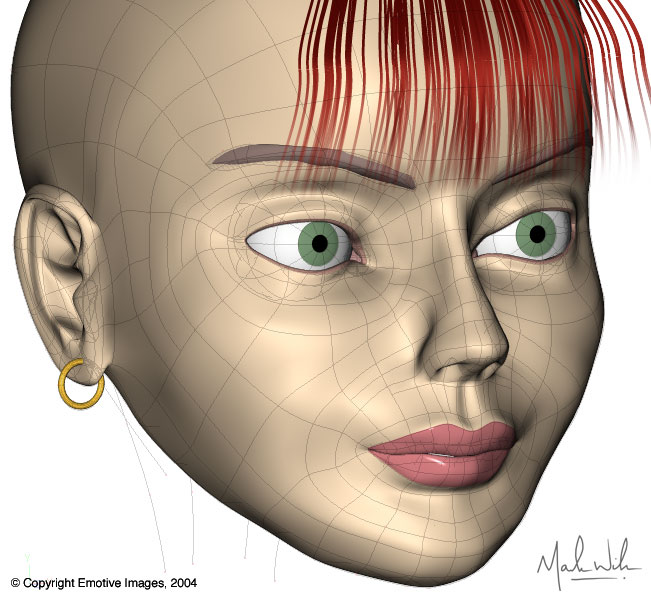
-
New Character model - Tara
Emotive Images replied to Emotive Images's topic in Work In Progress / Sweatbox
Thanks Ken / Vince. I'm sure there are loads of redundant splines in there. I'm always adding new splines to get detail, or resolve other problems that there may be other ways to get around. I'm not completely happy with the ear lobe or the lead in to the forward edge of the ear, but at least it doesn't look she's a part time boxer ;-) I'll post a wireframe this evening. Thanks. -Mark. -
Just a quick screenshot of the model I'm currently working on...Tara. I'm working in 10.5 and this is the first time I've got to a point where I'm happy with the way a character model is progressing. This is about a week's worth of evenings work. However I wanted to get some feedback from A:M veterans at this point. Where do I need to focus my attention. BTW, ignore the far side of the face, I have been wroking on smoothing out the bumps in the near side only. So, for example, the bump in the eyelid is pretty much sorted in the near side of the model. All the textures are temporary. Apart from that, don't spare my feelings! -Mark.
-
Hi Mega, I posted a reply to your question in the OT Forum.
-
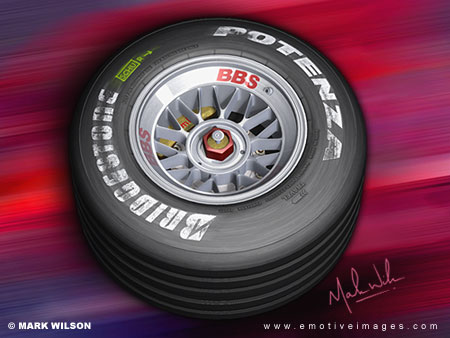
Here is an example of the Surface Toolkit in action on one of my images. The Bridgstone and Potenza logos were broken up using the images in the toolkit. The wear and rubbing on the tyre is done using it also. It just allows you to add that extra level of realism more easily. The tutorials were the really valuable part for me and clued me in to techniques and a way of approcahing texturing that I hadn't previously even considered.
-
Yes, it's a collection of images and a set of tutorials on how to use them ... not software. You have to do the creative work yourself which, of course, is the way it should be There are several Quicktime movies that show step-by-step how they used the Toolkit to make some of the images on the sample page. The Silver Top is the one that sold it for me! They used to have some free samples in the Lab section and on the page that I linked to in the last post. I think you have to sign up to get access to them, but it is free.
-
Yeah, I love 'em mucky! One of the best purchases I ever made (besides Animation:Master, of course ... oh, and not to mention the Setup Machine) was the Surface Toolkit from DVGarage. Hundereds of grunge maps and tutorials on how to get the most out of them. DVGarage - Surface Toolkit I bought my copy bundled with the colour companion when it was on special offer. It looks a tad pricey now. But it did make a huge difference to my finished products. One of those quantum leaps forward you wish would happen a lot more often I'll let you guys judge the difference, 'cos I'll be using it on this model.
-
If I could line up a Shoe-maker I'd be happy! BTW, anyone have an opinion on how I should combine the car and driver. Single model, two separate models ... or what? -Mark.
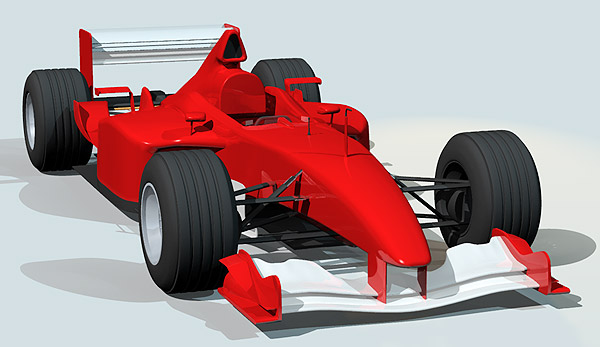
-
All these fantastic BMW models in progress reminded me that I hadn't finished my Formula 1 car model. It isn't too far away from being finished. It still needs wheel hubs and brakes, camera housings and a bit of work on the rear diffuser. Other than that, I'm quite happy with it. I will add panel lines using image maps. The driver model is close to being finished too. Can't quite get the helmet shape right. I like really dirty images ;-) so the final textures will probably reflect a car that has gone a race distance. No showroom shines for this puppy! What I would really love to do though is a wet weather shot. Puddles, reflections, rain, particle spray being thrown up from the tyres ... I'm getting giddy just visualising it!!! -Mark.