JavierP
-
Posts
191 -
Joined
-
Last visited
Content Type
Profiles
Forums
Events
Everything posted by JavierP
-
Interesting intro. Sort of reminiscent of a Zatoichi or a Toshiro Mifune film. I also like the inclusion of some authentic Aikido in the description. Should be good.
-
The Popeye forearms bother me, but I like it none-the-less. Hey ... what's wrong with Popeye forearms?! Great models Hutch. You have a very clean and appealing style.
-
Trying to get one project finished
JavierP replied to JavierP's topic in Work In Progress / Sweatbox
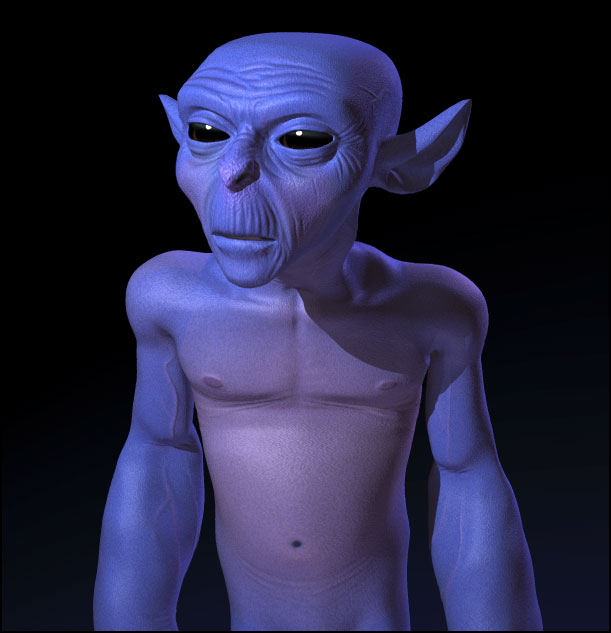
Thanks ken and David. Yes his nose was too coarse-looking for my tastes as well. I have changed that area of his bump map already. -
Trying to get one project finished
JavierP replied to JavierP's topic in Work In Progress / Sweatbox
Thanks Matt. The rim light is made by a "rim light". Its just a light placed behind the character, however, shadow casting is turned off. This only works if the light is at a glancing angle in relation to the model or the lack of shadows can become distracting. -
Trying to get one project finished
JavierP replied to JavierP's topic in Work In Progress / Sweatbox
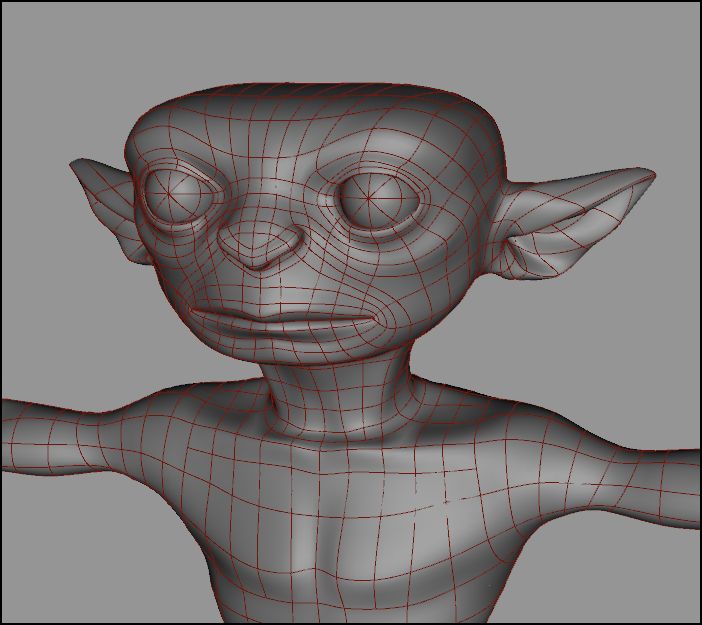
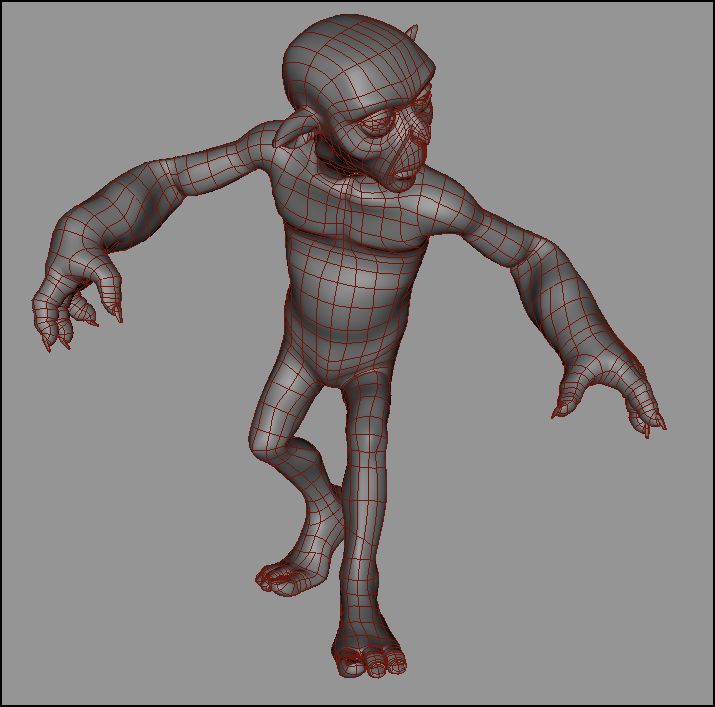
Well here's a minor update ... I'm still working on this but it has been slow going. This is the second goon to follow the shaman. Hopefully I can have him rigged and ready to go by the end of the day.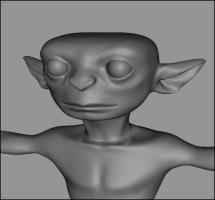
-
Trying to get one project finished
JavierP replied to JavierP's topic in Work In Progress / Sweatbox
Thanks guys. I've begun preliminary work on color and spec maps : There are still areas that need work but he is nearing completion. I need to hurry up as I still have a few more of these guys to make.
-
Nice! It looks like you're using a z-buffered bulb light ( or omni light as it is called elsewhere). The only thing that I can't see is some yellow light reflected off Thom. Still great work thought. This is definitely proof that with a little work AM can certainly do just about anything.
-
Trying to get one project finished
JavierP replied to JavierP's topic in Work In Progress / Sweatbox
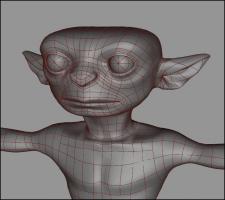
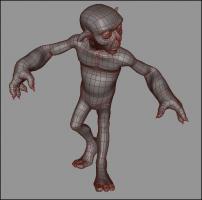
Haven't had much time to work on this, but here's a small update. I'm beginning to refine details and will soon be ready for color mapping. This is displacement mapping, although bump mapping looks the same but really doesn't render any faster in my opinion.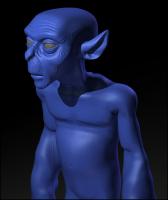
-
Trying to get one project finished
JavierP replied to JavierP's topic in Work In Progress / Sweatbox
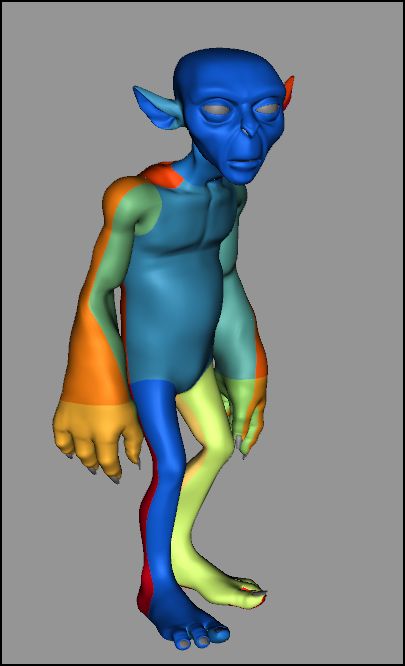
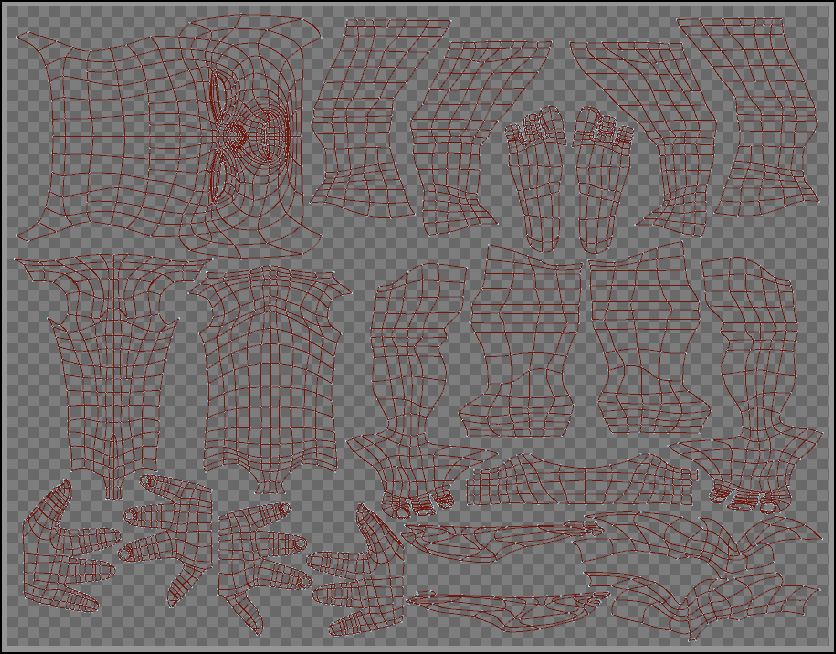
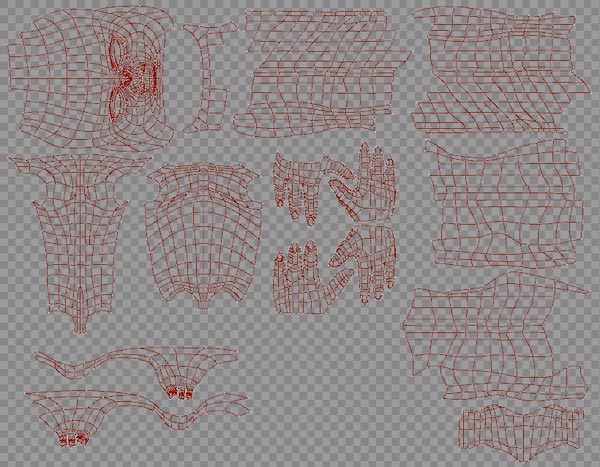
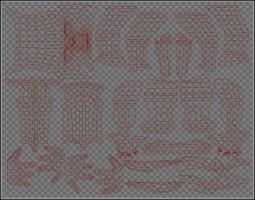
Ok, the model is fully unwrapped and textured (at least all the areas I plan to use decals on). I have not seen many tutorials on this sort of thing. William Sutton had some good info on his site, but I'm can't recall all the details of it. In my case I really am just working to find the smoothest work-flow for my own projects. What I found was that if my model is dissected into logical groups that would take advantage of the mapping methods (spherical, cylindrical,planar) it was easier for AM to unwrap the geometry without too much distortion. If you look at my previous post of the UVs you see quite a few differences with the final result. The extra step of creating groups gave me much better control of the location of seams and the unwrap patterns. This model required 22 individual groups and stamps, but I'm sure that the number of stamps will change from model to model. The actual application of stamps is fairly straightforward, I will try to distill my technique and post a step by step for you to see.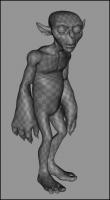

-
Trying to get one project finished
JavierP replied to JavierP's topic in Work In Progress / Sweatbox
Is this a new feature I've missed? How are you "auto-mapping" UVs? I don't think its a 'new' feature since I'm doing this with v13. I am still learning all the ins and outs of the new iterations of AM. Perhaps I'm not using the right terms, but I have found that manually flattening a model to apply decals is no longer necessary with the variety of application methods now offered (i.e. cylindrical, spherical, planar). It is fairly easy to map even a complex model with one decal to use in 3d painter (or even photoshop for that matter). AM unwraps them for you. Robcat has done some demonstrations of it lately in his 11 second club thread. My approach is different from his but the results are the same. You basically end up with an UV setup like those seen in poly apps except with a whole lot more flexibility in less than half the time of manual flattening. It is a pretty powerful feature that does not seem to get much attention.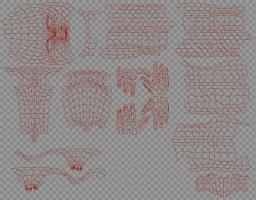
-
Trying to get one project finished
JavierP replied to JavierP's topic in Work In Progress / Sweatbox
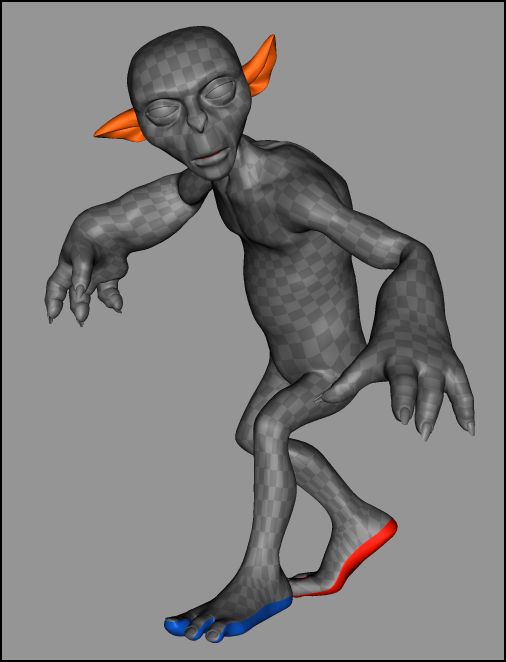
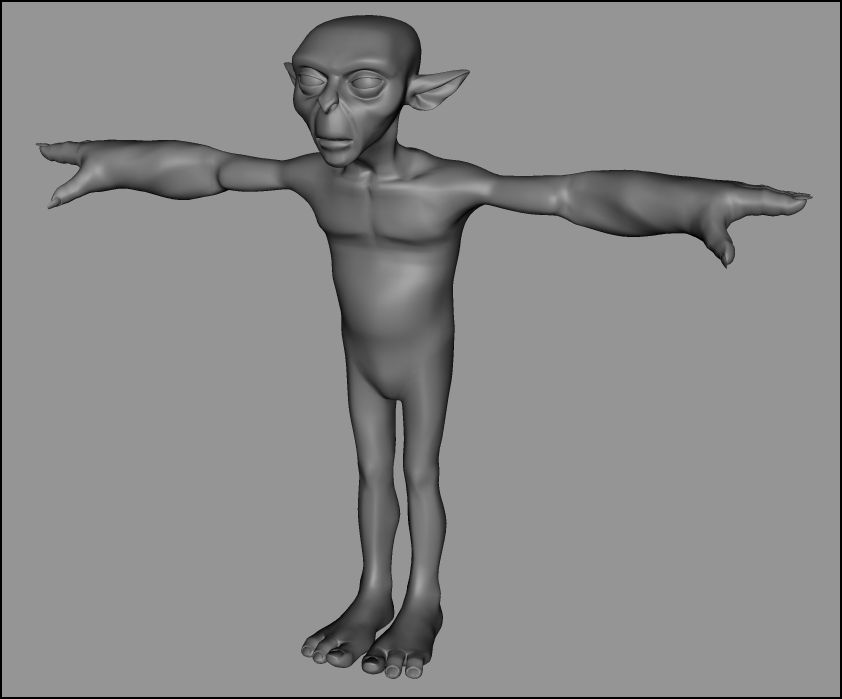
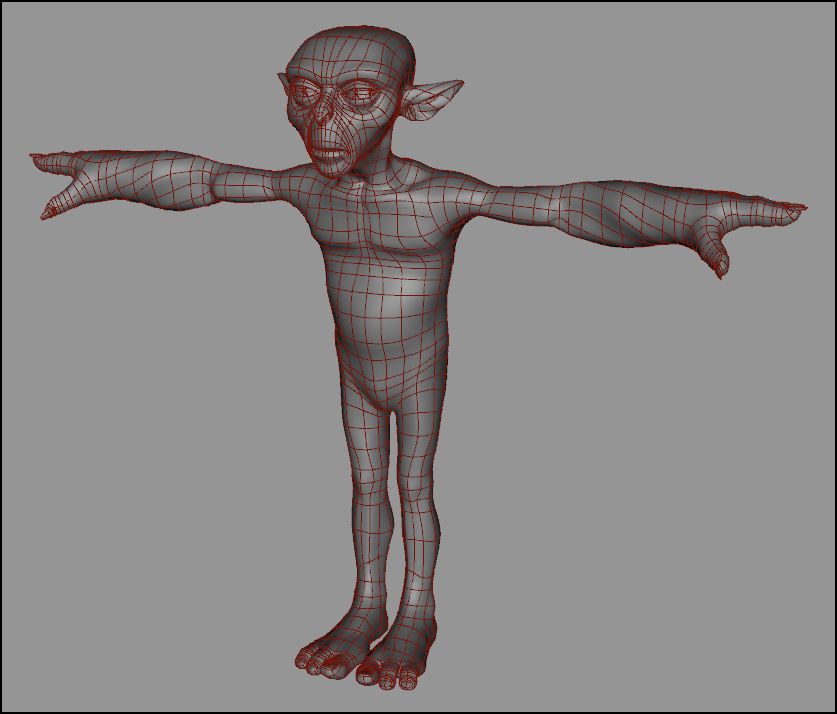
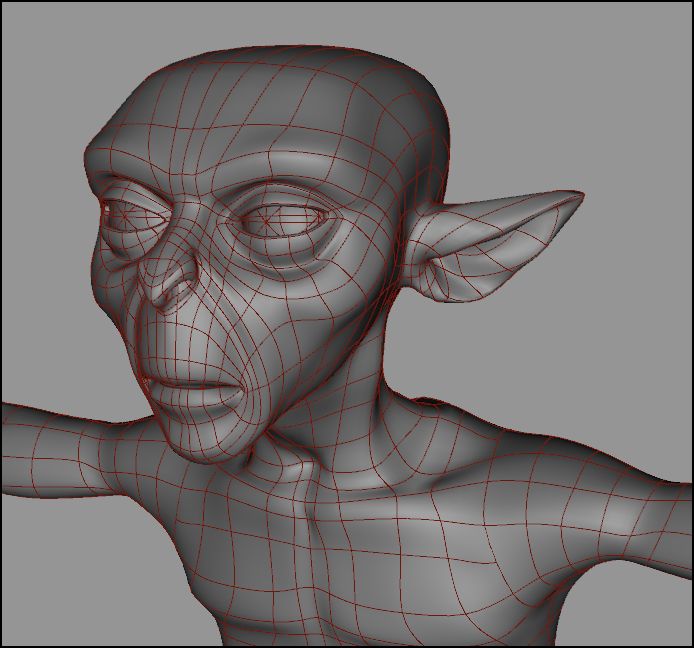
I managed to get some more work done on this project. UV mapping on the first character is almost finished. I'm just having a little trouble with the ears and the soles of his feet. I may have to flatten them manually instead of using the auto mapping in AM. Also working on a second goon for the orc leader. its on to paint as soon as he is fully mapped just fleshing out the face still. I may just modify the body of the first goon and attach it to his head ...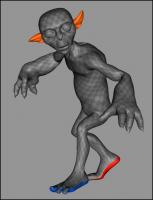

-
Trying to get one project finished
JavierP replied to JavierP's topic in Work In Progress / Sweatbox
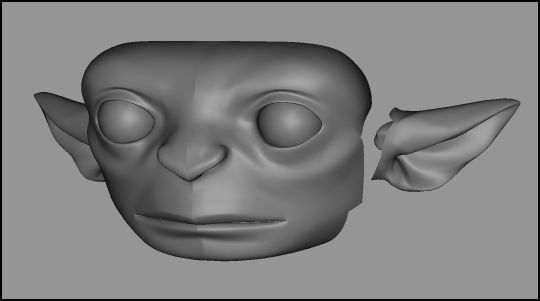
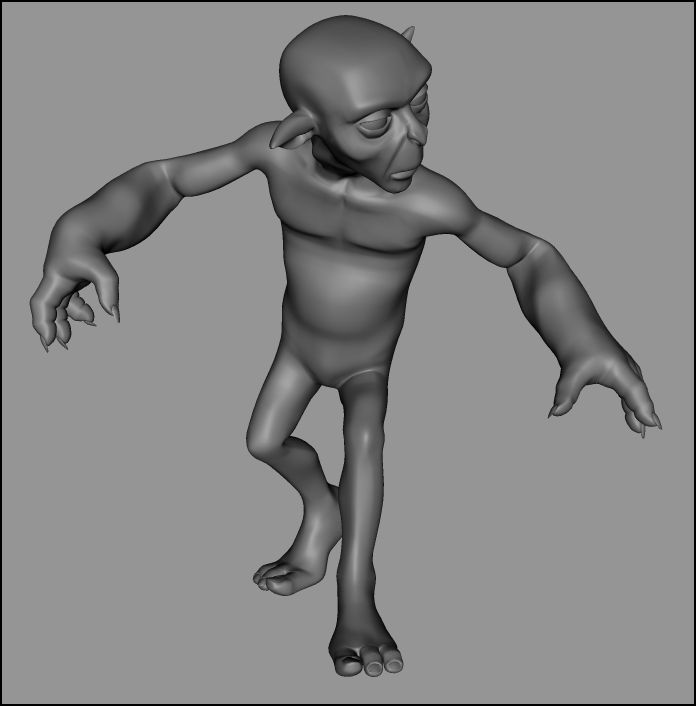
Here's a goon to follow the orc shaman. Its a model based on the original shaman model, but there are specific differences in the face layout and the layout of the torso. They will look similar because they are of the same race naturally, but I only re-used a portion of the original model. More to come ...

-
Trying to get one project finished
JavierP replied to JavierP's topic in Work In Progress / Sweatbox
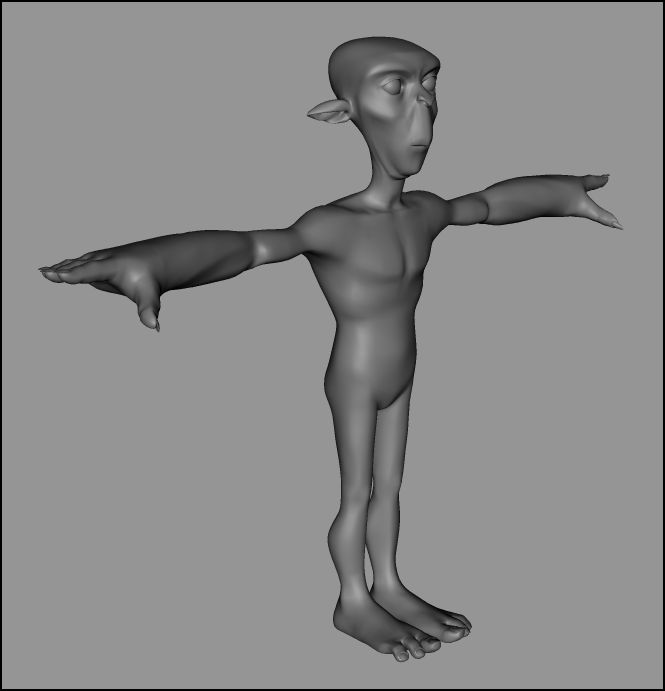
Thanks guys. Unfortunately I can't enter this model in the contest. I had another model I intended to enter but could not finish in time. Actually that's sort of why I started this thread. Here are some pics of the other model. Since I won't enter, I guess I can show it. Still plenty to do, rigging, textures, clothsim etc... Good luck to all those who entered. Maybe I'll submit something next year ...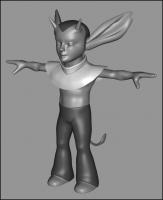

-
Trying to get one project finished
JavierP replied to JavierP's topic in Work In Progress / Sweatbox
Hey thanks! I was worried about the arms for deformation when posing but they seem to work ok. Up next is texturing. I will be using 3d painter.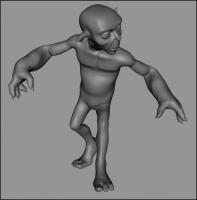
-
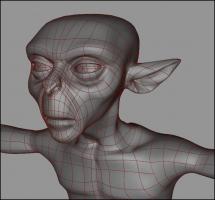
Hi, I've been planning to complete several projects in AM but I can't seem to get things rolling at a good pace. So I figured that if I post some WIPs I might be spurred along by the forum and eventually complete something. I usually have a few things going on at once so its a little difficult to concentrate on one project through to completion. I will try to change that for the new year. Hopefully I can find some success by doing this. The project I'm currently working on is fairly complex with numerous characters and a very detailed background with lots of action. It will be a still. I am doing this only for my own amusement, especially since it would probably be easier for me to just paint the image. The first model is of an orc chieftain or shaman. I still have to add accessories. and a closeup of the face, Hopefully I can keep this going till its done.


-
You know there is a way to have z-buffered shadows with a sun light. It's not 100% physically accurate or automatic but it works. Actually, let me make sure it still works ... then I'll post an explanation.
-
Here is the prj file: smoke_column.prj Made in version 13. It's structure is a bit messy as far as my project files go, but it was a sort of a rushed example. One thing to keep in mind is that I created it with no real application in mind other than the smoke image itself. Serious planning in advance (i.e. camera angles, duration of shot, lighting etc.) would be required to make any kind of useful effect. Hope it shines some light on the answers you are looking for. Javier
-
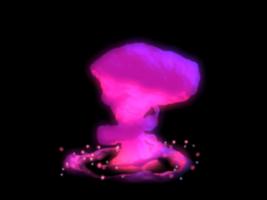
Here is a quick motion test without particles. Certainly rough, but with some time the desired timing and overall effect of the plume could be perfected. Hope this helps. smoke_motion.mov
-
Sorry I wasn't a bit more clear. The image I posted was just a quick test I made to approximate the example you posted. I haven't animated it yet, and I don't have any of the tests I originally did, but it is a fairly straight-forward process. Animation would be done with muscle mode transformations of the mesh, or a few bones applied to the mesh to control the scale, rotation etc. The timing would be a little tricky to set up, especially for the transformation of the materials, but with a little forethought, it could be accomplished. I'll see if I can make a quick and dirty example to show.
-
Hi, I have not posted on this forum in a while, but your question reminded me of some tests I had done a long time ago. The effect you want can be achieved, but it would take a bit of work to animate it properly. Nothing really fancy, just a model with materials controlling displacement, color and transparency. The addition of streak particle emitters and a little blurring finishes the effect. It would probably be better to render the smoke separately and then composite to really control the softness. Hope this helps.
-
Having Problems with Copy/Flip/Attach
JavierP replied to Noganite's topic in Work In Progress / Sweatbox
Ok I dont understand what you are talking about with this mesh thing so, uhm, anyhow, here are a few views of what I am doing in addition to trying the setting the X to 0 thing. Ok what you see is the plane half then a front view and a left view. Next is changing the X to zero before and after pics. Your problems stem from the fact that you have patches connecting the top and bottom of your center spline. Break the connecting splines, so that the center of the plane will be "hollow" when it is Copy/Flip/Attached. It should work correctly. Hope this idea helps. Javier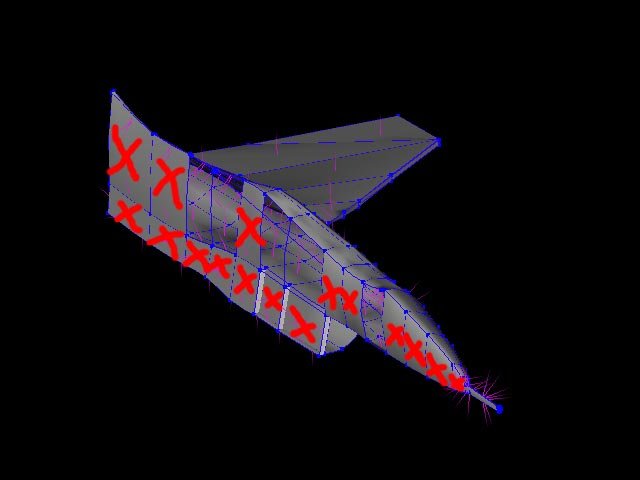
-
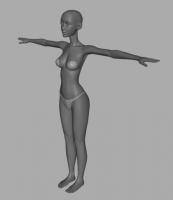
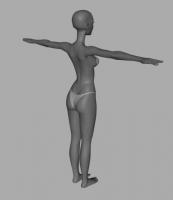
Funny, that's the scupture I was thinking of when I made her. That bust really is a masterpiece. Javier
-
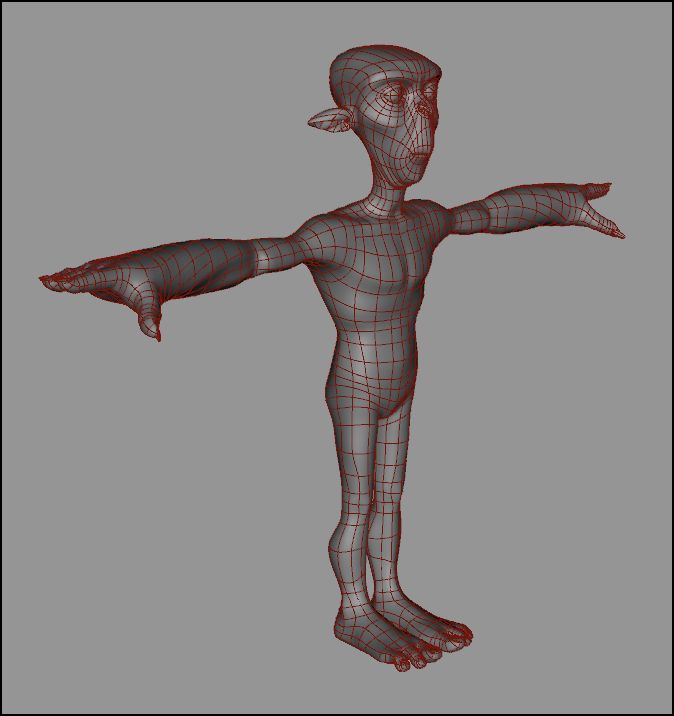
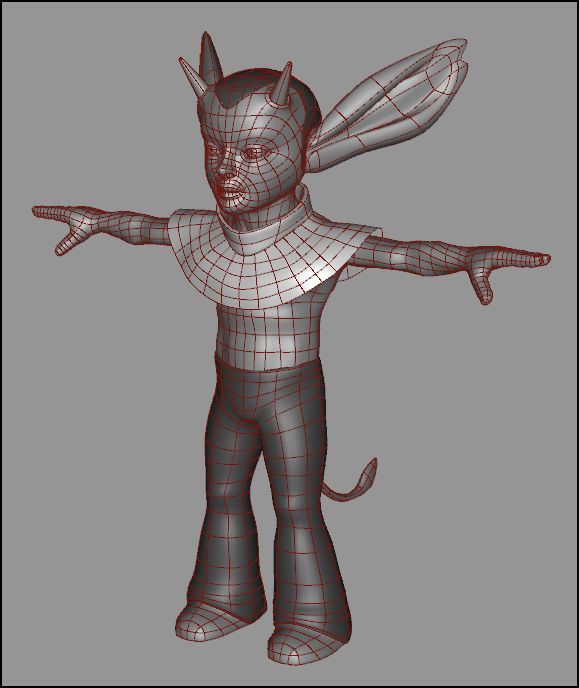
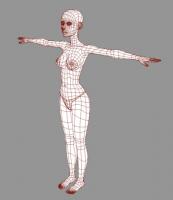
Hey Rodney, Yeah I kinda had to duck out there for a minute to handle so things in the "real" world, but I'm getting back on track now. I'm tring to get back into the grove. I think I'll have to uprade finally to v12 or 13, or whatever the new one is now . I'll send the model right over. Is there any particular e-mail address you prefer that I use? Javier Here are some wireframes, for anyone that's interested. [attachmentid=12919][attachmentid=12920]

-
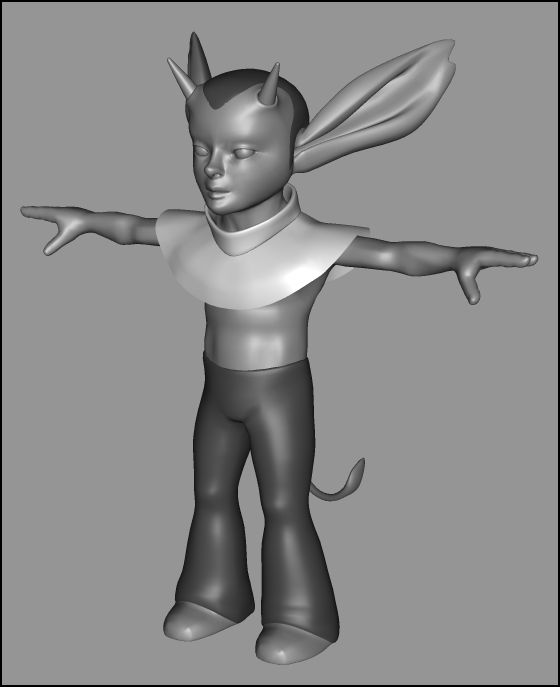
Hey Rodney So I wonder if you even remember this little projet. You probably already have your own version done by now anyway, but I thought I'd throw mine out there. She's not finished, mind you, but I haven't had time to work on this kind of thing in a looong time. So here you go: [attachmentid=12908][attachmentid=12909] Maybe you can finish up the bits and pieces (armor, rocket boots etc.)Let me know what you think, and I'll mail the .mdl to you. Javier
-
No luck getting there. The page supposedly is missing, so I tried to find in on the site...still no luck. Anywhere else we can catch it (no pun intended)? I took that clip down already. If you reeeally want to see it I can put it back up, but otherwise, I don't think I'll put it back up. Javier