GDblEK
-
Posts
12 -
Joined
-
Last visited
GDblEK's Achievements
New User (2/10)
0
Reputation
-
That model looks good, also looks familiar... ImagineFX?
-
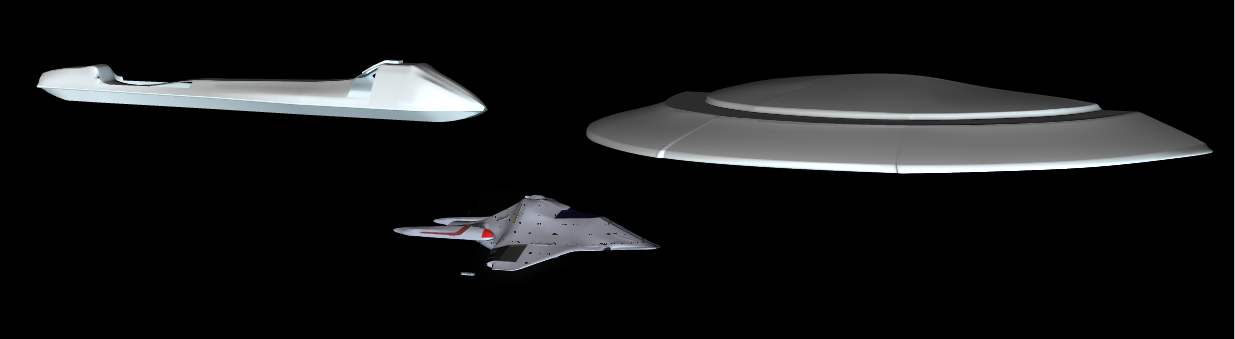
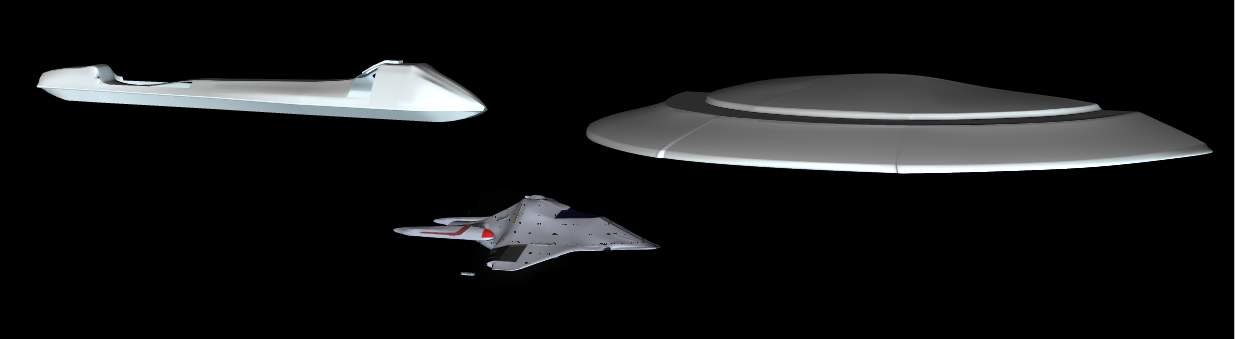
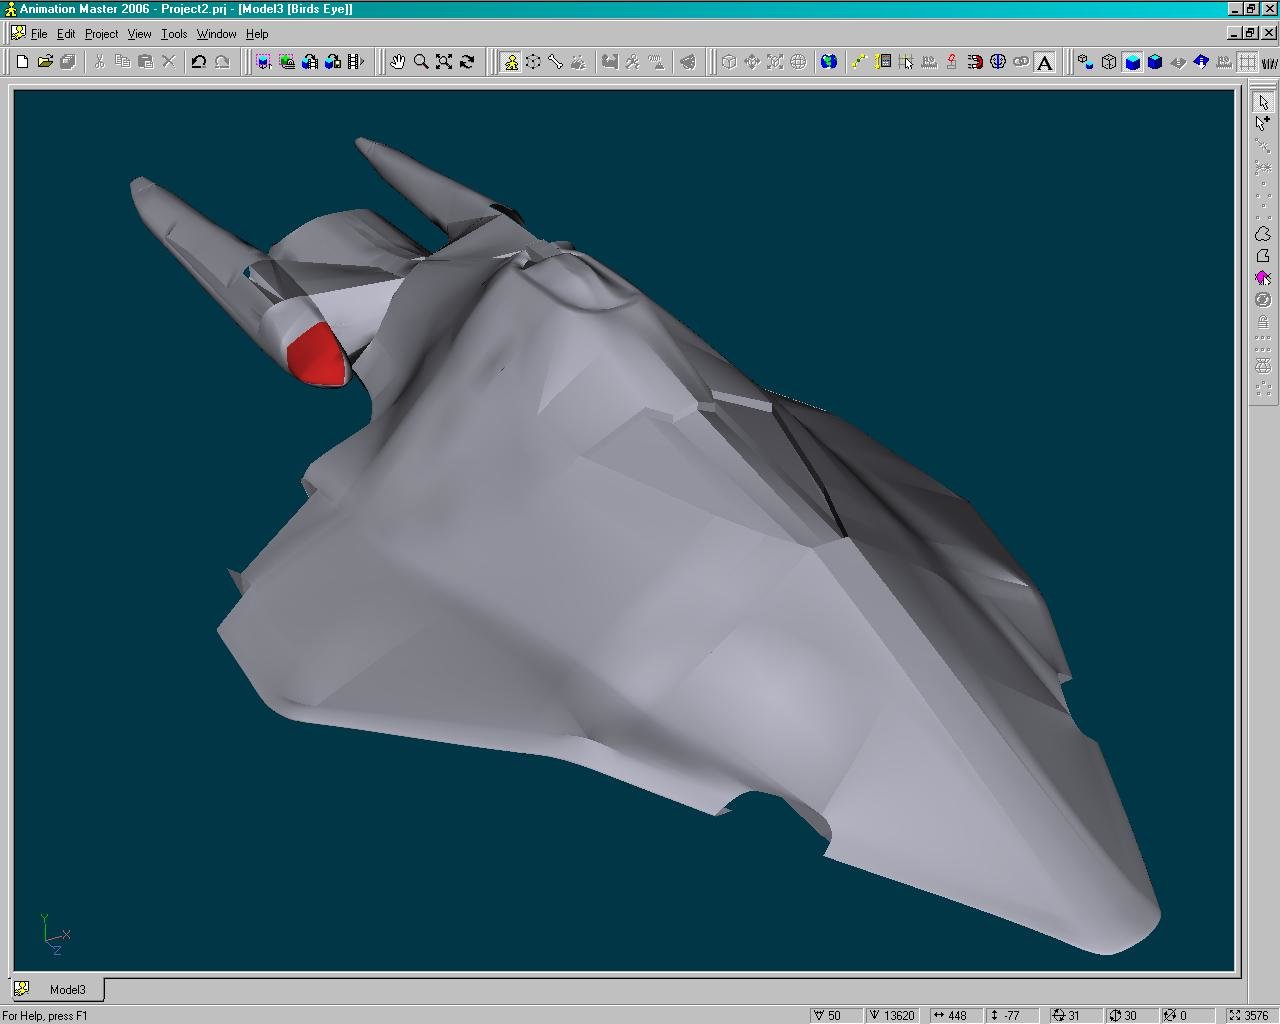
Having taken more of the advice to heart, I worked on just half the model, then did the copy/flip/attach option. I've also started on another piece of my vision and started modeling the Ent E. I've not gotten to far with that, but some of the detail can be seen. And here is the two models put into a simple choreography. To answer the question about how I came up with the design, I took the Dauntless from the Voyager series, kind of melded it with Voyager, put some touches from the Delta Flyer on and came up with this. There are some streches, as the engine are more common Star Trek engines.

-
I must say, like everyone else here, most excellent piece. I personally can hope to aspire to this level of detail and realism. This forum seems to have been inspirational for you and giving you some driving force to move this project farther along.
-
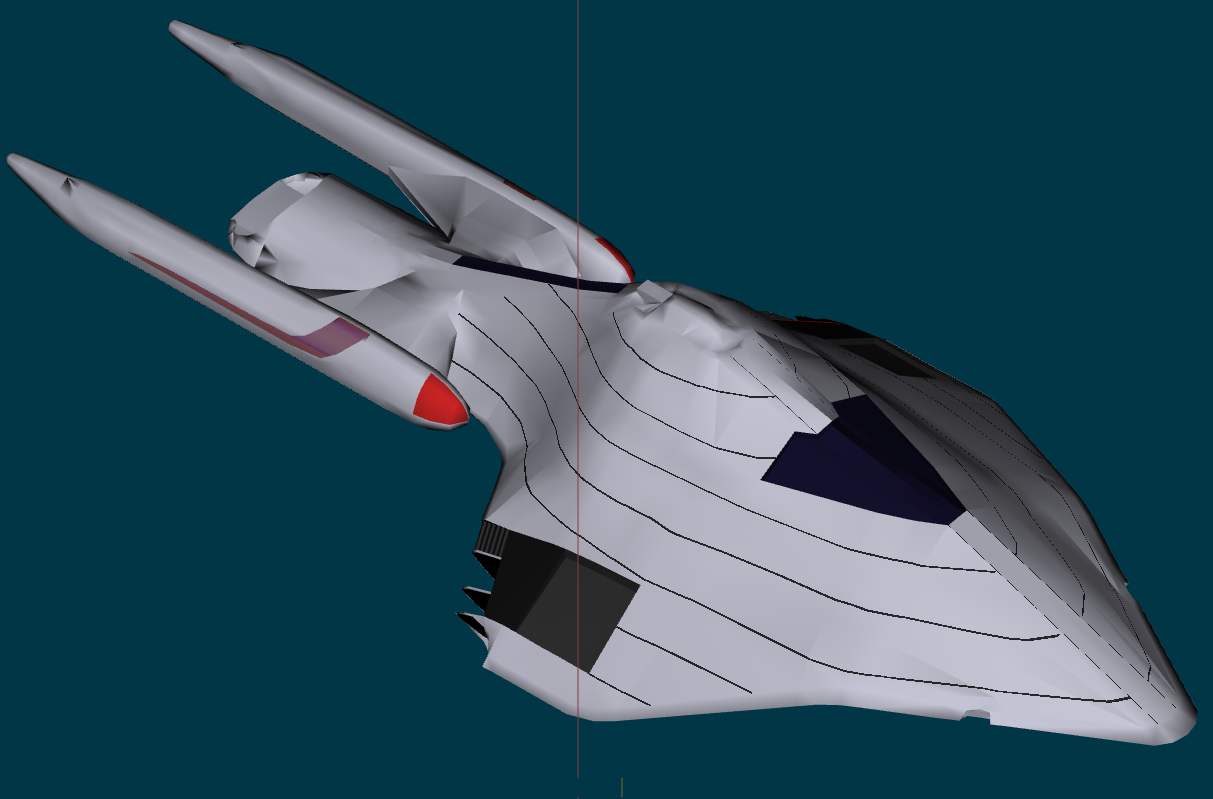
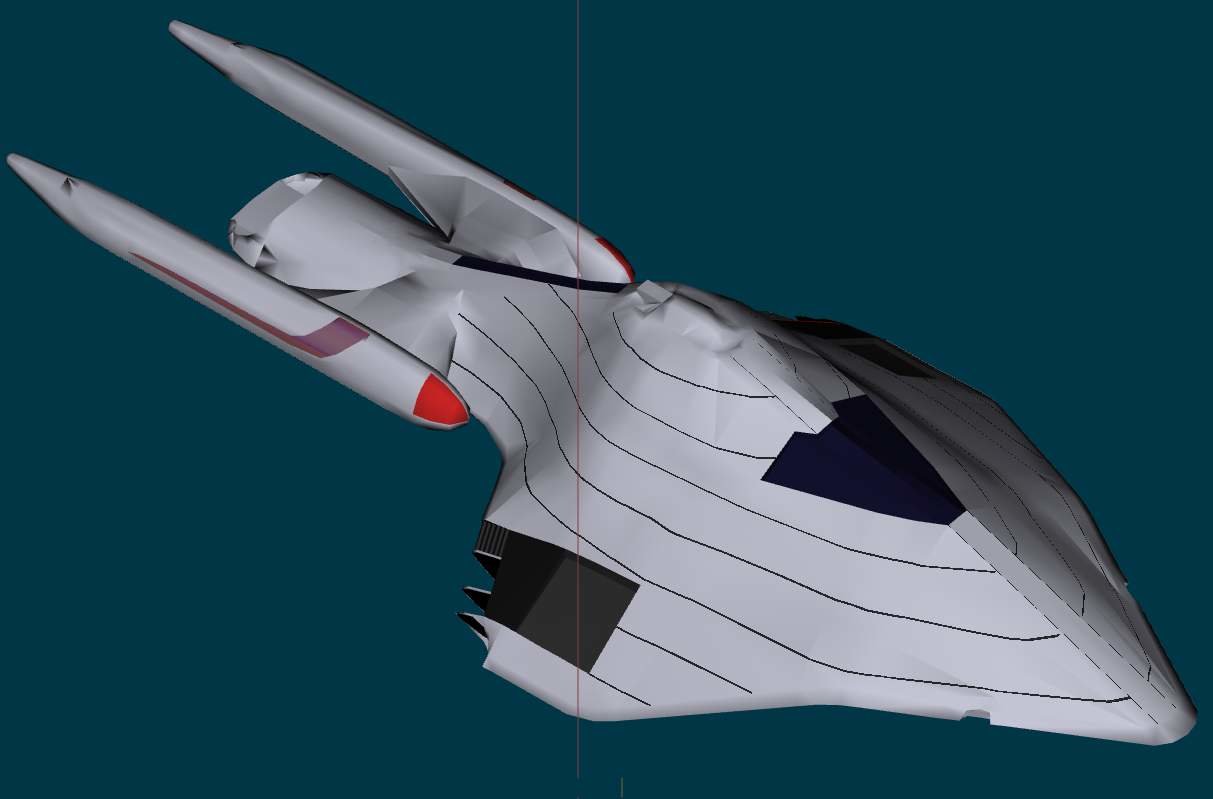
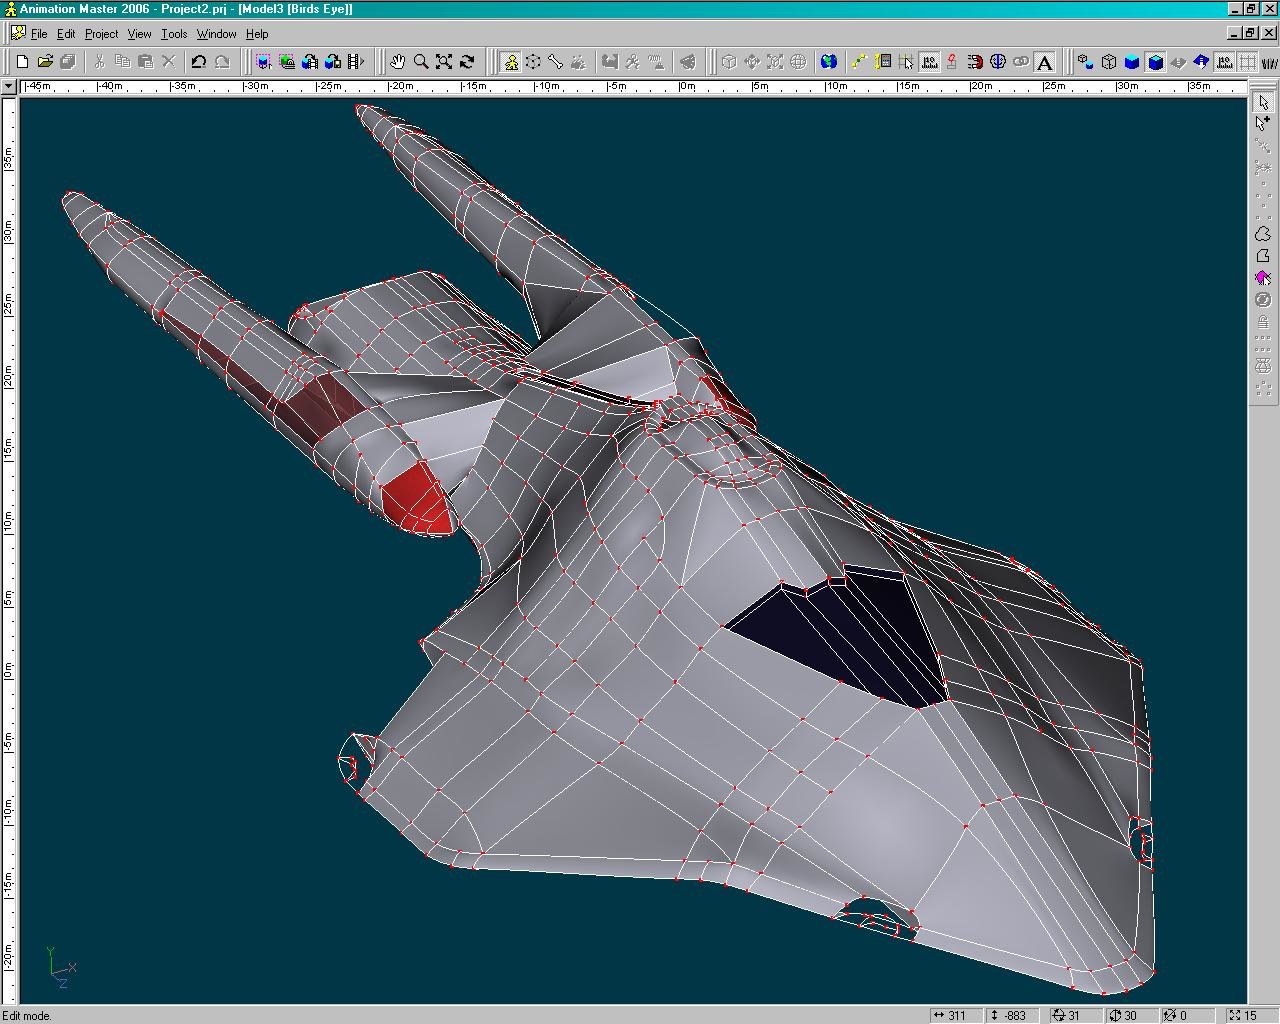
Having take the advice, I have made modifications that are cleaning up the exterior. I am working towards getting the model more complete with the details before I see about doing more modifications to the model itself. I've been looking at the other startship models that have been posted to see what I could use to help improve my work. I think one of the big things was to change the nacel to an extruded model vice hand drawing/placement. It does appear to be a smoother fit. I have tried to put a glow stick inside the nacels to get the engine field glow, but little success. I guess it is something I'm going to have to do more research on. I have started to use decals to see if I can get them to work. The first set is the deck dividers, which adds some definition. I'm going to see about adding more decals from star trek models I have lieing around.
-
I've been kinda looking around, and I found this thread. I too am a trekie, though not as deep as some, but deeper than others. I have been working on my own ship design too, though I don't think you'll be able to use it on this project, being the design is too new (post voyager). Your links about the skins maybe helpful in getting a more 'realistic' appearance, and from what you've posted here, you may be a better source. I first posted this under glutton for punishment. I've been able to apply some of the feedback to clean this up. I tried to link to your site that was posted earlier in this thread, but got a 404. Could it have been down?
-
I had kinda of noticed that dead ending a line into a patch had a tendancy to cause a point or ripple. As to using a hook, I shall look that up and see about using it to clean this model up. Thank you for the help and advice.
-
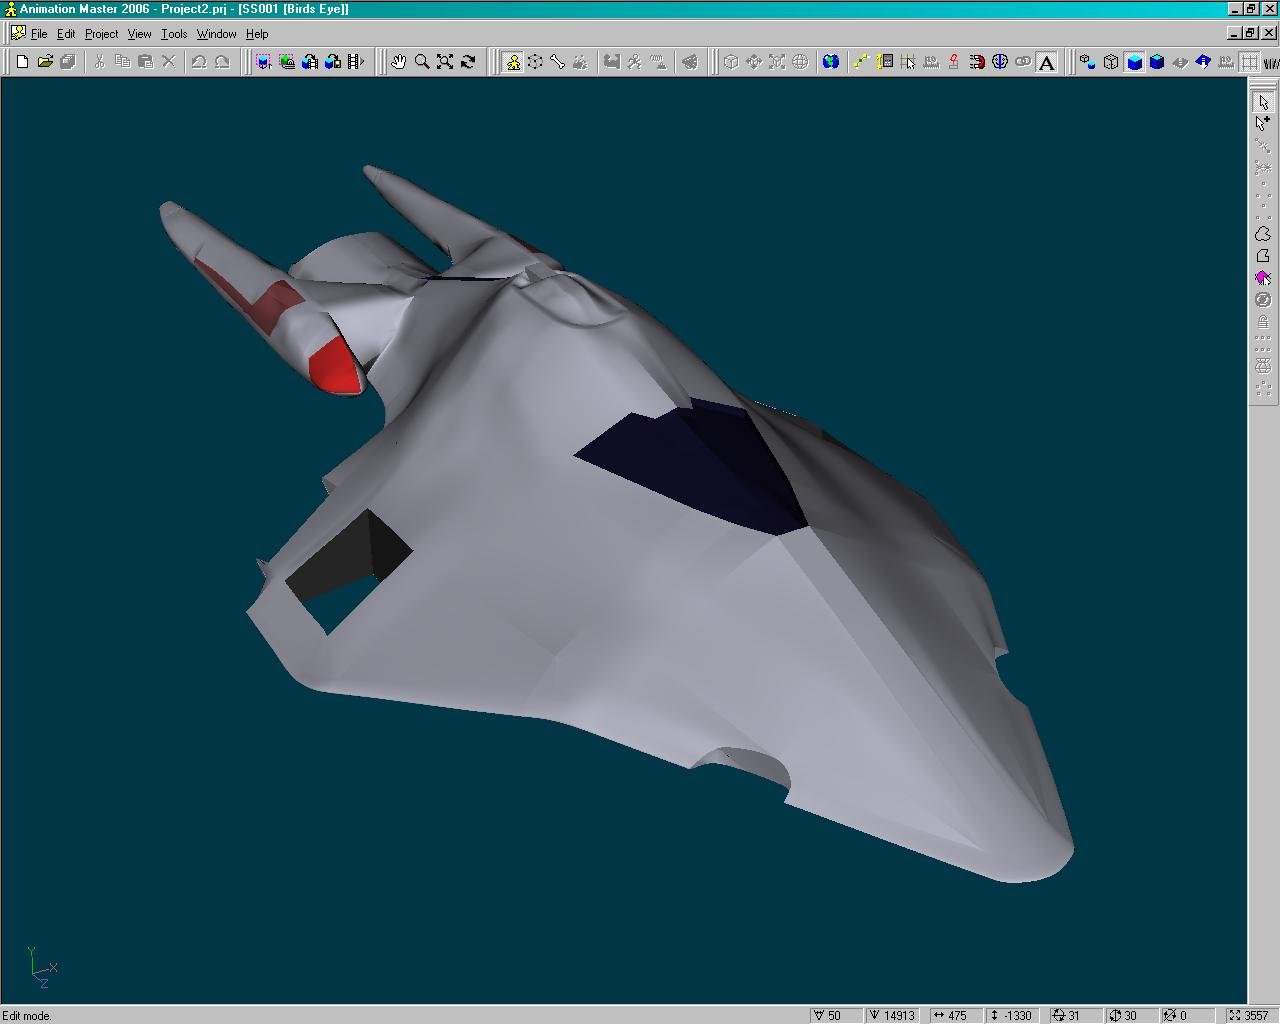
Here is the shaded wire frame of the project. Some of the 'ridges' are areas I think could use additional patching, due to the model size (150m.) Being this is the first time really trying to get a model like this built, I am making guesses, some WAG's and some SWAG's. I do have some understanding of modeling, but I am learning the capability of this program as I go. I am anticipating that a good level of detail will be beneficial, as I plan on getting some close ups of the model in fly-bys.
-
Hello, I too am new to using A:M. I've been reading about animation for some time, and recently started reading 3D World regularly as I've been feeling the urge to get back to my artistic side. I've read in their reviews that A:M is a good program for its price and that some of the professionals that use the higher end programs at work use this at home. So I finally bought a copy in December. I've gone through the first few exercises and skipped straight to the modeling section. I am hoping to learn to use this program to its full potential, and maybe a bit beyond...
-
Hello, I know the title may seem odd, but I think you'll get the joke by the time I finish this post. Being hard-headed and a bit stubborn, I decided to jump ahead in the curriculm and get the modeling basic of the program down so that I could start building the model I wanted. I have gone through the first three lessons, and skipped straight to models. I read through the plane one, then used what I read to start inputing my own model. Here it is todate: Minus a transparent pane on the visible side near the rear. I think the level of detail will need to buffed up, as this only has about 910 patches. From what I've been reading on high detail models that have on the order of tens of thousands. I am finding it a better learning experience for myself, if I work on what I want to and when I get to a point where I go, doesn't the program do this and I go look and learn how to apply it quickly. This is not something I would recommend for others, as I have spent a lot of time playing with the program. This is why I say I'm glutten for punishment, but I'm really like-ing how this is starting to look. comments?
-
I believe I fall into this catagory, being I am new to using AM. I believe I have the 2007 CD, but not absolute being I bought it late last December. It does have TWO chars on the face, and if I read correctly that signifies having the 07 CD. I would like to be in the next raffle.