

kinsman
-
Posts
22 -
Joined
-
Last visited
kinsman's Achievements
New User (2/10)
0
Reputation
-
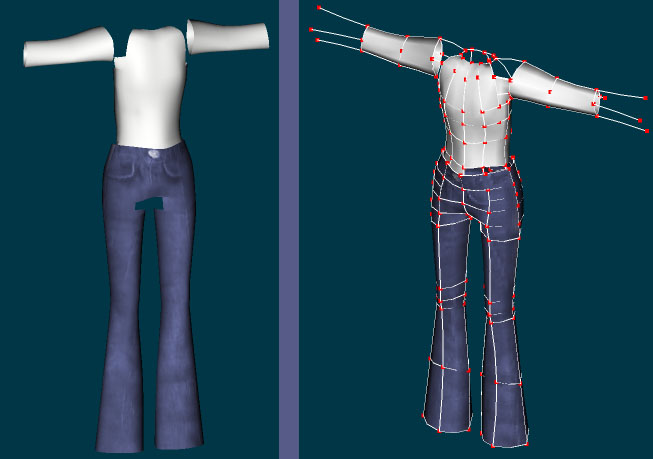
Progress is off and on, and rather slow, so I'm posting just to show how things are coming. Ross, for the face, I'm thinking of making the expressions 2D - drawn on the face as a texture. When I was trying to decide, it was a toss up - I knew that I didn't have enough experience yet to make a good, malleable 3D face with only bones, but I was worried that a textured face would be considered backwards as far as technology went. Then I saw that there were PS2 game like 'Suikoden' and 'Dragon Quarter' that had 2D faces - mostly for cartoony characters - and that made the decision a bit easier. Also, I decided there was still room for textured faces to improve. Most of the animations on a textured face are minimally animated - eyes blinking, maybe 2 or 3 frames for the mouth opening and closing. I figured that I could keep up with the "eye candy curve" by designing a face with thorough, 20 frame-per-second animation - you'll see more later on. Question for the audience - Beth's jacket here 'grows out' of the body about halfway down the torso. I did that to save patches, and I figure that texturing will cover for the details. Does it look OK to you all, or should I go back and spend some more patches on a fully-made jacket?
-
Well, making a game nowadays is easier than it used to be - there's a lot of game engines out there, free, cheap, and expensive. I picked GLScene, which lets me program in my favourite language (Pascal), is low level enough that I can muck around with the structure of my models, and is free under the Mozilla Public License. It's not for a company - I'm going to sell it myself as shareware. There's a few sites on the Internet that make it easy to sell your own software, like RegNow or BMT Micro or Share It - or if you want something fancier, CafePress lets you print your own CDs. And yeah, it is going to be a time consuming project, on the order of months and months.. Makes me wish I could find some extra artists or programmers, because I know it's a killer idea.. -Sean Givan
-
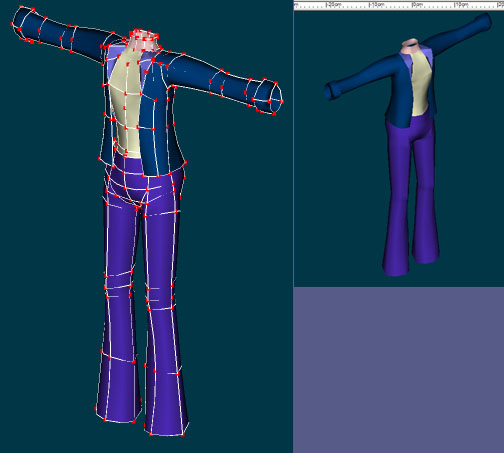
Here's my progress after two modelling sessions of about an hour or so each. -Sean Givan
-
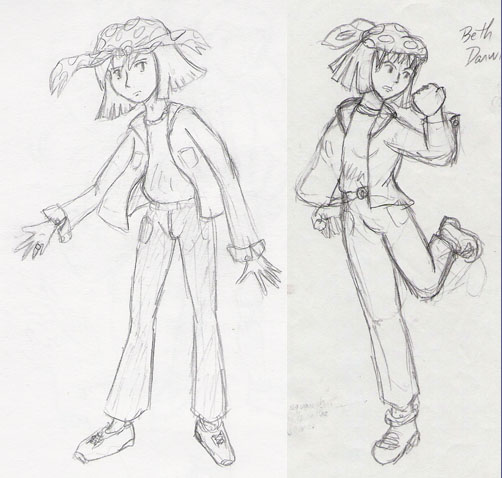
I'm starting some modelling work for a game I'm working on. This is Beth Darwin, a girl in her early teens. The model is going to be used in real time, so I have to keep an eye on patch count - I plan to export it as a PLY at detail level '4' (8 polys/patch) and use my own converter to get it to SMD format (a nice, easy to understand format that Half-Life uses.) Here's the character design - these pictures were drawn at two different times, and yes, there are some differences: -Sean Givan
-
It looks great, but the page really needs thumbnails - loading all those images as scaled full-size pictures is making my computer slow down and my hard drive thrash. -Sean Givan
-
What Star Wars would be like if it was directed by Paul Verhoeven Amateur CG films always rock. -Sean Givan
-
The patch on his shoulder's just a left-over porcelain flaw. I'm on it. A tail? Ummm.. no. If you look carefully, you'll see that I removed the horns on his head and put them on the wingtips. I have a clear idea of what I want to make.
-
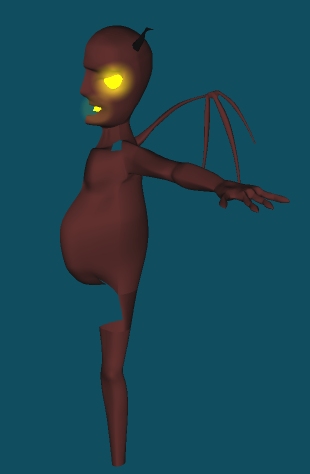
Okay.. added a shoulder bone, a neck bone, and added some smartskin in various other trouble spots. Also removed that U-shaped spline rising up the hip, since it was interfering with waist twists. Smartskin turned out pretty heavy in the hip area, due to the wierdness of how the legs stuck out of the bulb-shaped lower torso. Also, tried out porcelain on the figure - and was pleased with the results, so I'm going to keep it for this model. Here's a mild-mannered pose, just to demonstrate the changes. Still a few patches that I have to flip normals on, and on the right arm in the wrist area, too many hooks are confusing the porcelain shader.
-
And after some basic pose tests, I see I have to go back and rework the joint areas. He's folding in an unflattering way here.. -Sean Givan
-
Here's his wireframe..

-
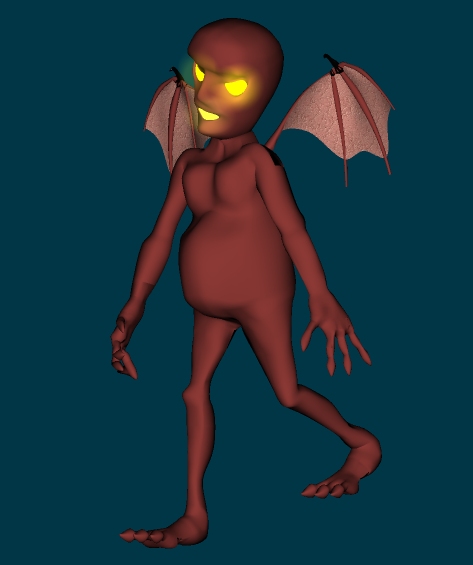
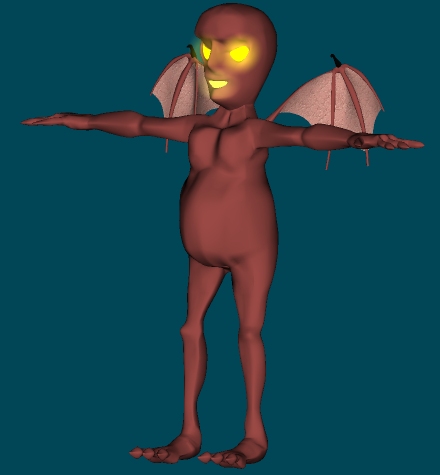
Gazzmatazz, I meant the modelling of the wing fronds. There were four 4-CP cylinders meeting in one place, and I had to use a fair number of hooks, 5ps, and spline rerouting to get it smooth. Grubber, Yes, he's meant to be a funny character, and you're right about the legs. Here's what I've got right now.. he's got a bone setup, so the next step is to figure out what textures would look good on him.
-
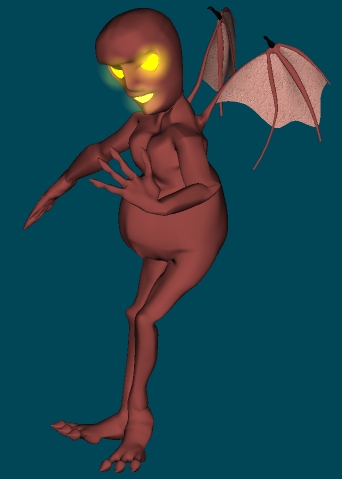
This is meant to be a little demonic imp that flaps around and acts as a mascot for another as-yet-unmodelled character. The funny thing is that I just recently had some new insight into the A:M modelling process. Tonight I took this partially done model, that had been sitting on my hard drive for a few months, and added the wings and legs - and the bat wing skeleton is probably the most complex splinesmanship I've done in A:M. I managed it in about twice my usual modelling speed -Sean Givan
-
Old, but not often repeated, advice....
kinsman replied to Dearmad's topic in Work In Progress / Sweatbox
[Takes the conch..] This is probably only for serious newbies, but it took me a while to realize: There's different ways to model a figure or object, but the best method I've found is.. 1) Draw a front outline and side outline. 2) Draw some additional guide lines hanging in space for, say, the eye hole, or the cheek bone. 3) Pick some points and extrude. After each extrusion, shape the curve to match your view of what the figure should look like. 3a) You don't necessarily have to connect to the floating guide lines you've made. In fact, it might be better to just let them float, line up the extruded curve with them, then extrude on by. 3b) Have a little thought for the end part of the modelling when everything needs to be connected together; for instance, if the upper half of the face has a sheet of patches 5 extrusions wide, try to make the lower half of the face 5 extrusions wide. 3c) Circular holes or circular-tipped areas like eyeholes, or breasts should extrude outwards; For anything else, extrude across as a sheet. 4) Do this until about 90% of the figure is made up out of your extruded sheets, then do basic splinesmanship (the hooks and 5 point patches) to connect things together. Your model should be clean, smooth, and logical. Bonus Tip: Copy/Flip/Attach early, Copy/Flip/Attach often. Save often if CFA'ing a lot seems to destabilize A:M; it's worth it to catch problems early, like finding out your face is too wide, or your eyes too far apart. And as long as your CFA'ing often, there's nothing wrong with going from half to full, doing something tweaking in mirror mode, then deleting the other side and going to half again for a while. And yes, 3) was not obvious to me at first.. My tactic used to be, draw splines from the front outline to the side outline, then start cutting up lines with extra CPs. With that method, what I created ended up all wrinkly and blotchy, and I found I was working slowly, thinking too much about what would happen when everything had to be connected together. -Sean Givan